Delve into the world of WordPress with this comprehensive tutorial, covering topics such as creating functions.php, devising the menu, and customizing the menu order.
This exercise is excerpted from Noble Desktop’s past WordPress training materials and is compatible with WordPress updates through 2020. To learn current skills in WordPress, check out our WordPress Bootcamp and coding bootcamps in NYC and live online.
Topics Covered in This WordPress Tutorial:
Creating Functions.php, Creating the Menu, Customizing the Menu Order
Exercise Preview
Exercise Overview
WordPress has a number of features that aren’t activated by default. Earlier, we added some code to create the nav menu, but we do not have a way of editing that in the Dashboard. Themes can use a file called functions.php to automatically load theme functions for extra customization. In this exercise, we will use functions.php to register a menu so we have access to it in the Dashboard.

If You Did Not Do the Previous Exercise
- In a web browser, go to localhost:8888/mrp/wp-admin (Mac) or localhost/mrp/wp-admin (Windows) and log in if prompted.
- On the left of the Dashboard, mouse over Appearance and click Themes.
- Click the Add New button.
- Click the Upload link, then the Browse (or Choose File) button.
- Navigate to Desktop > Class Files > WordPress.org Class and double–click mrpTheme-ready-for-nav.zip to open it.
- Click Install Now, then click Activate.
Creating Functions.php
Open your code editor.
Create a new file.
- Save the file as functions.php into the mrpTheme folder located here:
- Mac: Hard Drive > Applications > MAMP > htdocs > mrp > wp-content > themes
- Windows: C: > xampp > htdocs > mrp > wp-content > themes
-
First, let’s open a php tag:
<?php ?> -
We want WordPress to load in some code right when the page is being built. In WordPress, this is referred to as init (short for initialization). We can tell our custom code to load at this time, but first we need to create a function for it to load. Add the empty function shown below:
<?php function load_on_init() { } ?> -
Below the function declaration, add the following to tell WordPress to load our function on init:
<?php

function load_on_init() {

}

add_action( 'init', 'load_on_init' );

?>
Now anything we add into the function will be loaded on init.
-
Inside the load_on_init
()function, add the following bold code:function load_on_init() { if ( function_exists( 'register_nav_menu' ) ) { } }When writing code for WordPress, it’s very common to include an if statement to check to see if a function exists. Due to the modular nature of WordPress, new functions and features are added all the time and you never know where this code might end up (maybe in an old version of WordPress). This method just ensures that if you are trying to run a function that doesn’t exist, you don’t get any errors.
-
Next, we’ll add the register_nav_menu
()function to register our Header Menu. Inside the if statement, add the following bold code:if ( function_exists( 'register_nav_menu' ) ) { register_nav_menu( 'header-menu', __( 'Header Menu' ) ); } Save the file.
Open header.php from the mrpTheme folder.
-
Find the wp_nav_menu
()function around line 21:<?php wp_nav_menu(); ?>Right now, this code loads the first menu a user creates, or falls back on a standard page list if no menus exist. We want it to load the new Header Menu we registered in functions.php.
-
Add the following bold code to the wp_nav_menu
()function:<?php wp_nav_menu( array( 'theme_location' => 'header-menu' ) ); ?> Save the file.
Creating a Menu & Customizing the Order
- The menus feature should now be enabled in the Dashboard. Open a browser and go to:
- Mac: localhost:8888/mrp/wp-admin
- Windows: localhost/mrp/wp-admin
Log in if asked.
The Appearance menu now has a Menus option. On the left, mouse over Appearance and click Menus.
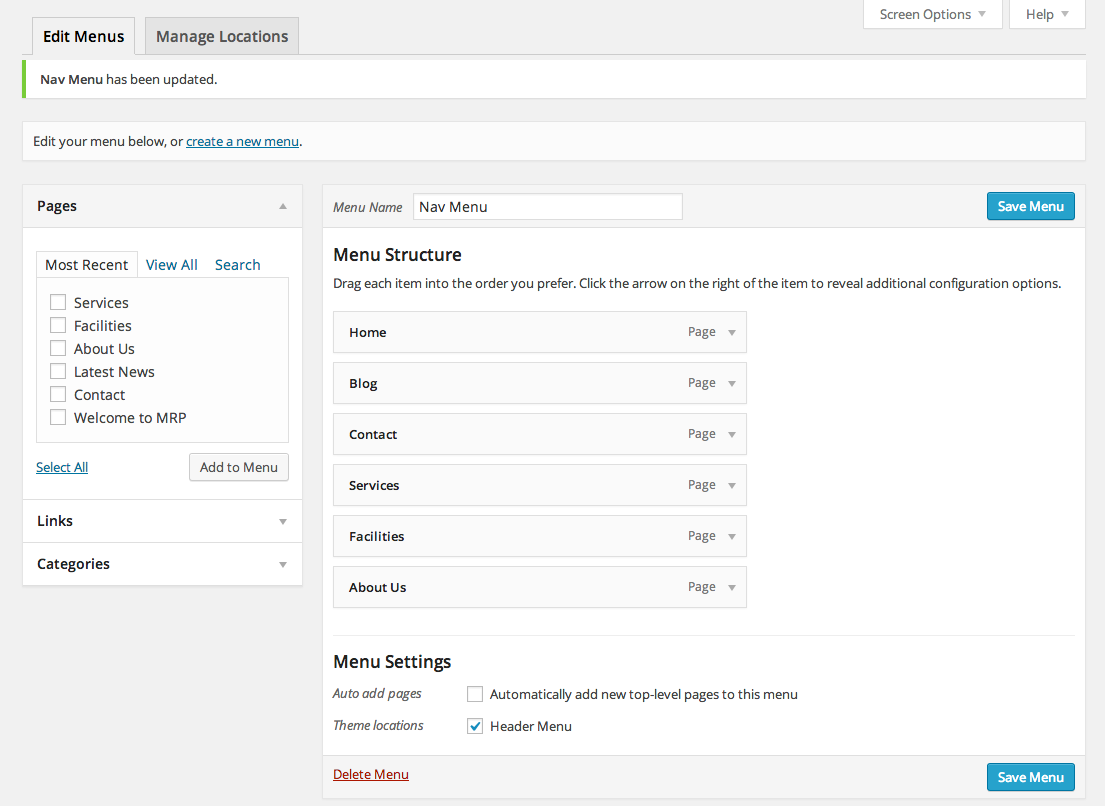
We need to create the menu. On the right, for Menu Name enter: Nav Menu
Click Create Menu.
You will see all of the pages (six or three) under Menu Structure on the right. If there are no pages in the menu, in the Pages module on the left, click Select All, then click Add to Menu. If there are multiple instances of the Welcome to MRP page, delete the bottommost one.
- This isn’t the order we want. Drag the menu items to reorder them as follows:
- Welcome to MRP
- Latest News
- Contact
- Services
- Facilities
- About Us
To the right of the Welcome to MRP link, click the small arrow to reveal the link’s options.
We want this link to display a different name. Change the Navigation Label to Home because this is what the menu will actually say.
To the right of the Latest News link, click the small arrow to reveal the link’s options.
Change the Navigation Label to: Blog
Click the Save Menu button.
Now that we have our menu, let’s set our Header Menu to use it. Under Menu Settings at the bottom, next to Theme locations, choose Header Menu.
Click Save Menu.
Click the Monteith Restoration & Performance title at the top of the Dashboard and view your work.
Multiple Menus
If you want your theme to have multiple menus (for example one in the header and one in the footer), the code to do that isn’t that different from a single menu. Instead of using the register_nav_menu() function you would use the register_nav_menus() function:
register_nav_menus(
   array(
      'header-menu' => __( 'Header Menu' ),
      'footer-menu' => __( 'Footer Menu' ),
      'another-menu' => __( 'Another Menu' )
   )
);
Inside the register_nav_menus() function, you would add an array with all the menus you want to create.
Bonus: Adding Current Page Styling
It would be nice to indicate the current page in the nav menu. Let’s inspect the page to see if there are any styles we can use.
- Open Chrome and go to:
- Mac: localhost:8888/mrp
- Windows: localhost/mrp
CTRL–click (Mac) or Right–click (Windows) the Home menu item, and choose Inspect.
-
In the left-hand panel, the link will probably be highlighted (your numbers may be slightly different):
<li id="menu-item-33" class="menu-item-type-post_type menu-item-object-page current-menu-item page_item page-item-14 current_page_item menu-item-33" >
   <a href="https://localhost:8888/mrp/">Home</a>
</li>
The link doesn’t have any styling, but the list item around it has quite a few classes applied (separated by spaces). From those, current-menu-item looks promising.
NOTE: current_page_item would also technically work in this case, but it wouldn’t be as flexible. It’s possible to add categories and other things to a menu that current_page_item will not work on, but we should just use current-menu-item.
Switch back to your code editor.
-
Switch to style.css. (If it isn’t open, open it from the mrpTheme folder.)
We want to change the color of the link inside the current-menu-item list item.
-
At the very bottom, add the following rule:
#nav.current-menu-item a {
   color: #f7bf10;
}
Save the file.
Switch back to Chrome and reload the page to see the new style.
Close the Developer Tools console.
Click the links to the other pages to see that it works across the entire site. Groovy!