Explore our Sketch tutorial which covers creating, editing, and organizing text styles for a consistent, professional look across your design projects.
This exercise is excerpted from Noble Desktop’s past web design training materials and is compatible with Sketch updates through 2021. Noble Desktop now teaches Figma as the primary tool for web and UX & UI design. To learn current skills in web design, check out our Figma Bootcamp and graphic design classes in NYC and live online.
Topics Covered in This Sketch Tutorial:
Creating Text Styles, Editing Text Styles, Renaming Styles & Organizing into Folders
Exercise Preview

Exercise Overview
In this exercise, you’ll learn how to create, apply, and modify text styles (which can help you create a consistent look for the type throughout your design).

Creating Text Styles
Let’s create some heading and paragraph text styles.
- In Sketch, go to File > Open Local Document.
- Navigate into Desktop > Class Files > Sketch Class > iTastify and double–click on iTastify Ready for Text Styles.sketch to open it.
-
Make sure you can see the iTastify Helps You Remember section of the page.
The text in this file looks different from the previous exercise because we’re going to style it using text styles.
- Let’s start with the headings about iTastify app’s 3 features. Make sure you can see the 3 features below the iTastify Helps You Remember heading.
-
On the artboard, click on the first feature Tag Companions text to select it.
NOTE: In Sketch, you can have multiple paragraphs in a single text layer. Within that text layer you can format words or lines differently. But if you want to save that text formatting as a text style, you must make separate text layers (one for each style you’ll be creating). We did this for you already, but keep this in mind when working on your own projects.
-
Still on the artboard, Shift–click on the other two bold feature names:
- Add Photos
- Take Notes
- In the Inspector, below the No Text Style menu click the Create button
 .
. -
Name it feature name and hit Return to apply.
NOTE: In the Inspector’s text style menu you should now see the feature name style (which is a preview of how the style looks). Because all 3 text layers were selected, they are all now using this text style.
- On the artboard, click on the You’ll never mix up company again text.
-
Shift–click on the other two descriptions:
- All your foodie pictures in one app.
- Remember every detail for next time.
- In the Inspector, below the No Text Style menu click the Create button .
Name it feature description and hit Return to apply.
Editing Text Styles
We don’t like the current font, so let’s change the styles. Text styles are as easy to edit as the layer styles we worked with in the previous exercise.
- Click on any of the feature names such as Tag Companions.
-
In the Inspector, set the following style attributes:
Typeface: Arial (feel free to use the Typeface menu’s search function) Weight: Bold Size: 21 (you’ll need to type it in and hit Return to apply) - In the Inspector, below the feature name style menu click the Update button
 (or hit CTRL–S) and notice that all 3 feature names get updated.
 - Select one of the feature descriptions such as You’ll never mix up company again.
-
Set the following style attributes:
Typeface: Arial Weight: Regular Size: 20 Color (Hex): 959595 In the Inspector, below the feature description style menu click the Update button
(or hit CTRL–S) to see the others get updated.
Creating More Text Styles
- We also need to style the heading. Select the iTastify Helps You Remember heading.
- In the Inspector, below the No Text Style menu click the Create button .
- Name it heading and hit Return to apply.
- Under the heading, select the paragraph iTastify is your own personal taste…
- In the Inspector, below the No Text Style menu click the Create button .
- Name it paragraph and hit Return to apply.
- Scroll down to the Browse & Search Your Experiences section of the page.
- Select the Browse & Search Your Experiences heading.
- Click on the No Text Style menu and choose This Document > heading.
- Under the heading, select the paragraph Never forget a restaurant…
-
From the style menu choose This Document > paragraph.
After the styles are applied, the italics will be gone, but the styling still isn’t what we want. Let’s change these styles (and see that both places get updated).
- Select the Browse & Search Your Experiences heading.
-
Set the following style attributes:
Typeface: Arial Weight: Bold Size: 35 - In the Inspector, below the heading style menu click the Update button (or hit CTRL–S).
- Scroll back up to the iTastify Helps You Remember heading and notice that its styling changed because it has the same text style.
- Now let’s change the paragraph text style to match our design. Click on the paragraph iTastify is your own personal taste…
-
Set the following style attributes:
Typeface: Arial Weight: Regular Size: 20 Color (Hex): 959595 Line: 26 - In the Inspector, below the paragraph style menu click the Update button (or hit CTRL–S).
- Scroll back down to the Browse & Search Your Experiences section of the page to see that the other paragraph has the styling applied.
- Scroll down to the next section of the page: 3 photos in a circle over a gray background and notice the 3 italic testimonial paragraphs (under the names).
- Select all 3 paragraphs (using Shift–click).
Apply the paragraph style.
Creating Multiple Versions of the Same Text Style
- Scroll down to the next section of the page and click on the white Start Remembering Now headline.
-
Click on the No Text Style menu and choose This Document > heading.
This style does not work well on a dark background. We could change the text color to white and not sync the style changes, but if we ever update the heading style in the future, the unsynced change will be lost. The best solution is to create a similar style.
- Set the fill color to white and hit Esc to close the color picker.
- In the Inspector, below the heading menu click the Create button .
- Name it heading light and hit Return to apply.
- Scroll up to the Rate What You Ate section (has four food icons).
Apply the new heading light style to the Rate What You Ate heading.
Renaming Styles & Organizing into Folders
Sketch gives you the option to organize text styles into folders (groups). Because we have two similar heading styles, let’s place them into the same folder.
-
At the top-left of the Toolbar, click on the Components button
 .
.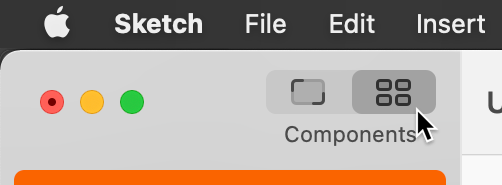
- In the middle of the Toolbar, click on the Text button
 .
. - Select the heading light style.
- In the Inspector on the right, change the name to heading/light and hit Return to apply it.
- Notice a heading folder was automatically created! This is another (secret) way to create groups.
- Select the heading style.
- Rename it to dark
- Drag the dark style onto the heading group in the Sidebar on the left.
-
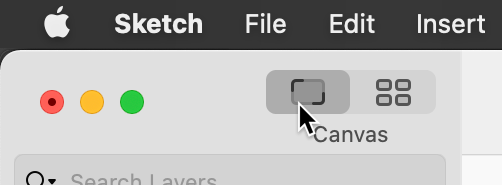
At the top-left of the Toolbar, click on the Canvas button
 .
.
Hit Cmd–S to save the file.
Optional Bonus: More Practice
- Create styles for the testimonial names (under the 3 circular photos), as well as for the footer at the bottom. Feel free to experiment with styling options!
- Rename the two feature styles to description and name and put them into a feature group.
