Dive into the complexities of the Ruby on Rails framework with this extensive tutorial, covering topics such as creating a view, adding dynamic data, and rendering a partial, complete with step-by-step exercises to cement your learning.
This exercise is excerpted from Noble Desktop’s past web development training materials. Noble Desktop now teaches JavaScript and the MERN Stack in our Full Stack Development Certificate. To learn current skills in web development, check out our coding bootcamps in NYC and live online.
Topics Covered in This Ruby on Rails Tutorial:
Creating a View, Adding Dynamic Data, Rendering a Partial
Exercise Preview
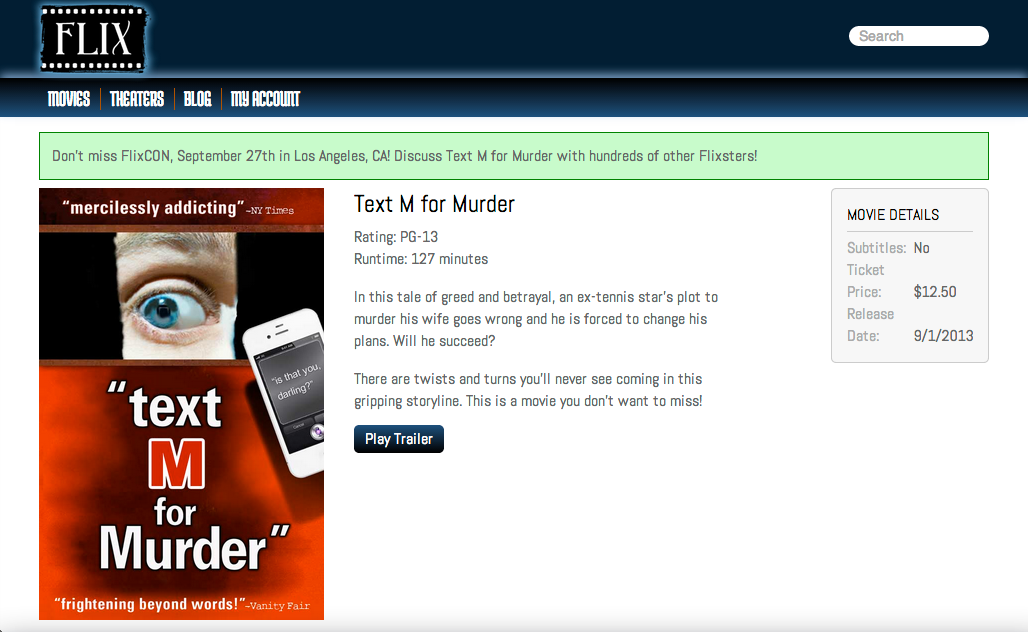
Photo courtesy of istockphoto, © Korhan Karacan, Image #15095805

Exercise Overview
In the last exercise, we looked at the basics of controllers and their role in routing requests, and now we’re going to look at what to do with the request once we receive it—in other words, we are going to build some views.
-
If you completed the previous exercises, you can skip the following sidebar. We recommend you finish the previous exercises before starting this one. If you haven’t finished them, do the following sidebar.
If You Did Not Do the Previous Exercises (3A–3C)
- Close any files you may have open.
- Open the Finder and navigate to Class Files > yourname-Rails Class
- Open Terminal.
- Type
cdand a single space (do NOT press Return yet). - Drag the yourname-Rails Class folder from the Finder to the Terminal window and press ENTER.
- Run
rm -rf flixto delete your copy of the Flix site. - Run
Git clone https://bitbucket.org/Noble Desktop/flix.Gitto copy the Flix Git repository. - Type
cd flixto enter the new directory. - Type
Git checkout 3Cto bring the site up to the end of the previous exercise. - Run
bundleto install any necessary gems. - Run
yarn install—check-filesto install JavaScript dependencies.
Creating a View
We need to create a details page view for each movie. Before we do that, though, we’ll create the controller action that displays the view.
Open the Finder and navigate to Class Files > yourname-Rails Class
Open Terminal.
Type
cdand a single space (do NOT press Return yet).Drag the flix folder from the Finder to the Terminal window.
Make sure you’re in Terminal and hit Return to change into the new folder.
-
Type the following to launch the server:
rails server We suggest opening the flix folder in your code editor if it allows you to (like Sublime Text does).
In your code editor open flix > app > controllers > movies_controller.rb.
-
After the index method, add the following bold code to create a new
showmethod and declare an instance variable:def index @movies = Movie.all end def show @movie = Movie.find(params[:id]) end endThe show method looks very similar to the index method, except that instead of loading all movies, it loads a specific movie (using a parameter called
id).We have to create a view before we go any further. You may be able to guess that this view is called show.html.erb. Our design department has made a great layout for the show page, which contains the details for each movie. All we need to do is implement the dynamic data that Rails is building for us into the design that has been given to us.
Save the file.
In your code editor open yourname-Rails Class > flix snippets > show.html.
Copy all the code to the clipboard.
Close the file.
Create a new file in your code editor.
Paste the code you just copied into the new file. (If you’re using Sublime Text, paste with Cmd–Shift–V to ensure proper indentation.)
- Save the file:
- Into yourname-Rails Class > flix > app > views > movies
- Name it show.html.erb
Switch to the browser, navigate to localhost:,000 and notice that our page is still working correctly. Try mousing over the three featured movies, keeping an eye on the bottom left of the browser, where the URL link of each movie is displayed. Each of the movies is linking to a different detail page such as localhost:,000/movies/1 and localhost:,000/movies/2
-
Click on Text M for Murder to see the detail page.
Everything looks pretty good! There is lots of information about the movie and it’s nicely styled thanks to our designer.
Click the Back button to go to the main movies page.
-
Click on a different movie than you clicked before.
Uh-oh! We’re getting information about Text M for Murder on every single page. This is because all we’ve done is simply copy the flat file that our designer gave us—we haven’t put in any dynamic data yet.
The site isn’t throwing any errors, but localhost:,000/movies/1, localhost:,000/movies/2, and localhost:,000/movies/3 all have the exact same information. Let’s put in the dynamic data so each detail page displays its unique info.
Adding Dynamic Data
-
Switch back to show.html.erb in your code editor.
You might be wondering: How can we know what variables are in the model? Which ones do we have at our disposal? Rails gives you a really easy helper for working with that: it’s called
debug. We can just tell Rails todebugthe@movieinstance variable, and simply dump the output onto the screen to find out what variables are available. -
Add the following bold code on its own line above the HTML (so it’s the first line of code in the file):
<%= debug @movie %>
<div id="movie-info" class="clearfix">
You should recognize this as an embedded Ruby tag, indicated by the
<% %>opening and closing tags. Here we include the = (equals sign) because we want to print the information to the screen. In the absence of the equals sign, the information in the tag is not printed to the screen. Save the file.
-
Switch to the browser and go to localhost:,000/movies/1
Thanks to the line of code we just wrote, there is some really rich information at the top of the page that tells us all the variables we can use, which are simply the columns of the movie model. They include an
id, atitle, adescription, aruntime, aposter_image, and more.The values (i.e., the title being set to Text M for Murder and runtime being set to 127) are particular to this one record, and come from the seed file that we used to populate the database with three sample entries. Take a moment to look over all of the debug information.
Switch to show.html.erb in your code editor. Now that we’re aware of the variables, we don’t need the debug info cluttering up the page anymore.
-
Delete the
<%= debug @movie %>line of code that you just wrote.Let’s go ahead and start populating the template file with those values we saw printed to the screen with
debug. Let’s start with an easy one, the title. -
Find the following code, around line 6:
<h2>Text M for Murder</h2> -
Edit the code as follows:
<h2><%= @movie.title %></h2>Again, we’ve included an = (equals sign) in our embedded Ruby tag (ERB) because we want the value to print to the screen.
Save the file.
Switch to the browser and reload localhost:,000/movies/1. Notice that the title looks exactly like it did before; it still says Text M for Murder. This is a good sign, at least we didn’t break anything!
Navigate to localhost:,000/movies/2 and localhost:,000/movies/3 and take a look at the titles. Each movie page now has its own individual title! This is exactly what we want.
-
Because the embedded Ruby tags are behaving correctly, we can go ahead and add more to our code. Return to show.html.erb and make the following changes shown in bold. (NOTE: You’ll replace the two paragraphs with the description):
<h2><%= @movie.title %></h2> <p class="mpaa-rating">Rating: <%= @movie.mpaa_rating %></p> <p class="runtime">Runtime: <%= @movie.runtime %> minutes</p> <%= @movie.description %> <a href="#" class="button">Play Trailer</a> </div> -
Add the rest of the dynamic data as shown below:
<div class="details">
   <h4>Movie Details</h4>
   <div>
      <span>Subtitles:</span>
      <%= @movie.has_subtitles? %>
   </div>
   <div>
      <span>Ticket Price:</span>
      <%= @movie.ticket_price %>
   </div>
   <div>
      <span>Release Date:</span>
      <%= @movie.release_date %>
   </div>
</div>
Notice the question mark at the end of
@movie.has_subtitles?which indicates that it will return a true/false value. Save the file.
-
Switch to the browser and load localhost:,000/movies/1 to see how it’s looking. Check out localhost:,000/movies/2 and localhost:,000/movies/3 to see that each page is displaying the unique information of each entry.
Unfortunately the layout is looking pretty rough. The description should be in two paragraphs, the Play Trailer button should be on its own line, and the date and ticket price (in the sidebar on the right of the page) are formatted incorrectly. Even more pressing—we still haven’t worked on the unique image for each movie page.
-
Before we figure out how to deal with the images, let’s take a quick look at their location in relation to the other site files. In the Finder, navigate to flix > app > assets > images > posters
Notice that the designer has provided two sub-folders with large posters for the detail pages and thumbs (thumbnail images) for the index page.
Switch to show.html.erb in your code editor.
-
Find the following area of the code at the very top of the document:
<div id="movie-info" class="clearfix"> <img class="imgLeft poster-image" src="/assets/posters/large/textmformurder-2x.jpg"> <div class="overview"> -
Replace the
<img>tag with the following bold code (type it all on one line):<div id="movie-info" class="clearfix"> <%= image_tag "posters/large/#{@movie.poster_image}", class: "imgLeft poster-image", ALT: "#{@movie.title} poster" %> <div class="overview">Using a hashtag followed by braces:
#{…}tells Rails that we are embedding a bit of Ruby code within the HTML. Also note that we’ve preserved the two image-related CSS classes that the designer created,imgLeftandposter-image. We’re also including ALT text identifying the movie by title to keep the site accessible for users with screen readers. Save the file.
- Switch to the browser and reload the following pages:
- localhost:,000/movies/1
- localhost:,000/movies/2
- localhost:,000/movies/3
The images are looking good, and the proper images are being displayed on the proper pages! Let’s clean up more of the formatting with Rails helper methods.
-
Switch to show.html.erb in your code editor and add the following helper method shown in bold:
<h2><%= @movie.title %></h2>
   <p class="mpaa-rating">Rating: <%= @movie.mpaa_rating %></p>
   <p class="runtime">Runtime: <%= @movie.runtime %> minutes</p>
   <%= simple_format @movie.description %>
   <a href="#" class="button">Play Trailer</a>
</div>
What the
simple_formathelper does (as you might remember from the Scaffolding exercise) is take a piece of text and apply very basic HTML styling to it such as turning line breaks into<p>tags. Save the file.
-
Switch to the browser and reload localhost:,000/movies/1 to see that the
simple_formathelper has successfully turned the description into two paragraphs, just like we hoped it would.Let’s work on formatting the subtitles area next. Currently it is displaying
Subtitles: false, which is really more of a “computer” thing to say; it’s not very friendly or very human. It would be better if it said yes/no instead of true/false. Switch to show.html.erb in your code editor.
-
We are about to write an if/else statement. In preparation for that, delete the = (equals sign) after the initial ERB tag so your line looks as shown in bold below:
<div>
   <span>Subtitles:</span>
   <% @movie.has_subtitles? %>
</div>
We did this because we don’t want to print the value of
has_subtitlesanymore; rather, we want to keep it hidden and examine it with the if/else statement. -
Make the following changes shown in bold to add the if/else statement:
<div>
   <span>Subtitles:</span>
   <% if @movie.has_subtitles? %>
      Yes
   <% else %>
      No
   <% end %>
</div>
Save the file.
-
Switch to the browser and reload localhost:,000/movies/1 or any of the other movie detail pages to see that the change is working like we wanted it to. (If you get an error message, double-check that you deleted the = equals sign.)
So far, so good! Let’s work on the ticket price. We want it to display a dollar sign at the beginning of the price and two values after the decimal point; it should say something like $12.50 instead of the current format (12.5). Luckily, Rails provides the perfect helper for this situation.
Switch to show.html.erb in your code editor.
-
Make the following change shown in bold:
<div>
   <span>Ticket Price:</span>
   <%= number_to_currency @movie.ticket_price %>
</div>
By default, the
number_to_currencyhelper defaults to USD, but if you need it to be in Euros or rubles, there are config options for that within Rails. Save the file.
Switch to the browser and reload localhost:,000/movies/1 or any of the other movie detail pages to see that the ticket price is now formatted correctly. However, we do need to fix the formatting of the date.
Switch to show.html.erb in your code editor.
-
Add the following bold code:
<div>
   <span>Release Date:</span>
   <%= @movie.release_date.strftime('%-m/%-d/%Y') %>
</div>
Ruby and Rails make many things very easy, like the
number_to_currencyhelper we implemented a few steps previously. However, dates are not quite as easy to fix because there are so many different ways of formatting them that vary between countries and situations.The code you just typed in parentheses stands for month (with no zero-padding), day (with no zero-padding), and the four-digit year.
This code is challenging to remember, but it’s easily accessible at apidock.com/ruby/DateTime/strftime which has a ton of information about formatting dates and times. You can create any kind of date formatting you want using the info on this page, so it’s a good one to bookmark.
Save the file.
Switch to the browser and reload localhost:,000/movies/1 or any of the other movie detail pages to see that the date is now displaying properly! Great, all of the formatting issues on the detail pages have been resolved.