Delve into this comprehensive Ruby on Rails tutorial to learn more about topics like resourceful and non-resourceful routing, as well as assigning instance variables, and make use of the exercise overview and step-by-step guide to generate a new model for a movie site.
This exercise is excerpted from Noble Desktop’s past web development training materials. Noble Desktop now teaches JavaScript and the MERN Stack in our Full Stack Development Certificate. To learn current skills in web development, check out our coding bootcamps in NYC and live online.
Topics Covered in This Ruby on Rails Tutorial:
Resourceful Vs. Non-resourceful Routing, Assigning Instance Variables, What If the Names Don’t Match?, Optional Bonus: Redirects
Exercise Preview
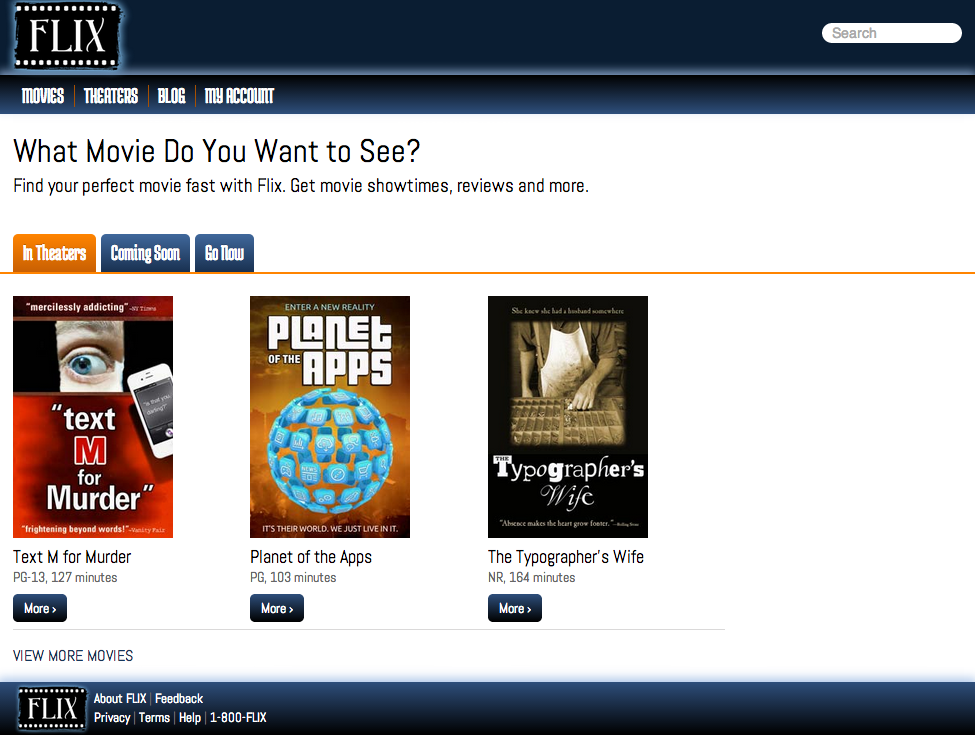
Photos courtesy of istockphoto, © Korhan Karacan, Image #15095805, Marcello Bortolino, Image #17472015, Sergey Kashkin, Image #318828

Exercise Overview
Earlier, we created a simple controller, but in this exercise we will dive into the heart of the MVC paradigm, learn more about routing requests, and see the difference between Resourceful and Non-Resourceful routing.
-
If you completed the previous exercises, you can skip the following sidebar. We recommend you finish the previous exercises before starting this one. If you haven’t finished them, do the following sidebar.
If You Did Not Do the Previous Exercises (3A–3B)
- Close any files you may have open.
- Open the Finder and navigate to Class Files > yourname-Rails Class
- Open Terminal.
- Type
cdand a single space (do NOT press Return yet). - Drag the yourname-Rails Class folder from the Finder to the Terminal window and press ENTER.
- Run
rm -rf flixto delete your copy of the Flix site. - Run
Git clone https://bitbucket.org/Noble Desktop/flix.Gitto copy the Flix Git repository. - Type
cd flixto enter the new directory. - Type
Git checkout 3Bto bring the site up to the end of the previous exercise. - Run
bundleto install any necessary gems. - Run
yarn install—check-filesto install JavaScript dependencies.
Getting Started
Open the Finder and navigate to Class Files > yourname-Rails Class
Open Terminal.
Type
cdand a single space (do NOT press Return yet).Drag the flix folder from the Finder to the Terminal window.
Make sure you’re in Terminal and hit Return to change into the new folder.
Generating a New Model
Choosing where to start a new project is generally challenging; when building a Rails app, it generally makes the most sense to start with your data storage, which means creating a model.
The Flix site is going to be all about movies, so our first step will be to create a model of a movie.
The command we’ll use to create the model will look a great deal like the command we typed to generate the recipes model with scaffolding:
rails generate scaffold recipe title:string description:string prep_time:string ingredients:text directions:textAfter creating this scaffolding, we could access properties of each recipe as methods of the @recipe instance variable. For example, we added the recipe’s title to the <title> tag of the page by referring to @recipe.title.
-
Type the following in Terminal, but do not press Return after typing it!
rails generate model movieBefore we add the components of the movie model, let’s look at the different kinds of fields available in Rails:
- string: single-line text
- text: multi-line text
- integer: 1,2, 3…
- decimal: 1.5,3.14…
- boolean: true/false (which will create methods ending in ? question marks)
- date, time, datetime: just like the names suggest, this can be the date, the time, or the combination of the two
Our movie model will incorporate all of these field types, so you will gain experience using all of them.
-
Add the following to your partially-finished Terminal command. Press Return after typing this time. (Take a moment to double-check your work first!)
rails generate model movie title:string description:text placement:string mpaa_rating:string runtime:integer poster:string has_subtitles:boolean ticket_price:decimal release_date:dateRails will then create several files for us, which are listed next to the green word
create. The most important of these is app/models/movie.rb, the model file itself. There are also two test files, but we’re not going to worry about those yet. At the top of the list is a migration file. Its name starts withdb/migrate/…and then a unique string of numbers. Let’s take a closer look at this file. -
In the Finder, navigate to flix > db > migrate > #
_create_movies.rbNOTE: The
#stands for the unique numerical filename, which is the timestamp of its creation and will be different for everyone.Rails migration filenames always start with a timestamp so Rails can run them in the proper order. This is why it’s important to use the
rails generatecommand from the Terminal and never create model files by hand. Open #
_create_movies.rb in your code editor. Rails created this file from the information in that longrails generate model moviecommand we just entered; let’s see what Rails put in this file automatically.-
Look at the first lines of the document:
class CreateMovies < ActiveRecord::Migration[6.1]
   def change
This means that Rails has created an object of the
CreateMoviesclass and it inherits fromActiveRecord::Migration. (The brackets indicate the version of Rails that created this migration; this is for backward compatibility.) Inside is a single method calledchange, which indicates that the migration within is reversible. (Migrations need not be permanent; they can be applied and rolled back as needed during the development process.) -
On the next line, within the change method is a call to
create_table:create_table :movies do |t|This code creates the structure of the
moviesdatabase.
Editing a Migration File
Although it’s convenient to create columns from the command line with rails generate, it is perfectly appropriate to add, remove, or edit columns here before applying the migration. Let’s try making a change to the file now.
-
Find the following piece of code, around line 9:
t.string :poster -
Make the following change shown in bold:
t.string :poster_imageLet’s also add some defaults for the ticket price field. It’s a good idea to do this with decimal values so they don’t display hundreds of digits after the decimal point and the numbers can be shared between different databases.
-
Find the following piece of code, around line 11:
t.decimal :ticket_price -
Add the following bold code:
t.decimal :ticket_price, precision: 8, scale: 2Precisionindicates the overall size of a field.Scaleindicates how many places should be after the decimal point. With these precision/scale settings, the ticket price will have a maximum of 8 total digits (6 digits before the decimal point and 2 after) which should allow Flix plenty of room to grow! -
Notice the following piece of code around line 14:
t.timestampsWe didn’t create this column; Rails generated it automatically. The
timestampscolumn in a Rails database keeps track of every migration’s timestamp, ensuring the database functions properly. Save the file.
Switch to the Terminal.
-
Type the following in Terminal:
rails db:migrateThis applies the migration. The changes we made in the migration file have now been committed to the database.
Populating a Database with a Seed File
At this point, you’re probably wondering: How do we add data to the database? Well, there are several ways, but at this moment we’re just concerned with getting a few movie records (with all the required information, like runtime and title) entered in the database for development purposes. Rails provides a handy way for developers to quickly populate a database with data for testing purposes with something called a seed file.
We have created a seed file in advance to save you some time. Let’s copy it to the correct directory and check it out.
Open Finder and arrange two windows side-by-side.
In one window, navigate to the destination for the seed file: flix > db
In the other window, find Class Files > yourname-Rails Class > flix snippets > seeds.rb
Copy seeds.rb from flix snippets and paste it into the flix > db folder.
You will see an alert about replacing a file with the same name; click Replace. (We are overwriting the automatically created blank seeds file.)
-
Open the newly copied seeds.rb in your code editor.
Take a look at the code that starts on line 8 (after the commented-out part). It starts with a call to
Movie.create, then has an array of hashes. You should be able to scan over the code and recognize all the fields that are part of the movies model, interspersed with sample data.Seed files are usually created by hand and used whenever you have to move a development site around (or share it between multiple developers). The seed file is pretty simple, and we can apply the file to the database by running a simple command. Let’s try it!
Switch to the Terminal.
-
Type the following to apply the seeds.rb file to the database:
rails db:seed That’s it! We now have a database with some sample movie data loaded. You can’t see it yet, but we’ll handle that in the next section.
Non-Resourceful Routing Explained
Let’s review quickly what we did earlier to create a Non-Resourceful Route to get the localhost:,000/movies page to start displaying properly:
- We generated a new controller using
rails generate controller. - In the routes.rb file we added a route to /movies.
- We added the
aboutaction to the MoviesController by creating a method calledabout. It was enough to simply create the empty method; we didn’t have to put anything in it. - We created a new view with some really simple HTML, called it about.html.erb, and saved it in the proper folder. Rails automatically knew to load it because of the directory and the name of the method.
Non-Resourceful Routing Vs. Resourceful Routing
We have previously tried Non-Resourceful Routing. This routing process is very powerful: you can map any URL to any controller in any action, but it comes at a cost. That cost is complexity. Imagine if we had to create a route for every movie submitted, doing this same process for movies/star-wars and movies/the-godfather… We could be routing movies all day.
Fortunately, there’s a better way. It’s called Resourceful Routing. Resourceful Routing assumes that a controller implements several standard methods associated with the basic CRUD (Create, Read, Update, and Delete) functions. Let’s take a look at the way Resourceful Routing works.
Resourceful Routing
In your code editor open flix > config > routes.rb.
-
Edit the code as shown in bold:
Rails.application.routes.draw do
   get 'about' => 'movies#about'
end
Save the file.
Switch to the browser.
Reload localhost:,000/movies and notice that it no longer exists.
Navigate to localhost:,000/about which displays correctly—it is the new home of the about page!
Switch back to routes.rb in your code editor.
-
Add the following bold code:
Flix::Application.routes.draw do
   get 'about' => 'movies#about'
   resources :movies
end
With this single line of code, we have just created a great number of routes, which you’ll see in just a moment.
Save the file.
Back in Terminal, hit CTRL—C to stop the server.
-
Type the following in Terminal:
rails routesThis command will always show you all the available routes in your application. Now that Rails knows that movies are a resource, it can make some assumptions about routing. Here are the most important ones:
- Rails expects an index (or an overview list of movies) to exist at /movies
- Rails expects to serve a details page for /movies/:id (which might be something like /movies/1 or /movies/shrek).
-
GETroutes are created to serve pages: movie data for viewing, for example, or to help create movies or edit existing movies. There are alsoPUT,PATCH,POST, andDELETEroutes which will receive user input and perform the requested actions.
We’re going to start with the
indexaction, which is the most basic.
Catching the CRUD
Another term for what resourceful routing does is CRUD. CRUD stands for Create, Read, Update, Delete. These four operations describe the lifecycle of an object in Rails. Each of these actions corresponds to an HTTP verb:
- Create = POST
- Read = GET
- Update = PUT/PATCH
- Delete = DELETE
What’s the difference between PUT and PATCH? PUT is intended for updates that overwrite an entire record, while PATCH is for partial updates—just a single field or two.
Assigning Instance Variables
In your code editor open flix > app > controllers > movies_controller.rb
-
Add the following bold code to create a new method:
class MoviesController < ApplicationController
   def about
   end

   def index
   end
end
Save the file.
We know from our earlier trial-and-error process that we’re going to need an index view file for this to work. To save you the work of writing the HTML, we’ve provided a file for you—we just need to copy it into the right place. Switch to the Finder.
Navigate to yourname-Rails Class > flix snippets and copy index.html.erb
Navigate to flix > app > views > movies
-
Paste it (Cmd–V) into the movies folder.
We’re going to be writing views of our own soon enough, but this view file is just to get us up and running. Now we have our controller, our action, and our view. Let’s see how our site is looking!
-
Type the following in Terminal:
rails server -
In the browser, attempt to navigate to localhost:,000/movies and notice that it displays an error. But it’s an error we’ve never seen before, so it will be a good learning opportunity.
This is a good time to point out that Rails does a really great job of helping you debug. Rails is even highlighting the exact line in the source code where things are falling apart.
So why did we get this
NoMethodError? Because our view was expecting to display a list of movies using an instance variable called@movies. One of the most important functions of a controller (besides routing) is to assign instance variables. Having received a request from the user such as “Show me a list of movies!” it is the controller’s duty to fetch that list of movies and share it with the view to render to the user. This error needs to be fixed inside of our movies controller. Switch to movies_controller.rb in your code editor.
-
Add the following bold code:
class MoviesController < ApplicationController
   def about
   end

   def index
      @movies = Movie.all
   end
Save the file.
Switch to the browser and reload localhost:,000/movies
-
Notice that our page is now displaying properly, with a list of three movies!
Let’s look back at the line of code we just wrote. The most important part is the @ sign, which made
@moviesan instance variable. Remember when we used@nameearlier in the Ruby exercises? The @ sign is there so that the variable will be available outside of the index method (for example, to the view file that it’s calling). In the browser, navigate to localhost:,000 and notice it’s still the default Rails welcome page. Let’s fix that.
Switch to routes.rb in your code editor.
-
Add the following bold code:
Flix::Application.routes.draw do
   get 'about' => 'movies#about'
   resources :movies
   root 'movies#index'
end
Save the file.
Switch to the browser, reload localhost:,000 and notice that the default
You're riding Ruby on Railspage is no longer there—it’s been replaced by our movies index page. Our Flix app is really coming along!
Optional Bonus: Redirects
Redirects are another one of those necessary evils on the internet. Suppose we put together a newspaper advertisement to promote Flix, and that ad accidentally directed people to flix.com/films instead of the real address, flix.com/movies. Rather than firing our copy editor, we could easily create a redirect in routes.rb. Let’s try doing that now.
Switch back to routes.rb in your code editor.
-
Add the following bold code, taking a second to double-check the position of the various punctuation marks:
Flix::Application.routes.draw do
   get 'about' => 'movies#about'
   get '/films', to: redirect('/movies') resources :movies
   root 'movies#index'
end
Save the file.
Switch to Terminal and type the following to start the server:
rails server-
Switch to the browser and navigate to localhost:,000/films and notice that it redirects swiftly to localhost:,000/movies just like we wanted!
What if our board of directors had a meeting where they determined that films is a classier and more appropriate way to refer to movies? What if they told us to use flix.com/films as the basis for our site—do we have to rename our model? Do we have to delete all of our data and start over? Do we cry? No! All we have to do is add a bit of information to our resource.
Switch back to routes.rb in your code editor.
-
Make the following changes shown in bold, taking a moment to double-check that all the commas and colons are in the proper place:
Flix::Application.routes.draw do get 'about' => 'movies#about' get '/films', to: redirect('/movies') resources :films, as: :movies, controller: : movies root 'movies#index' end -
We also need to reverse our redirect, as shown in bold:
get 'privacy' => 'movies#privacy'
   get '/movies', to: redirect('/films')
   resources :films, as: :movies, controller: :movies
   root 'movies#index'
end
Save the file.
-
Switch to the browser and navigate to localhost:,000/films and see that it was really that simple to reorganize the entire site!
What if that board of directors had another meeting and decided to reverse the whole change? Well, their wish is our command.
Switch to routes.rb in your code editor.
-
Revise the code to read as follows, making sure to delete the entire redirect line:
get 'about' => 'movies#about'
   resources :movies
   root 'movies#index'
end
Save the file.
-
Switch to the browser and navigate to localhost:,000/movies
Now our site is back to its original configuration. Thanks to that finicky board of directors, now you know that if you did want to have a controller and a route with a different name than your model, it’s entirely possible to arrange that. Rails leaves it completely up to you.
Back in Terminal hit CTRL–C to shut down the server.