Learn how to enhance your Ruby on Rails skills with this comprehensive tutorial that covers topics such as creating a model method for runtime, Scopes, DRYing up the scopes, and adding tab highlight behavior.
This exercise is excerpted from Noble Desktop’s past web development training materials. Noble Desktop now teaches JavaScript and the MERN Stack in our Full Stack Development Certificate. To learn current skills in web development, check out our coding bootcamps in NYC and live online.
Topics Covered in This Ruby on Rails Tutorial:
Creating a Model Method for Runtime, Scopes, Optional Bonus: DRYing up the Scopes, Additional Bonus: Adding the Tab Highlight Behavior
Exercise Preview
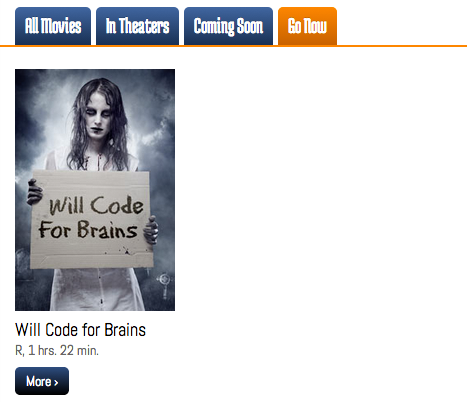
Photo courtesy of istockphoto, © Bliznetsov, Image #20982716

Exercise Overview
Perhaps over the course of writing validations you started thinking, “We have this nice big model file, movie.rb, and it’s so empty! What else can we put in it?” For one: model methods, which, like the name suggests, pertain to behaviors of models and their components.
Another popular saying in the Rails community is “fat model, skinny controller”—in other words, the bulk of an application’s logic should be in its models, not in its controllers or views. The assumption underlying this principle is that model code is more reusable than controller code, thus more DRY.
-
If you completed the previous exercises, you can skip the following sidebar. We recommend you finish the previous exercises before starting this one. If you haven’t finished them, do the following sidebar.
If You Did Not Do the Previous Exercises (3A–4D)
- Close any files you may have open.
- Open the Finder and navigate to Class Files > yourname-Rails Class
- Open Terminal.
- Type
cdand a single space (do NOT press Return yet). - Drag the yourname-Rails Class folder from the Finder to the Terminal window and press ENTER.
- Run
rm -rf flixto delete your copy of the Flix site. - Run
Git clone https://bitbucket.org/Noble Desktop/flix.Gitto copy the Flix Git repository. - Type
cd flixto enter the new directory. - Type
Git checkout 4Dto bring the site up to the end of the previous exercise. - Run
bundleto install any necessary gems. - Run
yarn install—check-filesto install JavaScript dependencies.
Getting Started
Open the Finder and navigate to Class Files > yourname-Rails Class
Open Terminal.
Type
cdand a single space (do NOT press Return yet).Drag the flix folder from the Finder to the Terminal window.
Make sure you’re in Terminal and hit Return to change into the new folder.
-
Type the following in Terminal:
rails serverThe Rails server is now running, so let’s get to work exploring model methods.
Creating a Model Method for Runtime
The Flix site currently has runtimes listed in minutes—but honestly, who wants to mentally calculate the equivalent of 238 minutes? Let’s make these values more user-friendly by displaying them in hours and minutes. This would be a good use for a model method.
We suggest opening the flix folder in your code editor if it allows you to (like Sublime Text does).
In your code editor, open flix > app > models > movie.rb
-
Let’s add a new method to the model file. Type the following above the last
end:def runtime_hours unless runtime.nil? end uWe already have a value called
runtime, so we have to name this one something different, likeruntime_hours. Also, it’s always a good idea to add anunlessstatement right away; in the case that there is no runtime entered for a given movie, we’ll avoid an error that will crash the whole page. -
Add the following bold code to the
unlessstatement:unless runtime.nil? "#{runtime / 60} hrs." endA Rails quirk to be aware of: when Rails divides using / it completely discards the remainder of the division equation. Conversely, the modulus (with %) produces ONLY the remainder of the division equation; let’s use it to take care of the minutes.
-
Add the following bold code to the line you just added:
"#{runtime / 60} hrs. #{runtime % 60} min." Save the file.
Open app > views > movies > index.html.erb
-
Find the following code, around line 22:
<div><%= movie.mpaa_rating %>, <%= movie.runtime %> minutes</div> -
Edit the line as shown below, deleting the word
minutesbecause we added that in theruntime_hoursmodel method:<div><%= movie.mpaa_rating %>, <%= movie.runtime %></div> -
Add the following bold code:
<div><%= movie.mpaa_rating %>, <%= movie.runtime_hours %></div> Save the file.
We need to make the same change in the show file. Open app > views > movies > show.html.erb
-
Find the following piece of code, around line 8:
<p class="runtime">Runtime: <%= @movie.runtime %> minutes </p> -
Edit the code as follows, making sure to delete the word
minutes:<p class="runtime">Runtime: <%= @movie.runtime_hours %></p> Save the file.
-
Switch to the browser, navigate to localhost:,000 and notice that all of the runtimes now display in user-friendly hours and minutes!
What other methods could we add to the model? Well, we’ve listed MPAA ratings in a number of places—including the controller, where they don’t really belong! Let’s DRY up the code by storing the complete list of MPAA ratings as a class method in the model.
DRYing up the Code with Another Model Method
In your code editor, open app > views > movies >
_form.html.erb-
Find the following code, around line 41:
<% mpaa_ratings = options_for_select ["G", "PG", "R", "NR"], selected: @movie.mpaa_rating %> -
Select the following portion, the array of MPAA ratings, and cut it (Cmd–X):
["G", "PG", "R", "NR"] -
The remaining code should look like this:
<% mpaa_ratings = options_for_select(, selected: @movie.mpaa_rating) %> -
Add the name of the class method we’re about to create:
<% mpaa_ratings = options_for_select(Movie.all_mpaa_ratings, selected: @movie.mpaa_rating) %>Remember, class methods always start with the name of the class itself.
Save the file.
Switch to movie.rb in your code editor.
-
Add the following bold code above the start of the mpaa_rating validation method:
def self.all_mpaa_ratings

end

validates :mpaa_rating, inclusion: { in: self.all_mpaa_ratings }
You may be wondering, why did we use
selfhere, and not earlier? Well, because the list of possible MPAA ratings is common to all movies and not particular to any one movie, we are creating a class method here rather than an instance method. Class methods are called by invoking the class directly, rather than the particular instance. When we want to invoke the list of possible MPAA ratings, we can callMovie.all_mpaa_ratingsand we don’t need to rely on a particular instance of the movie class.You may also be wondering, why does this method come above the validation? The answer is because the validation needs this method to exist first—otherwise you’ll get an error.
-
Paste the code within the method so the code reads as follows:
def self.all_mpaa_ratings
   ["G", "PG", "R", "NR"]
end
We decided to make a class method because there is just one list that will be the same for every movie; we only would have made an instance method if there were somehow a different list of MPAA ratings for each movie.
-
Finally, we have the opportunity to change the array syntax to a simpler version, so let’s do it!
def self.all_mpaa_ratings
   %w(G PG R NR)
end
This alternative Ruby array syntax can only be used when your array is composed of simple strings, without spaces.
Scopes
Another way to add logic to your app, besides model methods, is to utilize scopes. Scopes provide a handy way to select only the records that match a specific pattern.
-
In a browser, navigate to localhost:,000 and try clicking the tabs that say All Movies, In Theaters, Coming Soon, and Go Now. The tabs currently lack functionality, but we can get them working with scopes!
We already have a field to handle this element (placement), which contains information about each movie’s placement category. We just need to create a scope for the record and a bit of controller logic to route the movies appropriately.
Switch to your code editor.
Open flix > config > routes.rb
-
On line 4, define a new route as follows:
get 'movies/recommended/:placement' => 'movies#recommended'
resources :movies
This’ll pass a parameter called :placement to the controller action recommended.
Save the file.
Open app > controllers > movies_controller.rb
-
Add the following method around line 11. It doesn’t really matter where it goes, in fact, as long as it is above the private method:
def recommended
   @placement = params[:placement]
end
We created the instance variable
@placementin case we wanted to display it on the screen or use it for another purpose. Because we have three placement values, and we want it to do something different for each of those values, this is a good opportunity to use a case statement. -
Add the following bold code to create a case statement:
def recommended
   @placement = params[:placement]
   case @placement
      when 'in_theaters'
      when 'coming_soon'
      when 'go_now'
   end
   render 'index'
end
You might be wondering: isn’t this where we would create a new view file, e.g.,
app/views/movies/placement.html.erb? But, why create duplicate code? We already have a view (the index page) that is capable of showing a list of movies as a grid. So, we’re using therendercommand to ask Rails to just use an existing view.We left the three cases blank because we haven’t written the scopes yet. Let’s create them now.
Save the file.
Switch to movie.rb
-
Add the following code around line 6:
validate :mpaa_rating_must_be_in_list

scope :in_theaters,

def runtime_hours
A scope definition always starts with the word
scopefollowed by the name of the scope (in this case,:in_theaters). -
Add the following code to the scope definition:
scope :in_theaters, -> { where(placement: 'in_theaters') }The little arrow
->is referred to as a lambda and indicates that some Ruby code is about to follow. We can then invoke the Rubywheremethod to find the exact movies we want to display. This scope tells Rails to load all movies where placement is equal toin_theaters. Let’s define the other two scopes. -
Copy the entire line you just wrote and paste it twice below (or in Sublime Text you can duplicate the current line by pressing Cmd–Shift–D) so you have a total of three identical definitions as follows:
scope :in_theaters, -> { where(placement: 'in_theaters') } scope :in_theaters, -> { where(placement: 'in_theaters') } scope :in_theaters, -> { where(placement: 'in_theaters') } -
Make the following changes shown in bold:
scope :in_theaters, -> { where(placement: 'in_theaters') }
scope :coming_soon, -> { where(placement: 'coming_soon') }
scope :go_now, -> { where(placement: 'go_now') }
Save the file.
Switch back to movies_controller.rb
-
Add the following bold code to the case statement:
@placement = params[:placement]
case @placement
   when 'in_theaters'
      @movies = Movie.in_theaters
   when 'coming_soon'
      @movies = Movie.coming_soon
   when 'go_now'
      @movies = Movie.go_now
end
render 'index'
This means that when the placement is
in_theaters, the@movieinstance variable should be equal toMovie.in_theaters, and so on for the other cases. Save the file.
Last but not least, let’s update the index view. Switch back to index.html.erb.
-
Find the code for the tabs, which starts around line 7:
<li class="active"><a href="#">All Movies</a></li> <li><a href="#">In Theaters</a></li> <li><a href="#">Coming Soon</a></li> <li><a href="#">Go Now</a></li> -
Delete the opening and closing anchor tags so the code looks like this:
<li class="active">All Movies</li> <li>In Theaters</li> <li>Coming Soon</li> <li>Go Now</li> -
Right now the All Movies tab is always highlighted in orange. Remove the
class="active"code as follows:<li>All Movies</li> -
Add the following bold embedded Ruby code to the All Movies tab:
<li><%= link_to " All Movies", movies_path %></li>We are using the
link_tohelper. As you can see from the code, thelink_tohelper first takes the text for the link, then takes the link itself.You might be wondering where the
movies_pathpart came from; it’s the same as typing"/movies". Remember, to see all the existing routes in the application you can switch to the Terminal and typerake routes. Append_pathto any of the listed routes and a little bit of Rails magic will happen; Rails will know the exact path to that particular route! There is no route forrecommended, though, so we’ll have to write out the other links longhand. -
Add the embedded Ruby for the other links as follows:
<li><%= link_to "All Movies", movies_path %></li>
<li><%= link_to " In Theaters", "/movies/recommended/in_theaters" %></li>
<li><%= link_to " Coming Soon", "/movies/recommended/coming_soon" %></li>
<li><%= link_to " Go Now", "/movies/recommended/go_now" %></li>
Save the file.
-
Switch to the browser, navigate to localhost:,000/movies and click on each tab, which should display certain movies based on their placement value. Great!
That was a pretty easy feature to add to the site, primarily because we didn’t have to modify the logic of the index view. In fact, let’s look at the index view a bit closer.
-
Switch back to index.html.erb in your code editor.
This view was written in a fairly generic way. It simply expected to receive an instance variable called
@movieswhich contained some number of movie objects, as you can see in line 15:<% @movies.each do |movie| %>The view doesn’t care whether
@moviescontains all movies, or just a subset, as long as each object is a movie. It’s the controller’s job to indicate precisely which collection of movies is shown. Let’s take a quick look at the controller code. -
Switch to movies_controller.rb and take a look at this method around line 7:
def index
   @movies = Movie.all
end
This means that by default, all movies should be sent to the index.
-
Look at the
recommendedmethod that we wrote a few minutes ago (it starts around line 11).This method allows the controller to receive user input (i.e., whichever tab they select) and make a decision about which group of movies to feed back to the view. The view then goes on to display what it’s told to display. This is an example of MVC all working together in harmony!
Back in Terminal hit CTRL–C to shut down the server.
Optional Bonus: DRYing up the Scopes
We did a really good job here leveraging the power of Rails to create this feature… but we can always do better. We have three very similar-looking scopes; let’s DRY them up into one simplified scope.
Switch to movie.rb in your code editor.
-
Delete the scopes for
coming_soonandgo_nowso this is the only one left:scope :in_theaters, -> { where(placement: 'in_theaters') } -
Make the following substitutions shown in bold:
scope :with_placement, -> { where(placement: placement) } -
Add the following bold code after the lambda:
scope :with_placement, -> (placement) { where(placement: placement) }This is a really idiosyncratic bit of Rails syntax, meaning that the scope receives
placementas a variable.We have just replaced three scopes that corresponded to specific placement values with one scope that can take any value for placement, receive it as a variable and filter the set of models by placement value. This level of abstraction allows us to DRY up the code easily.
Save the file.
Switch to movies_controller.rb
-
Find the following area of code:
def recommended @placement = params[:placement] case @placement when 'in_theaters' @movies = Movie.in_theaters when 'coming_soon' @movies = Movie.coming_soon when 'go_now' @movies = Movie.go_now end render 'index' end -
Delete the case statement so the code reads as follows:
def recommended @placement = params[:placement] render 'index' end -
Add the following bold code:
def recommended
   @placement = params[:placement]
   @movies = Movie.with_placement(@placement)
   render 'index'
end
Notice that we are able to call the scope
with_placementjust like we would call a regular method. Save the file.
-
Switch to Terminal and type the following to launch the server:
rails server Switch to the browser, reload localhost:,000/movies and click on any of the tabs. They should still be working perfectly, but now our code is much DRYer.
Back in Terminal hit CTRL–C to shut down the server.
Additional Bonus: Adding the Tab Highlight Behavior
Let’s get the tab highlight behavior working properly so the placement tabs turn orange when selected.
Switch to index.html.erb in your code editor.
-
Find the following code, starting around line 7 and add the bold changes. Make sure to nest these within the
<li>tags and type a single space before eachclass=active;(The spaces below are not typos.)<li<%= ' class=active' if @placement.nil? %>><%= link_to "All Movies", movies_path %></li> <li<%= ' class=active' if @placement == "in_theaters" %>><%= link_to "In Theaters", "/movies/recommended/in_theaters" %></li> -
Copy and paste the
in_theatersbit of code as shown below:<li<%= ' class=active' if @placement.nil? %>><%= link_to "All Movies", movies_path %></li> <li<%= ' class=active' if @placement == "in_theaters" %>><%= link_to "In Theaters", "/movies/recommended/in_theaters" %></li> <li<%= ' class=active' if @placement == "in_theaters" %>><%= link_to "Coming Soon", "/movies/recommended/coming_soon" %></li> <li<%= ' class=active' if @placement == "in_theaters" %>><%= link_to "Go Now", "/movies/recommended/go_now" %></li> -
Make the changes shown in bold below:
<li<%= ' class=active' if @placement.nil? %>><%= link_to "All Movies", movies_path %></li> <li<%= ' class=active' if @placement == "in_theaters" %>><%= link_to "In Theaters", "/movies/recommended/in_theaters" %></li> <li<%= ' class=active' if @placement == "coming_soon" %>><%= link_to "Coming Soon", "/movies/recommended/coming_soon" %></li> <li<%= ' class=active' if @placement == "go_now" %>><%= link_to "Go Now", "/movies/recommended/go_now" %></li>NOTE: Rails automatically (and somewhat inexplicably) wraps
class=activein quotes (so it looks likeclass="active") which saves us a little bit of work. Save the file.
-
Switch to Terminal and type the following to launch the server:
rails server Switch to the browser and navigate to localhost:,000
Click on the placement tabs. They should work perfectly, turning orange when selected. The Flix site is really coming along!
Back in Terminal hit CTRL–C to shut down the server.