Enhance your Ruby on Rails projects by incorporating the designer’s HTML and CSS designs, images, and fonts into your Rails files, making your site visually appealing and improving your development and testing experience.
This exercise is excerpted from Noble Desktop’s past web development training materials. Noble Desktop now teaches JavaScript and the MERN Stack in our Full Stack Development Certificate. To learn current skills in web development, check out our coding bootcamps in NYC and live online.
Topics Covered in This Ruby on Rails Tutorial:
Incorporating the Designer’s HTML & CSS, Incorporating the Images & Fonts
Exercise Preview
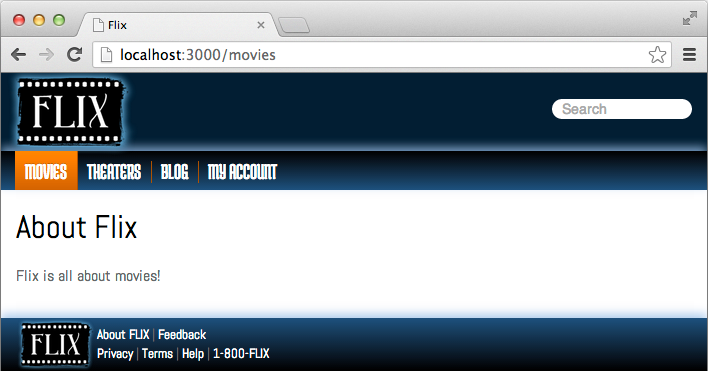
Photo courtesy of istockphoto, © Korhan Karacan, Image #15095805

Exercise Overview
At this point, our Rails site is working—but it’s pretty bare. In this exercise, we will integrate a designer’s HTML into our files. Developing and testing will be much more pleasant once we get the site looking a little spiffier.
Getting Started
Fortunately at Flix we have a very professional design department that has provided us with HTML mockups for the site. Let’s look at these files.
-
In the Finder, navigate to: yourname-Rails Class > flix snippets > Flix HTML
Notice there are subfolders for all different elements of the site: css, fonts, img, js and also an index.html file. In this exercise we will look at all the places in the Rails system where these files need to be stored.
Open index.html in any browser. This is what the Flix site is going to look like once we’ve implemented these designs!
Switch to the Finder and navigate to Class Files > yourname-Rails Class
Open Terminal.
Type
cdand a single space (do NOT press Return yet).To enter the path in Terminal, drag the flix folder from the Finder to the Terminal window and hit Return to change into the new folder.
-
Type the following in Terminal:
rails server
The Automatically Created File Application.html.erb
Every Rails application has a controller with an accompanying set of views as well as a global set of views in a folder called layouts. These global views generally constitute the visual framework that is common across the entire site.
Whenever you create a new Rails app, a file called application.html.erb will automatically be created in a specific location.
-
Let’s check it out. Open the following file in your code editor: flix > app > views > layouts > application.html.erb
Everything in this file was created automatically by Rails. It is a super-basic and stripped-down HTML file, with nothing more than a
DOCTYPEdeclaration and a few basic tags. There is a bit of Ruby code, which is important, and we’ll need to preserve it as we implement the design we’ve been given. Let’s look at the four dynamic data tags on this page one-by-one. -
Take a look at line 11, the most important piece of Ruby code in the file:
<%= yield %>This is where the template file yields to whatever the current action is. Everything AROUND this
yieldtag is a permanent, static part of the site (things that should be the same sitewide, including the header, navigation menu, footer, and search bar).It’s important to start thinking in terms of what content on a given Rails site is permanent, and what content will change from page to page and be loaded inside the
yieldtag. -
Notice this line a little farther up the page:
<%= stylesheet_link_tag 'application', media: 'all', 'data-turbolinks-track': 'reload' %>This dynamic data tag replaces any calls to CSS files that you’d find in a regular HTML file. CSS files for Rails sites must be stored in a specific way, which we’ll look at in a moment.
-
Notice this line as well:
<%= javascript_pack_tag 'application', 'data-turbolinks-track': 'reload' %>Much like the last one, this dynamic data tag replaces the calls to JavaScript files that you’d see on a non-Rails website.
-
The also notice this Ruby code, on lines 5 and 6:
<%= csrf_meta_tags %>
<%= csp_meta_tag %>
This is a security feature of Rails that helps prevent cross-site request forgeries. It is important to leave this code in the file; it’s not replacing any other element. (In particular, this code helps out when a form is submitted, making sure the form submission is not coming from a different site. It also helps secure AJAX requests.)
These four dynamic data tags are important, unique to Rails, and must be kept in the global view file, application.html.erb.
Incorporating the Designer’s HTML
-
Open the following file in your code editor: yourname-Rails Class > flix snippets > Flix HTML > index.html
Notice there are several commented-out lines that point out the areas that will be replaced with
stylesheet_link_tagandjavascript_pack_tag.There are also
<!—begin cut here—>and<!—end cut here—>comments that show the beginning and end of the HTML.It only requires basic coding knowledge to copy and paste this code to the correct place, plus we’re eager to get on to learning more about Rails, so we have prepared in advance a file that integrates the designer’s HTML with the important pieces of Ruby code. Let’s check it out.
-
Open the following file in your code editor: yourname-Rails Class > flix snippets > application.html.erb
Notice that the
stylesheet_link_tagandjavascript_pack_tagare in place, the<%= yield %>is in the middle of the document, and also there are a few instances of<%= image_tag %>that reference images that are loaded into the site as assets. Close the file.
Open Finder and arrange two windows side-by-side.
In one window, navigate to this folder, the destination for the file: flix > app > views > layouts
In the other window, find yourname-Rails Class > flix snippets > application.html.erb
Copy application.html.erb and paste it into the layouts folder.
Click Replace (we want to overwrite the automatically created file.)
-
Open your browser and navigate to localhost:,000/movies to see what the page is looking like. Rails presents an error:
Sprockets::Rails::Helper::AssetNotFound in Movies#aboutA bit further down the page, you’ll also see:
The asset "logo-2x.png" is not present in the asset pipeline.Rails is trying to let us know that it’s expecting an image named “logo-2x.png”, but didn’t find it. But what does it mean by “asset”?
Incorporating the Images
Let’s get the site working by adding the images to the rails asset pipeline. The asset pipeline is a convenient way to let Rails compress and combine CSS, images, and other files for production environments.
Rails tends to think of the building blocks of a site that are not Ruby code (CSS, images, etc.) as assets. Accordingly, they all live in the app > assets folder.
-
In one Finder window, navigate to: flix > app > assets > images
This folder is currently empty.
In the second window, navigate to: yourname-Rails Class > flix snippets > Flix HTML > img
Hit Cmd–A to select all the images in the img folder, copy them, and paste them in the flix > app > assets > images folder.
Switch to the browser, reload localhost:,000/movies and notice that the page is working now—but we’re obviously missing most of the styling. We’ll tackle the CSS next.
Incorporating the Stylesheets
Open your browser and navigate to localhost:,000/movies to see what the page is looking like. The navigation links, footer information, search bar, and images are present—kind of. The image links are broken and nothing is styled with CSS.
In the Finder, make sure you still have two windows open. In one, navigate to: yourname-Rails Class > flix > app > assets
In the second window in the Finder, navigate to: yourname-Rails Class > flix snippets > Flix HTML > css
-
Hit Cmd–A to select all three files in the folder, copy them, and paste them in flix > app > assets > stylesheets
While we’re in the stylesheets folder, there is a file we should look at.
-
Open flix > app > assets > > stylesheets > application.css in your code editor.
Because of its name, which recalls application.html.erb, you might think that this is perhaps the global CSS file for the site. It’s not. You are technically permitted to put CSS for your application in this file, but it’s considered better practice to create separate CSS files outside of this file. The real job of this file is summed up in this one bit of code, on line 13:
*= require_tree.This directive tells application.css to load any other CSS or SCSS files that are in the directory with it. It will load them in alphabetical order. If there was a case where certain files should only be loaded under special circumstances, you would have to delete this line of code and call each file by name. We will leave it in place, but there is one change we need to make in this file.
In the file provided by our designer, the CSS was listed in this order:
<link rel="stylesheet" href="css/normalize.min.css">
<link rel="stylesheet" href="css/fonts.css">
<link rel="stylesheet" href="css/main.css">
The ordering of the CSS files is significant; normalize.min.css ought to run first and smooth out any browser quirks before either fonts.css or main.css runs. Let’s make sure our Rails app loads them in the right order, rather than alphabetically.
-
Add the following bold code:
*= require_tree.
*= require 'normalize.min'
*= require_self
Note that we didn’t need to append .css to the filename; Rails will automatically hunt it out and run it first! Rails is also smart enough to know, when it gets to the
require_selfline, that it has already loaded normalize.min.css therefore it won’t load it a second time. Save the file.
We need to make a few adjustments to main.css. First, we need to rename it main.scss. Right-click on the file name in your text editor and select Rename. A text field will appear at the bottom of your text editor window where you can make the changes. Hit ENTER when you’re done.
-
Open main.scss in Sublime Text. There are four lines that reference images. These have become Rails assets, so the old paths aren’t going to work, and we don’t know the new ones. Fortunately, thanks to Rails’ magic, we don’t have to. We can use the image-url() helper to sort this out. Find these four lines, throughout the file:
background-image: url(../img/header-bg.png);
background-image: url(../img/header-bg-2x.png);
background: url(../img/star-rating-sprite.png) no-repeat;
background: url(../img/star-rating-sprite-2x.png) no-repeat;
And replace them with:
background-image: image-url('header-bg.png');
background-image: image-url('header-bg-2x.png');
background: image-url('star-rating-sprite.png') no-repeat;
background: image-url('star-rating-sprite-2x.png') no-repeat;
If we view the site at this point, we’ll notice it’s looking basically complete, with the exception of the fonts. We’ll tackle those next.
Incorporating the Fonts
In the flix > assets directory, there is no fonts folder. Although it is possible to add fonts to the assets pipeline, it requires a fair amount of work and isn’t really necessary. Let’s take this opportunity to explore a different folder in Rails.
-
In one of your Finder windows, navigate to flix > public.
By default, there are a few files in this folder such as common error messages (404,422,500) and a robots.txt file; you can open them up if you’re curious.
As you might guess from the stuff that’s in this folder (and its name!), this is the folder that corresponds to the root folder of a conventional website.
-
To prove how closely this folder corresponds to a traditional root folder, you can switch to your browser and navigate to localhost:,000/robots.txt and that file will indeed display at that address.
Therefore, if we want to have our fonts located at the address /fonts, which is how they are referenced in the designer’s HTML, it makes sense to simply add a fonts directory to the public folder.
Switch to the Finder, and in the second window, navigate to: yourname-Rails Class > flix snippets > Flix HTML
Copy the entire fonts folder and paste the folder into flix > public.
-
Switch to your browser, reload localhost:,000/movies and notice that the fonts are looking much more attractive. (If for some reason the fonts don’t change, you may have to quit and relaunch your browser to see them.)
Great, we’ve finished integrating the basic design of our app!