In this Premiere Pro tutorial, learn how to apply various effects such as the Warp Stabilizer, time reversing footage, and masking an effect, to refine and enhance your video clips.
This exercise is excerpted from Noble Desktop’s Adobe Premiere Pro training materials and is compatible with Premiere Pro updates through 2023. To learn current skills in Premiere Pro with hands-on training, check out our Premiere Pro Bootcamp, Video Editing Certificate, and video editing classes in-person and live online.
Topics Covered in This Premiere Pro Tutorial:
Warp Stabilizer Effect, Time Reversing Footage, Masking an Effect
Exercise Preview
Exercise Overview
In this exercise you will finish the Promotion video, refining the clips on the timeline. You will stabilize some of the more shaky clips and adjust the timing and playback of others to produce a better ad.

Previewing the Final Video
Let’s see a preview of what you’ll be making.
On the Desktop, navigate to Class Files > Premiere Pro Intermediate > Noble Promotional Ad and double–click Noble Promo.mp4
-
Notice the following:
- The Coding on a Laptop video is less shaky then you saw it in the previous exercise.
- The Classroom Pan video is playing in reverse.
Close the video when done.
Getting Started
If you completed the optional bonus part of the previous exercise 4C, you can just open and continue working with that project file. Otherwise, open use the file we’ve provided as follows:
If you have a project open in Premiere, choose File > Close All Projects.
In Premiere Pro, choose File > Open Project or hit Cmd–O (Mac) or CTRL–O (Windows).
Navigate to Desktop > Class Files > Premiere Pro Intermediate > Noble Promotional Ad > Finished Projects.
-
Double–click on Noble Promo Ad—All Clips on Timeline.prproj to open it.
NOTE: If you see a dialog about Converting Project (from a prior version) refer to Fixing Version Compatibility Issues section in Exercise 1A. If the Link Media dialog opens refer to Locating Missing Media in Exercise 1A.
Go to File > Save As.
Name the file Noble Promo Ad—Your Name and save it to Desktop > Class Files > Premiere Pro Intermediate > Noble Promotional Ad
Stabilizing Shaky Footage
Video that is shot without a tripod (hand–held video) is often very shaky. While a very short clip, or a clip with only slight shakiness can usually be used, too much shakiness is a big problem. In situations like this, the Warp Stabilizer effect is our friend.
Choose Window > Workspaces > Editing.
-
On the Timeline, move the playhead to 11:01
TIP: With the Timeline active, you can hit Cmd–F (Mac) or CTRL–F (Windows), type the name of the clip you’re looking for into the Find field, and click Find or hit Return (Mac) or Enter (Windows).
Press the Spacebar to preview the Coding on a Laptop clip. Notice that the hand–held shot is very shaky, and this makes it distracting.
Position the Playhead so you see the preview of the Coding on a Laptop clip in the Program panel.
Make sure the Coding on a Laptop clip is selected in in the Timeline.
In the Effects panel search for Warp
-
Double–click the Warp Stabilizer effect to apply it to the highlighted clip on the Timeline.
NOTE: The warp stabilizer is a two step process, an analysis (noted by the blue ribbon) and then a stabilization (the orange ribbon). The Warp Stabilizer is a background process, so you can do other things while it is working on the clips.
-
Once the effect has finished processing, move the playhead to the beginning of the clip and press the Spacebar to preview it.
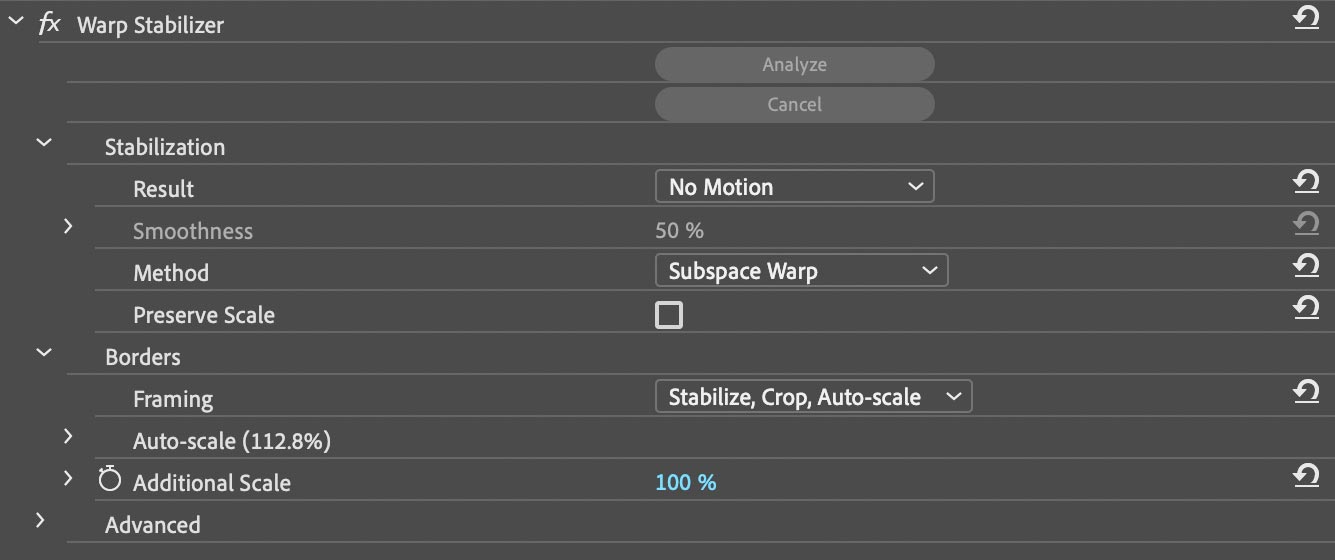
The default setting for this effect gives you a 50% reduction in the motion in the clip and may be good to quickly make unusable shaky footage usable.
With the Coding on a Laptop clip still selected, go to the Effect Controls panel and locate the Warp Stabilizer effect.
-
Under Stabilization, change Result to No Motion.
NOTE: The default analysis is usually very good but for more troublesome footage you can enable Detailed Analysis in the Advanced settings. It takes considerably longer to process, but can yield superior results.
Move the playhead to the One on One Help clip at 22:24
Click on the One on One Help clip to select it.
In the Effects panel, double–click on the Warp Stabilizer effect to apply it. The default setting should smooth off the shakiness of this clip just fine.
Time Reversing Footage
We can adjust the timing of video using the tools provided in Premiere Pro.
Move the Timeline playhead to 14:09 (the beginning of the classroom Pan 01 clip).
Press Spacebar to preview the Timeline. Notice how the 2 clips, Classroom Pan and Instructor Teaching look like they are ping–ponging back and forth.
-
CTRL–click (Mac) or Right–click (Windows) on the classroom Pan 01 clip and choose Speed/Duration.
- Change Speed to 80%
- Confirm that the link between Speed and Duration is enabled.
- Check on Reverse Speed.
- Click OK.
Preview this area of the timeline and notice that the clip now plays in reverse and the speed of the pan better matches the next clip.
Move the playhead near the end of the Timeline so it’s on top of the last Instructor Teaching clip.
CTRL–click (Mac) or Right–click (Windows) on this clip and choose Speed/Duration.
Check on Reverse Speed and click OK.
Masking an Effect
Sometimes you’ll need to obscure an area of the video on the timeline. Let’s see how to blur the screen of a computer.
Move the Timeline playhead to 5:07 (the start of the Designing a Web Page clip).
Click on the Designing a Web Page clip to select it.
In the Effects panel search for gaus
Double–click the Gaussian Blur effect to apply it to the highlighted clip on the Timeline.
-
In the Effect Controls panel:
- Set Blurriness to 40
- Confirm that Repeat Edge Pixels is checked on.
Also in the Effect Controls panel, click the 4–point polygon mask button
 to add a mask.
-
In the Program panel, drag the 4 corner points of the mask to line up with the 4 corners of the computer screen.

NOTE: Clicking on the mask’s outline will add a new point. To remove a point, hold Cmd (Mac) or CTRL (Windows) and click on the unwanted point.
To make sure the mask stays on the screen when the camera moves, in the Effect Controls panel under Mask (1) click the Track Mask Forward button
 .
.Lastly, in the Effect Controls panel set Mask Feather to 20
Preview this area of the Timeline to preview the tracked mask.
Choose File > Save or hit Cmd–S (Mac) or CTRL–S (Windows).