Learn how to remove a moiré pattern from a scanned printed photograph with our Photoshop tutorial, featuring step-by-step instructions and practical exercises.
This exercise is excerpted from Noble Desktop’s past Photoshop training materials and is compatible with Photoshop updates through 2020. To learn current skills in Photoshop, check out our Photoshop Bootcamp and graphic design classes in NYC and live online.
Topics covered in this Photoshop tutorial:
How to Remove a Moiré Pattern
Exercise Preview
Depending on the print quality of this workbook, you may not be able to see the moiré pattern in this scan. This can also be true for your personal printer. It’s best to trust the view on-screen at 100%.

Exercise Overview
When you scan a printed photograph, you often get a moiré pattern due to the presence of a halftone screen. This halftone screen is necessary to print any image on most media. However, there are several options available for avoiding the moiré pattern.
The first option is to use a “descreening” option that comes with your scanner software. This is useful, however, only if your scanning software has such a feature, and even then, the results may be unrewarding. Therefore, other tactics may be needed.
The following method seems to work well for many images. First, the image is scanned at an unusual pixel-per-inch number—say, 718, instead of 300. Then the Median filter should be applied to the image. The Median filter can be found in the Filter menu, under Noise. When you apply this filter, use a radius of 2 pixels. What it does is blend adjacent pixels in the image, equalizing them. This rids the image of some of the variation inherent in the halftone screen. The image will appear to melt together slightly after you apply the filter.
After applying the filter, reduce the image size to the resolution (ppi) you desire—say, 300 ppi for print. The resampling and discarding of aberrant pixels further enhances the smoothness of the image.
Now that you are at the right size, apply the Unsharp Mask filter. A suggested setting is 50% under Amount, a 3-pixel radius, and a 5-pixel threshold. Try this and adjust the settings to your taste.
NOTE: We scanned the file you’ll use in this exercise at 359 ppi and we will downsize it to 150 ppi. This is fine for some newspapers but for other print work, you should use the previously stated 718 ppi scanning resolution and 300 ppi should be the final resolution.
To see how this method works on a real scanned image, try this:
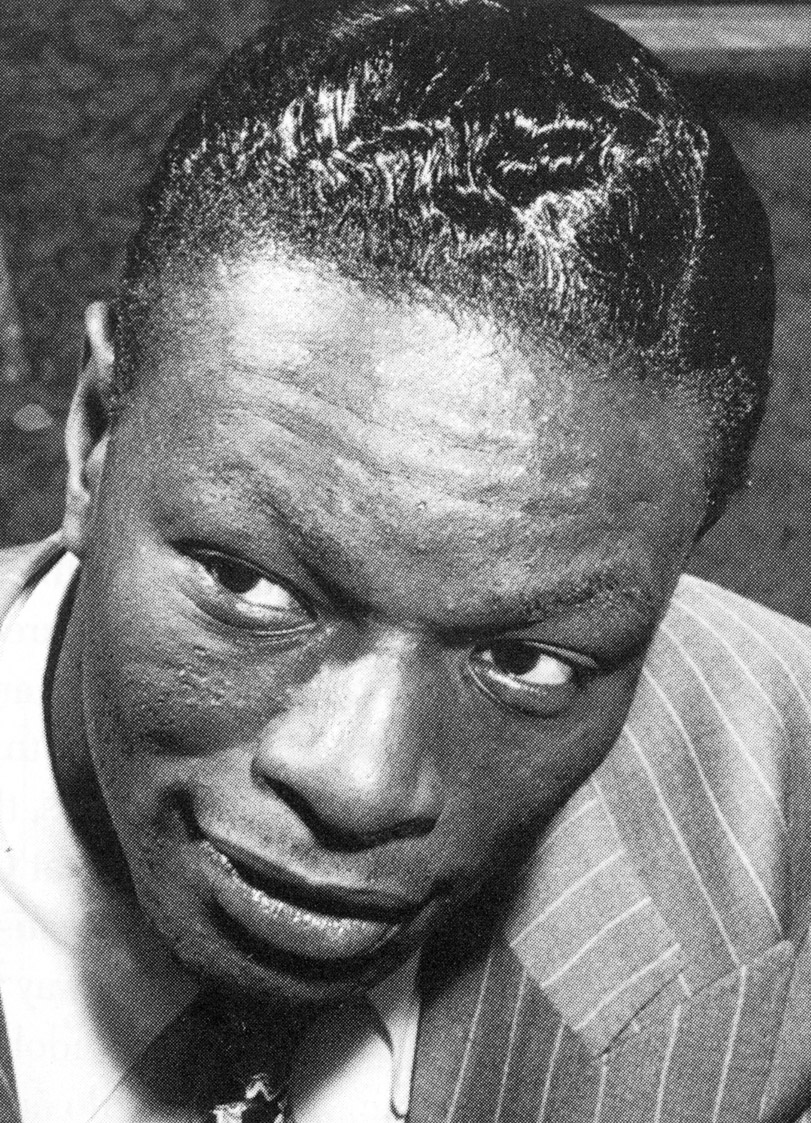
From the Photoshop Class folder, open Nat Cole.tif.
Go to View > 100%. He’s been scanned at 359 ppi, and as you can see, a strong dot pattern is evident.
First, go to Filter > Noise > Median.
Make the radius 2 pixels and click OK.
Next, go to Image > Image Size and reduce the image to 150 Pixels/Inch (ppi).
Click OK.
-
Finally, go to Filter > Sharpen and apply the Unsharp Mask filter. Try these settings:
Amount: 50% Radius: 3 px Threshold: 5 Click OK.
Save the file as yourname-Nat Cole.tif.
Open the original and compare them side-by-side by choosing Window > Arrange > 2-up Vertical. Make sure they are both zoomed to 100%. The final image should have a much more natural texture than the original.
