Enhance your Photoshop skills with our in-depth tutorial which covers topics such as resizing and resampling, soft proofing, and image compression for preparing images for the web.
This exercise is excerpted from Noble Desktop’s past Photoshop training materials and is compatible with Photoshop updates through 2020. To learn current skills in Photoshop, check out our Photoshop Bootcamp and graphic design classes in NYC and live online.
Topics covered in this Photoshop tutorial:
Resizing & resampling, Soft proofing, Image compression (JPEG)
Exercise Preview
Exercise Overview
Preparing an image for the web is a slightly different process from preparing it for print. This exercise will walk you through a typical web preparation workflow.

Prepping the Image for Use on the Web
-
From the Photoshop Adv Class folder, open East River-for web.psd.
Notice that no color management dialog opened? That’s because this image has already been converted into our Adobe RGB workspace and is ready to work on.
-
Do a File > Save As. Save it back into the Photoshop Adv Class folder as yourname-East River-for web.psd.
NOTE: If you had done any work to the image, this is when you would flatten the image (Layer > Flatten Image).
Go to Image > Image Size.
-
Check on Resample and choose Automatic. Do not click OK yet!
Behind the scenes Photoshop will automatically choose Bicubic Sharper because we’re reducing the size of the image. Bicubic Sharper helps maintain a bit more sharpness than Bicubic. NOTE: Prior to CS6 we had to manually select Bicubic Sharper each time.
-
Change the following settings:
Resolution: 72 Pixels/Inch Width: 450 Pixels Click OK.
If you aren’t already viewing at actual size, go to View > 100%. This is how large it will be on the web.
Sharpen the image using whatever sharpening techniques you usually use (such as Smart Sharpen or Unsharp Mask).
Saving the File Appropriately
-
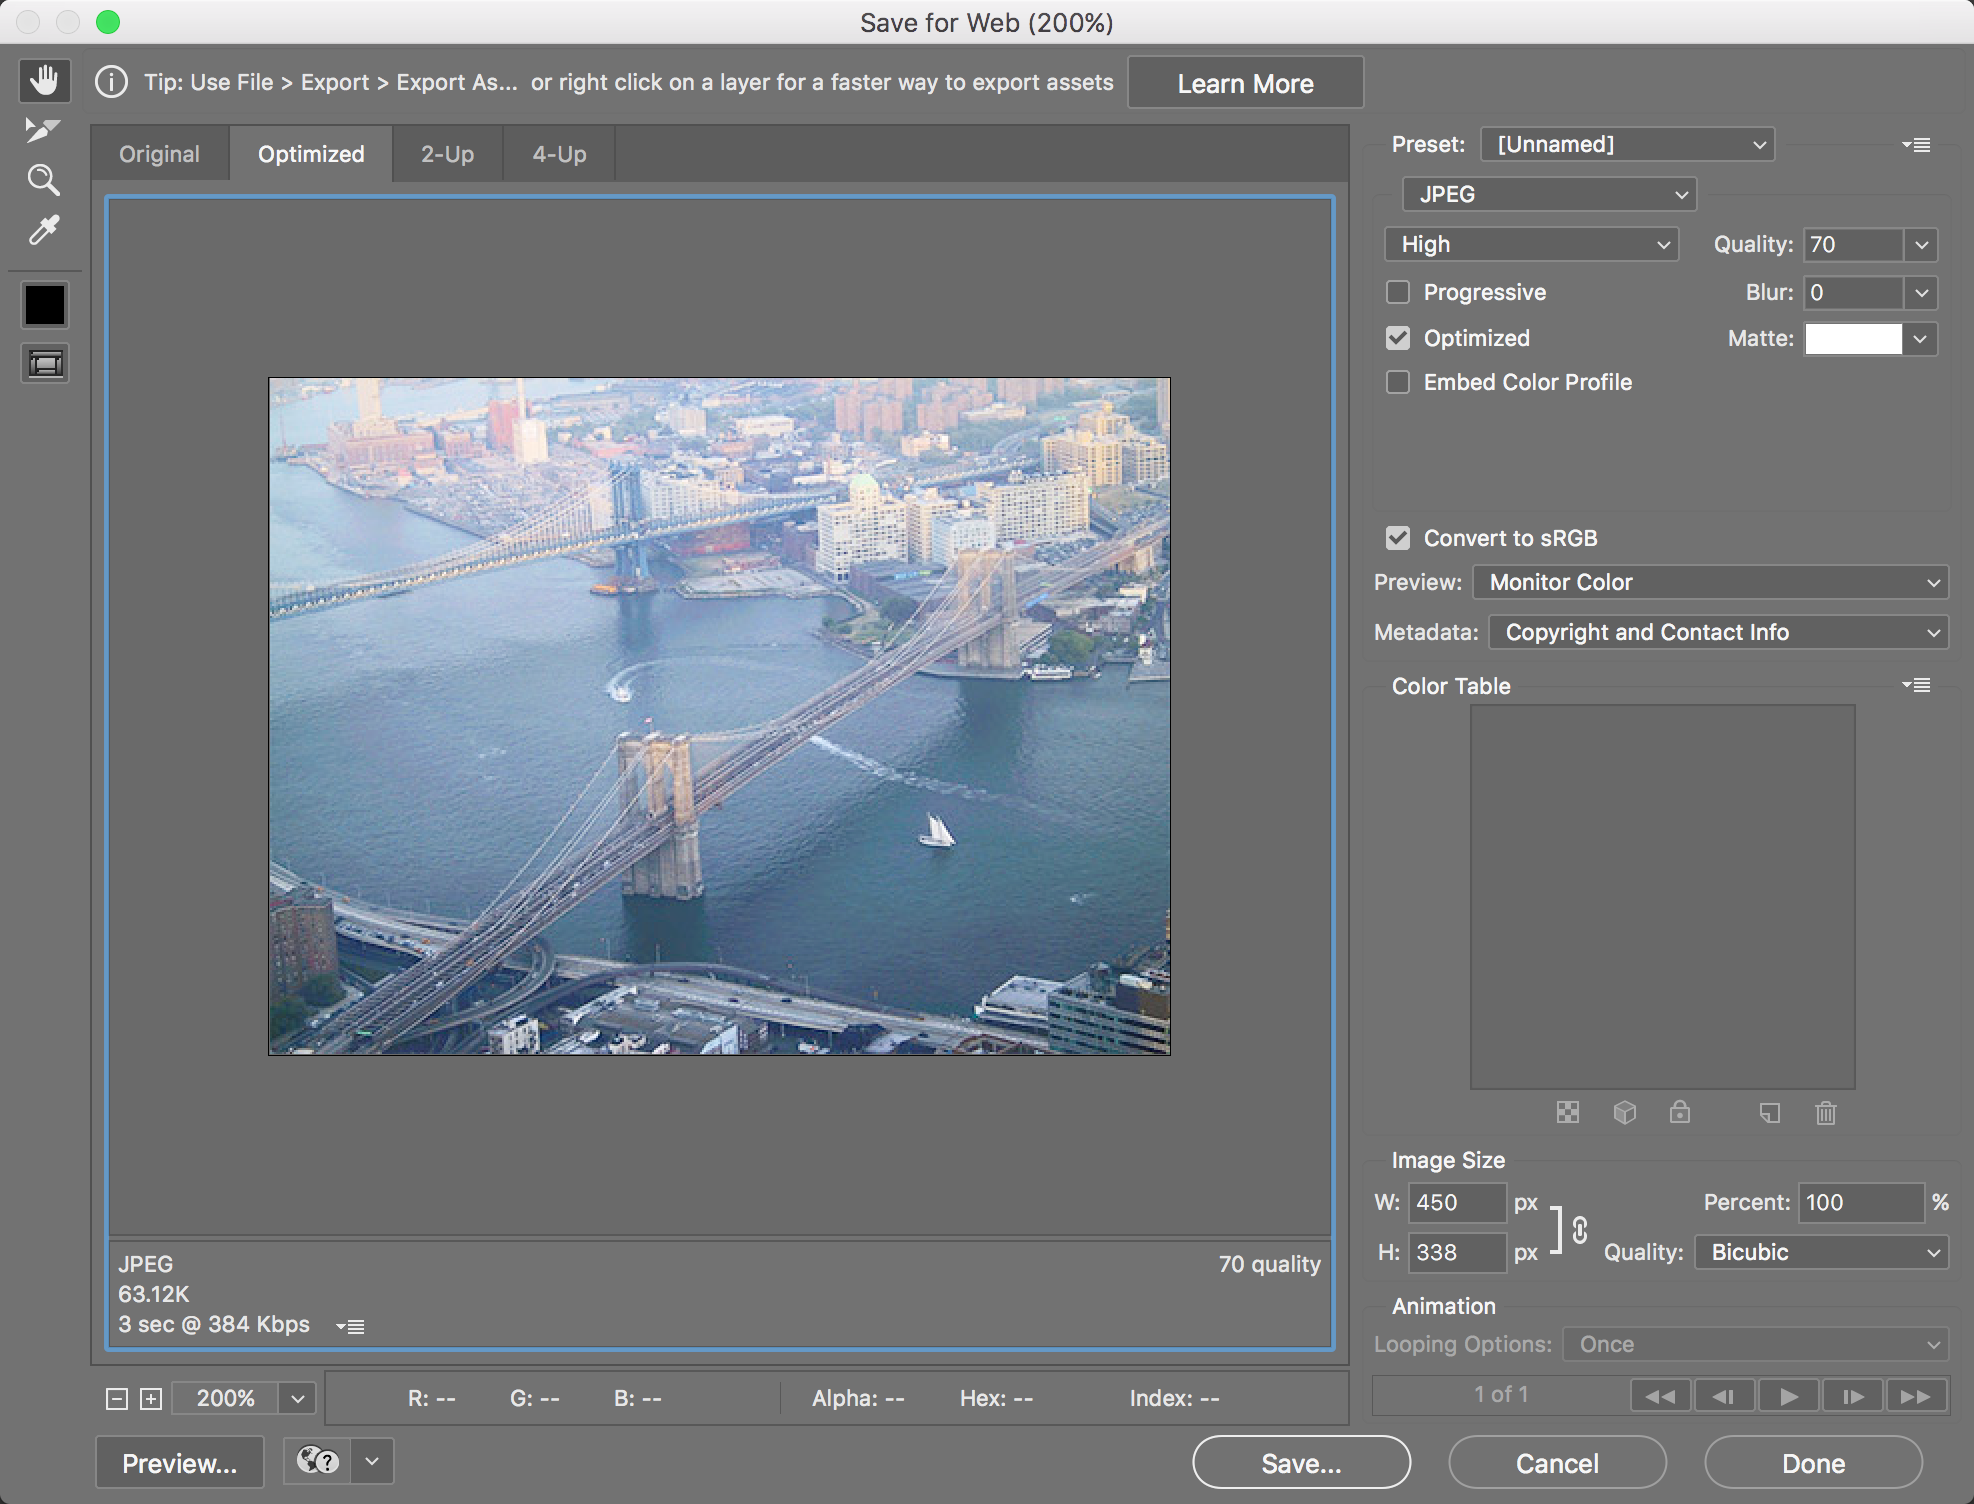
Do a File > Export > Save for Web (Legacy).
NOTE: Save for Web is now marked as Legacy because Adobe won’t be updating it to support new features such as artboards. In CC 2015 Adobe introduced brand new exporting methods such as File > Export > Export As. These new methods may be suitable in some cases, but they are currently not as developed and lack some options found in Save for Web. Adobe is keeping Save for Web until the new methods can fully replace it. For what we’re doing in this book, we prefer Save for Web for its more complete feature set.
At the top right of the window, below the Preset menu, choose JPEG.
Set Quality to 70.
-
Make sure the default of Convert to sRGB is checked. While sRGB is not so good for print work, it is good for web work.
Although you could embed a color profile, for the web you should NOT because:
- It often adds several extra kilobytes to the file size. Kilobytes add up quickly when you have many images throughout a website, making pages load slower.
- Most browsers don’t even support color management yet.
Click Save. Save it back into the Photoshop Adv Class folder.
Close the Photoshop file, saving any changes.
