Deepen your understanding of web design with our detailed Photoshop tutorial, covering important topics such as photo importing and cropping, colorizing icons, adding effects, layering, and much more.
This exercise is excerpted from Noble Desktop’s past web design training materials and is compatible with Photoshop updates through 2020. We now teach Figma as the primary tool for web and UX & UI design. To learn current skills in web design, check out our Figma Bootcamp and graphic design classes in NYC and live online.
Topics Covered in This Photoshop for Web Design Tutorial:
Importing & Cropping Photos (masking), Colorizing Icons (vector Smart Objects) in Photoshop, Adding Effects Such As Stroke, Inner Shadow, & Gradient Overlay, Copying Effects to Other Layers, Fill Opacity
Exercise Preview
Exercise Overview
In this exercise, you’ll learn about cropping photos to show the parts you want. Photoshop calls this masking. You’ll also experiment with layer effects to create interesting appearances for buttons, icons, etc.

Importing the Photo
- In Photoshop, close any files you have open.
- Hit Cmd–O (Mac) or CTRL–O (Windows).
- Navigate into Desktop > Class Files > yourname-Photoshop for Web Class > iTastify and open iTastify Ready for Photos.psd.
-
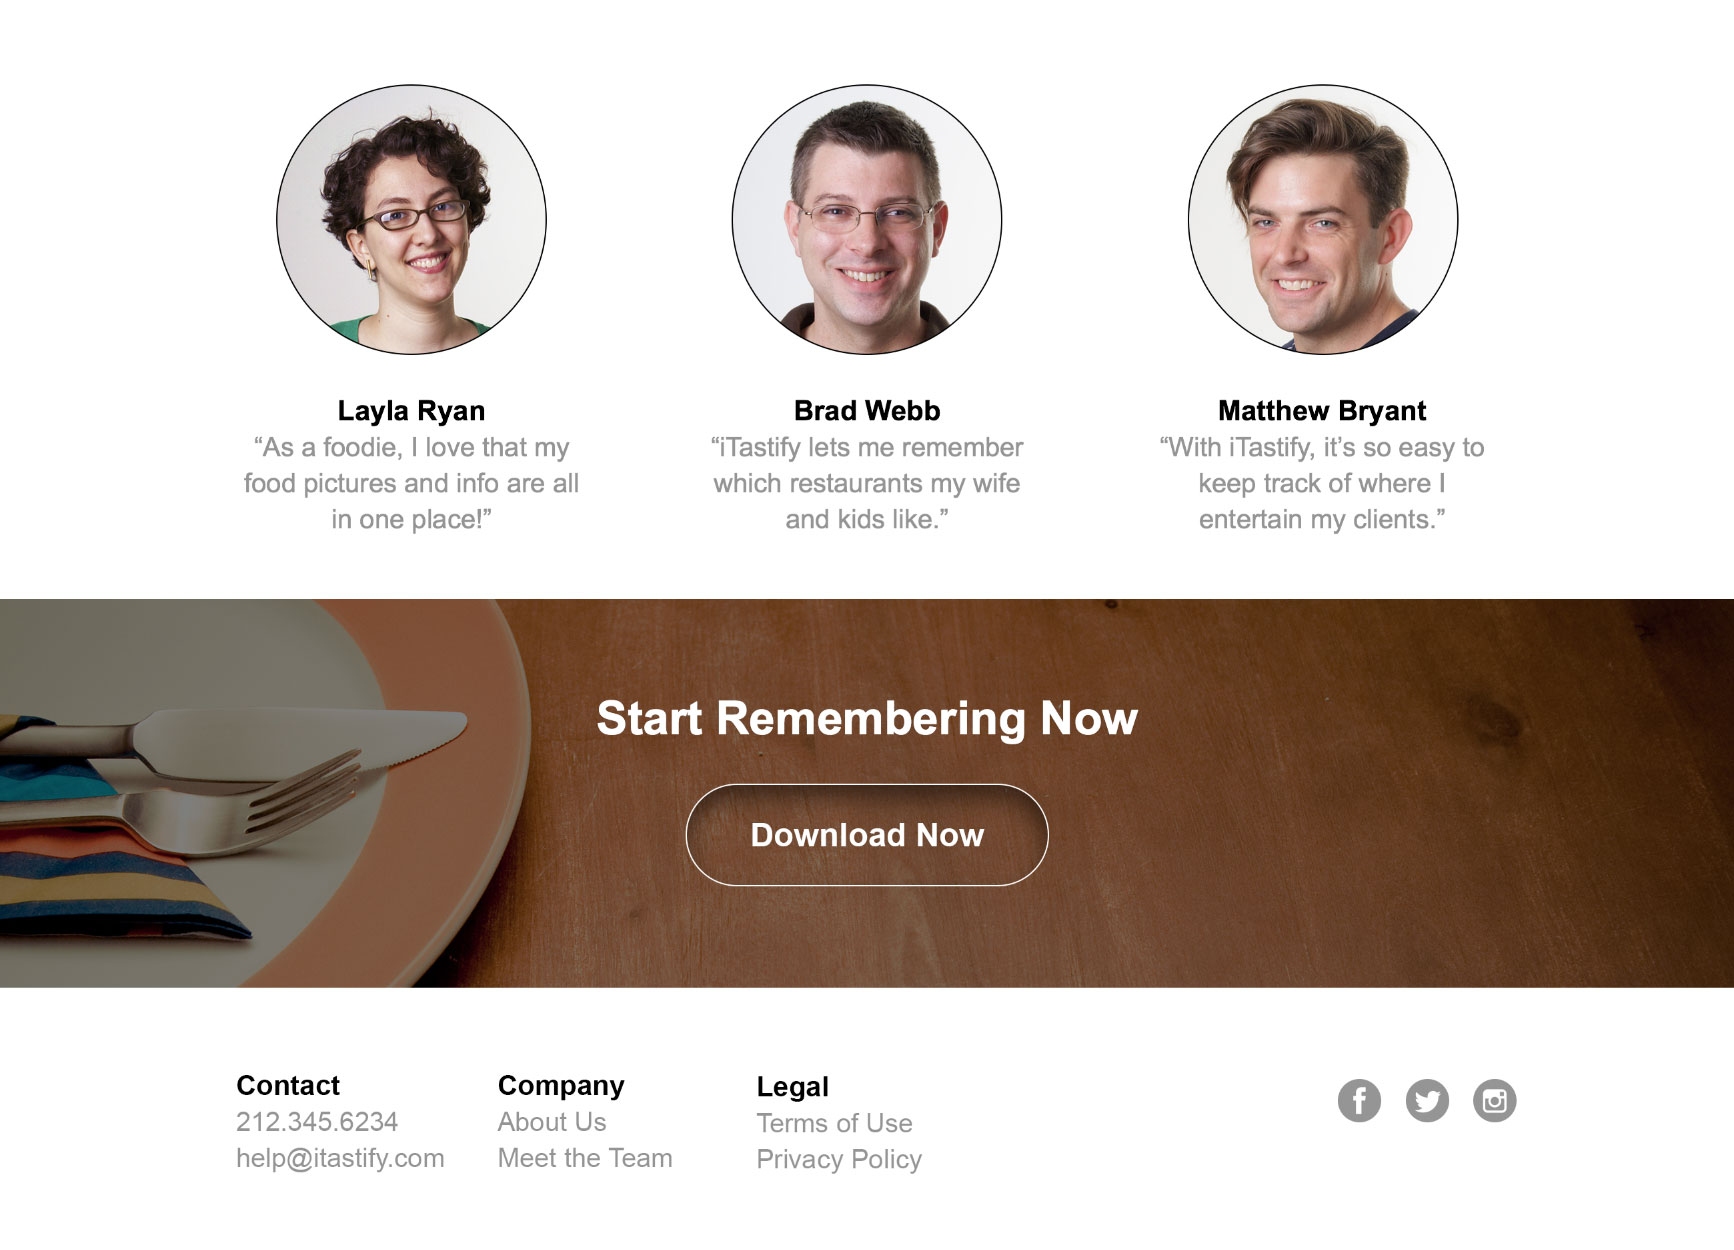
Zoom in and scroll down to the three testimonials below the heading Browse & Search Your Experiences.
We’ve already brought in one photo, and we want to make the others look the same (a headshot in a circle).
- Choose the Move tool
 .
. -
At the top left of the Options bar, make sure:
Auto-Select is NOT checked.
The menu to its right is set to Layer.
- We’ll start with Brad Webb’s photo. CTRL–click (Mac) or Right–click (Windows) on the gray box above Brad Webb.
- In the menu that appears, choose Customer Image (which should be listed just under Quote-Brad).
- Hit Delete to remove the gray placeholder box.
- Let’s import the photo. Choose File > Place Embedded.
Navigate into Desktop > Class Files > yourname-Photoshop for Web Class > iTastify > user-photos and double–click on brad-webb.jpg to choose it.
Accept the default size by hitting Return (Mac) or Enter (Windows).
We’ll perfect the alignment later, but let’s get it roughly into position. Drag the image so it’s roughly centered above the Brad Webb text and the eyes are aligned with Layla’s eyes on the left.
Putting the Photo into a Circle (Cropping/Masking)
We need to draw a circle to put the photo into. Near the bottom of the Tools panel, select the Ellipse tool
 .
.At the top left of the Options bar, set the menu to Path. (The menu may currently say Shape or Pixels.)
-
The other circle is 406px, so let’s create another one the same exact size. Hover over the photo of Brad. Aim the cursor right between the eyes and click once.
NOTE: In your own designs, you could drag out a circle that looks the correct size.
- Set the following:
- Width and Height to 406 px.
- Check on From Center.
- Click OK.
In the Options bar, click the Mask button. If you do not see the button, you must have done something differently, but don’t worry. As long as you still have the path selected, choose Layer > Vector Mask > Current Path to do the same thing.
-
Aligning vector masks is different from aligning layers. In the Options bar click the Path alignment button
 to see the menu of options.
In the pop-up panel that appears, set Align To to Canvas.
-
Again click the Path alignment button
, then click the Align horizontal centers button  .
.The path may not move much (or any) if it was already centered, but now we know the path is perfectly centered in the canvas.
-
Choose the Move tool
.We need to vertically align the circle with Layla’s circle. Smart guides often help with this, but sometimes they can be tricky when you have a complex layout where they snap to too many objects. It’s good to know that you can also create guides for objects to snap to, so let’s create our own alignment guide.
Select Layla’s circle photo by Cmd–clicking (Mac) or CTRL–clicking (Windows) on it.
Verify in the Layers panel that the layla-ryan layer is selected. By selecting this layer, the guide we’re about to create will snap to this layer’s boundaries.
Make sure you can see the top of Layla’s circle photo.
If the rulers are not visible, choose View > Rulers.
Hover over the ruler at the top of the document. Click and drag down to pull out a guide, pulling down until it snaps to the top of Layla’s photo.
After the guide has been positioned, choose View > Lock Guides.
Now we can move Brad’s circle. Cmd–click (Mac) or CTRL–click (Windows) on Brad’s circle to select it.
-
Sadly, dragging the layer with the Move tool will not snap the circle to the guide, it will snap to the cropped photo which extends beyond the edges of the circle. To snap to the circle, we need to select it with a tool which selects vector elements.
Choose the Path Selection tool
 .
. Click on Brad’s circle to select it.
Start dragging the circle and then hold Shift. Continuing dragging up/down so the top of the circle snaps to the guide. Once it’s in position, let go of the mouse first, then release Shift.
The photo does not move with the circle, so let’s adjust the cropping of the photo within the circle. Choose the Move tool
.In the Layers panel, find the currently selected layer, brad-webb.
-
Notice there are two thumbnails:
- The left one represents the photo’s smart object.
- The right one represents the circle (which is a vector mask).
Unlink them by clicking the link icon between the two thumbnails.
-
In the file, drag the photo into a good position or use the Arrow keys to nudge it.
TIPS: People often look at eyes first, so you may want to align the eyes. Also, if you wanted to resize the photo, you could now do a Free Transform without affecting the size of the circle.
-
In the Layers panel, re-link the two thumbnails on the brad-webb layer by clicking in the empty space between the thumbnails where the link used to be.
Re-linking a layer to its mask is typically a good habit to get into. Later you may try to move the layer and forget they were unlinked.
-
Now that you’ve seen how to put a photo into a circle, the easiest way to make the third photo is to duplicate this one and then swap out the photo. But we must be careful of how we make the copy.
If we held Option (Mac) or ALT (Windows) and dragged off a copy, Photoshop would think of both photos as the same (because they are connected to the same smart object behind the scenes). If we swapped out the photo, both photos would be replaced, not just the one! Don’t worry though, there is a way!
To make a copy that won’t be connected to this smart object, choose Layer > Smart Objects > New Smart Object via Copy.
In the file you won’t see anything change, but in the Layers panel notice there is a new layer brad-webb copy.
Double–click that layer name and change it to: matthew
In the Layers panel, drag the matthew layer down into the Quote-Matthew folder below.
Drag the matthew layer so it’s the topmost layer in the Quote-Matthew folder.
In the Layers panel, inside the Quote-Matthew folder select the Customer Image layer (the gray placeholder box).
Press Delete (Mac) or Backspace (Windows) to remove it.
Select the matthew layer.
In the file, hold Shift and drag the photo above Brad Webb to the right, positioning it above Matthew Bryant. Smart guides should help you center it above the text.
Now we can swap the photo with the correct one. With the matthew layer selected, choose Layer > Smart Objects > Replace Contents.
Navigate into Desktop > Class Files > yourname-Photoshop for Web Class > iTastify > user-photos and double–click on matthew-bryant.jpg to choose it.
Hide the guides by hitting Cmd–; (Mac) or CTRL–; (Windows).
Adding a Stroke
The backgrounds of these photos blend too much into the white. One thing we can do is add a stroke (an outline) around them to help define the circle’s edge. In the Layers panel, make sure the matthew layer is still selected.
At the bottom of the Layers panel, click the Add a layer style button
 and choose Stroke.
Move the Layer Style window so you can see the Matthew Bryant photo as you work. You should already see a black stroke.
The default size is 1px, but we’re in a 2x file so that would end up being a half pixel in a 1x file. Set the Size to 2 px.
Click OK.
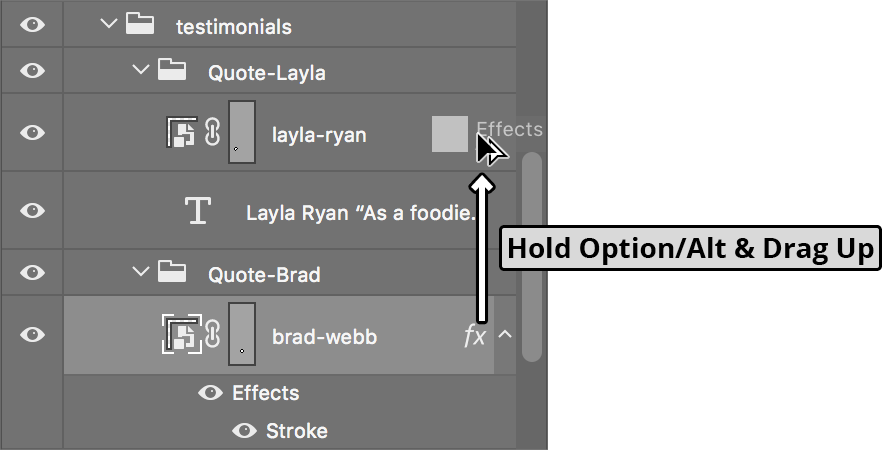
Let’s copy the effect to the other two photos. In the Layers panel, CTRL–click (Mac) or Right–click (Windows) on the matthew layer’s name.
In the menu that appears, choose Copy Layer Style.
Find the brad-webb layer (just a couple layers above the current layer).
CTRL–click (Mac) or Right–click (Windows) on the brad-webb layer’s name.
In the menu that appears, choose Paste Layer Style.
-
Let’s see another way to copy the style. As shown below, hold Option (Mac) or ALT (Windows) and drag the fx icon from brad-webb to layla-ryan.
To clean up the Layers panel, collapse the testimonials layer group.
Importing a Background Photo
Scroll down to the Start Remembering Now section just below the testimonials.
In place of the gray background we want a photo. Select the gray background by Cmd–clicking (Mac) or CTRL–clicking (Windows) on it.
We are not going to delete the gray shape, because we’ll be able to use it in a moment. Let’s bring in the photo on top of it. Choose File > Place Embedded.
Navigate into Desktop > Class Files > yourname-Photoshop for Web Class > iTastify and double–click on plate-on-table.jpg to choose it.
-
The image is currently giving us the option to size it. The plate sticks too far into the middle of the image, so in the Options bar:
- Change the W to 75%
- The Link icon
 should already be checked so H should also change).
 - Hit Return (Mac) to Enter (Windows) twice to apply the size.
We want the plate on the left, so choose Edit > Transform > Flip Horizontal.
Drag the photo so the knife points to Start Remembering Now and the right side of the photo aligns with the right side of the file.
- We want to crop the photo to be the size of the placeholder background, and luckily we can reuse the rectangle from it! In the Layers panel, select the call to action bg layer.
- Choose the Path Selection tool .
- A blue outline of the path should appear. Click on it to select it.
- Choose Edit > Cut. (This removed the layer from the Layers panel.)
-
The plate-on-table layer should be selected, so choose Edit > Paste.
Cool, the photo was automatically masked by pasting a path onto it!
To make the heading and button stand out more on this background, let’s darken the photo. In the Layers panel, double–click in the empty space to the right of the plate-on-table layer.
The Layer Style window should open. On the left side, click on the words Color Overlay so it’s checked on and selected. Click directly on the words. Do not just check the checkbox, or else you won’t see its options on the right.
To the right of the Blend Mode menu click the Color Swatch.
Set the color to black, #
Click OK.
Lower the Opacity to 50%.
Click OK.
Colorizing Icons
- Scroll down so you can see the three social icons at the bottom right of the page.
- We want to change all the social icons to be a single color that matches our design. In the Layers panel, scroll to the bottom and expand the footer folder.
- Inside the social-icons layer group are the three icons. By applying a layer effect to the group, all the items in the group will get it! This makes it easier to change later (one change versus three). Before we add the effect though, open the Swatches panel (Window > Swatches).
- In the Layers panel, double–click in the empty space to the right of the social-icons layer group name.
- Move the Layer Style window so you can see both the icons and the Swatches panel.
- On the left side of the window, click on the words Color Overlay so it’s checked on and selected. Click directly on the words. Do not just check the checkbox, or else you won’t see its options on the right.
- Set Opacity to 100%.
- To the right of the Blend Mode menu click the Color Swatch and do not click OK until we say to!
-
If you did all the previous exercises, in the Swatches panel, you should have a iTastify red swatch at the end of the list. If you have it, click on that red swatch.
If you don’t have that swatch, click on the red background of the Download Now button to sample that red, or just set the color to #e24637
- All the icons should become red. Wow, that’s bright! Let’s try a more subtle gray instead. Near the end of the swatches you may still have a text gray. Click on that if you have it, otherwise set the color to #959595
That’s better. Click OK twice.
Layer Effects
Let’s have some fun with layer effects. We’ll experiment with different looks for the Download Now button just above the footer.
Choose the Move tool
.In the file, Cmd–click (Mac) or CTRL–click (Windows) on the red background of the Download Now button to select it.
In the Layers panel, double–click in the empty space to the right of the Download Button bg layer name.
The Layer Style window should open. Move it so you can see the button. Do not close it until we say so. We’re going to try several different effects.
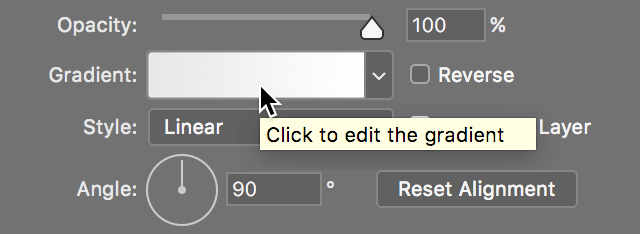
- On the left side of the window, click on the words Gradient Overlay so it’s checked on and selected. Click directly on the words. Do not just check the checkbox, or else you won’t see its options on the right.
- Set Opacity to 100%.
-
As shown below, next to Gradient, click on the gradient swatch to open the Gradient Editor window.
In the Gradient Editor, go into the Reds folder and click on the Red_05 preset (the 5th icon in the row).
- Let’s change the purple to an orange. At the bottom left of the gradient preview, double–click the color stop
 below the purple color.
 - Set the color to #ff7a03
- Click OK twice until you’re back in the Layer Style window.
- Check on Reverse.
- That’s interesting, but let’s try some more effects. On the left side of the window, click on the word Stroke so it’s checked on and selected. Click directly on the word. Do not just check the checkbox, or else you won’t see its options on the right.
- Set Size to 2 px.
- Next to Color click the color swatch.
- Set it to white, #fff
- Click OK once.
- On the left side of the window, click on the words Inner Shadow so it’s checked on and selected. Click directly on the words. Do not just check the checkbox, or else you won’t see its options on the right.
- Set Opacity to 50%.
- Change the Size to 40 px.
In the file drag down on the button to move the shadow down slightly.
Let’s remove the gradient. On the left side of the window, uncheck Gradient Overlay. You should now see the solid red color again.
Click OK.
At the top of the Layers panel, under Opacity you should see Fill. This refers to Fill Opacity, which only affects the fill color and leaves the layer effects unchanged.
Hover over Fill, and drag to the left. Reduce the Fill (opacity) until you get to 0%.
You should still have the stroke and inner shadow, but instead of the red fill color you should be able to see through to the wood grain. That’s a cool effect! It’s probably not as effective for an important call to action because it doesn’t stand out enough, but it was still interesting to see all the effects.
If you want to save the file, go to File > Save As.
Navigate into Desktop > Class Files > yourname-Photoshop for Web Class > iTastify.
Name the file yourname-iTastify Photos Done.psd
Click Save.
Exporting Circular Photos for a Webpage
We plan on adding a background to the testimonials section, so we’ll need a transparent area around the circles. The only file format that supports transparency and enough colors for photos is PNG-24. Photos are better optimized as JPEGs though, so using PNG would produce large file sizes.
The ideal way to code a webpage for circular photos would be to recreate their appearance using CSS. We would take a square photo (saved as a JPEG for the smallest file size) and use CSS rounded corners (called border-radius) to create the circle shape. A stroke, or other effects such as drop shadow, could also be added via CSS. This works in modern browsers, while older browsers would fall back to showing the photo as a square. This technique gives us the most control and keeps file size down.
We would not want to export the images as they appear in the Photoshop file. We instead would want to export square versions cropped to the size we need. In this layout, our circles were 406px wide and tall. Knowing that, we could batch process our images to this size. For more info on how to do that, check out the Batch Processing bonus exercise.
