Discover the intricacies of Photoshop, including the creation and adjustment of masks, in this comprehensive tutorial.
This exercise is excerpted from Noble Desktop’s Adobe Photoshop training materials and is compatible with Photoshop updates through 2023. To learn current skills in Photoshop with hands-on training, check out our Photoshop Bootcamp, Graphic Design Certificate, and graphic design classes in-person and live online.
Topics Covered in This Photoshop Tutorial:
Creating a Mask, Adjusting a Mask by Painting on It
Exercise Preview
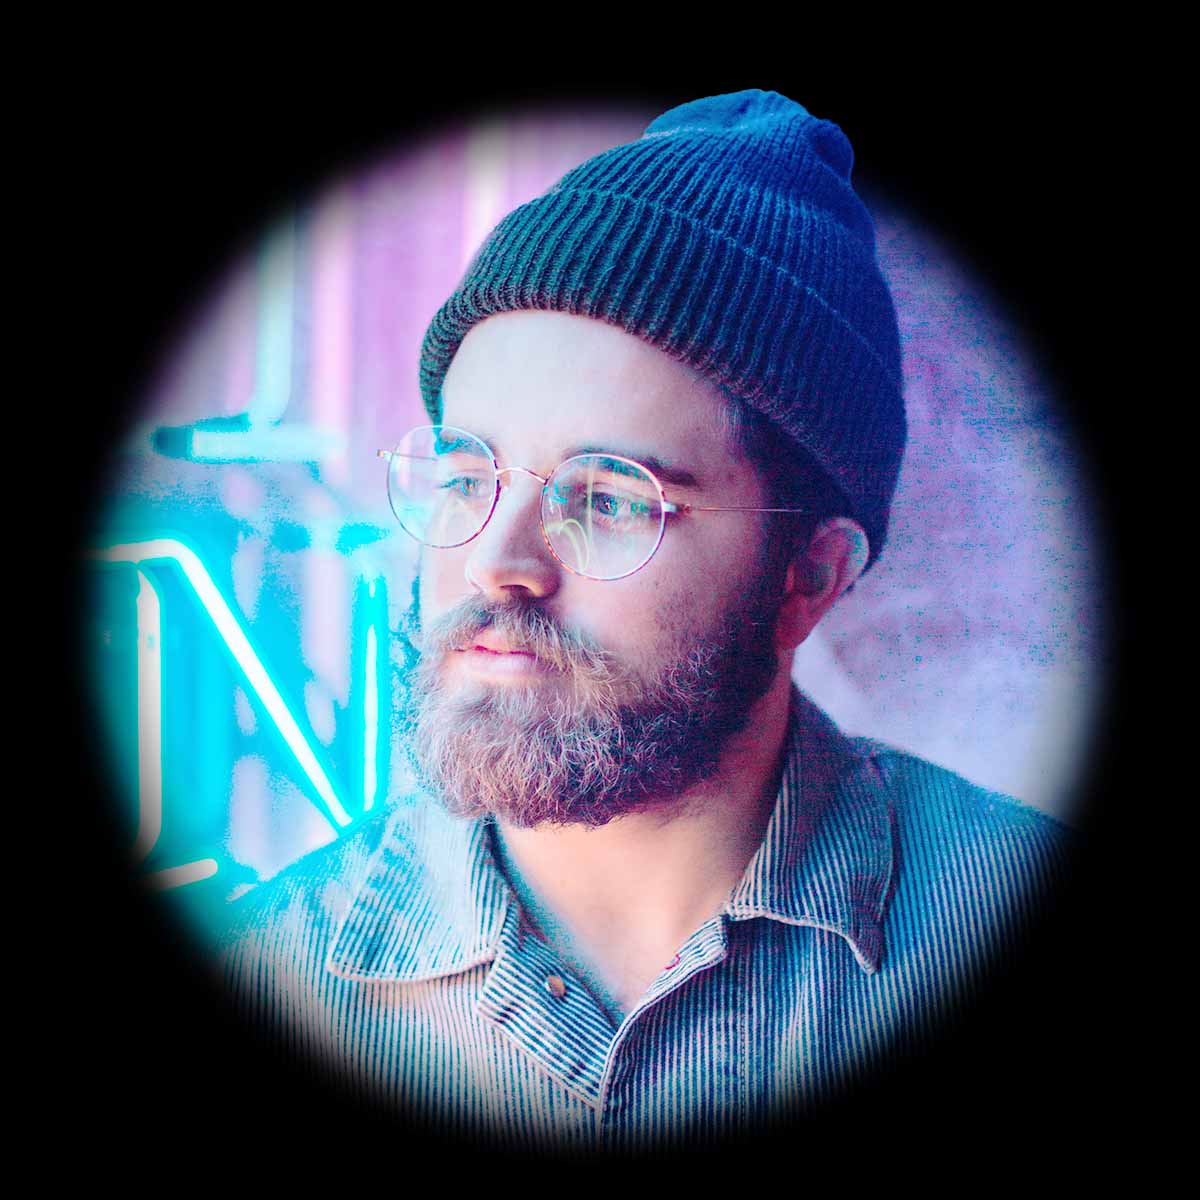
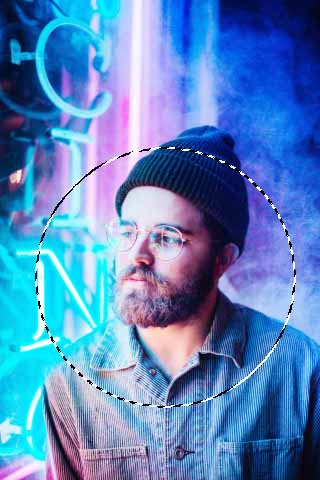
Photo by Lucas Sankey on Unsplash

Exercise Overview
In this exercise you’ll learn how to use masks, which many features in Photoshop rely on. Instead of destructively deleting pixels, masks allow you to hide (or un-hide) pixels for non-destructive editing.
Creating a Mask
- From the Photoshop Class folder, open the 3C Hat guy.jpg file.
- In the Tools panel, click and hold on the Rectangular Marquee tool
 and choose the Elliptical Marquee tool
  .
. - In the image, hold Shift (to make it a perfect circle) and drag a selection circle (marquee) around his head (you’ll be able to move it later so don’t worry about being perfectly sized or positioned).
- In the Layers panel, at the bottom click the Add a mask button
 .
. - Choose the Move tool
 .
. - Drag on the circle to see the circle (and the guy in it) both move around.
-
In order for you to move the circle separately from the guy, as shown below, click the link icon
 to unlink the guy from its layer mask.
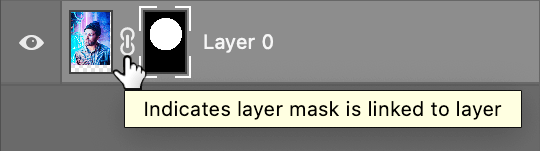
-
Select the layer thumbnail (the left of the 2 icons).
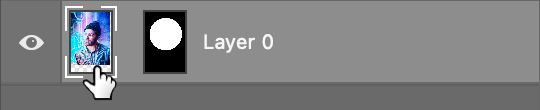
- In the image, drag on the guy to see the photo move inside the circle (the circle should NOT move).
-
Select the mask thumbnail (the right of the 2 icons).
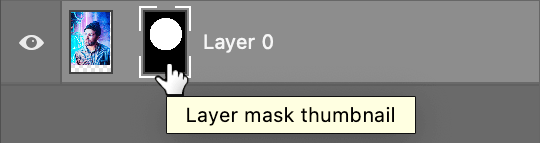
In the image, drag to move the circle (the guy should NOT move).
Adjusting a Mask by Painting on It
- In the Layers panel, make sure the mask thumbnail is still selected.
- In the Tools panel, choose the Brush tool
 .
. -
Let’s set the brush size. In the Options bar at the top of the screen, click on the Brush Preset picker and set the following:
• Size: 500px • Hardness: 0%
-
Near the bottom of the Tools panel, above the foreground and background colors, click the small Default Colors icon
 to set the Foreground color to white and the Background color to black.
TIP: You can also hit D on your keyboard to do the same thing.
- Starting from inside the circle, drag outside the circle to see you start revealing some of the photo that was hidden.
- Hit X to exchange the foreground/background colors, so you’re painting with black.
-
Paint over any of the visible photo to see you’ll now hide it.
Masks: Black, White, and Grays
- Where a layer mask is black, pixels on that layer are completely hidden.
- Where the mask is completely white, pixels on that layer are fully visible.
- Any place where a layer mask is a shade of gray, pixels on that layer are partially hidden (transparent). The darker the gray, the more transparent.
-
Masks are non-destructive, which means they do not remove pixels, they only hide them. To prove this, we can get the entire original image back!
In the Layers panel, drag the mask thumbnail to the Trash button
 at the bottom right of the panel.
- A dialog will likely appear, in which you should click Delete.
Now you should see the entire photo again (although some of it may be outside the document).
NOTE: If you had clicked Apply, Photoshop would have deleted the pixels (a destructive change).
TIP: You can hit Delete (Mac) or Backspace (Windows) when a mask is selected, to delete it without seeing the dialog.
Making the Hat Pop Out of the Circle
- Go into the File menu and choose Revert.
- Choose the Elliptical Marquee tool .
- Hold Shift and drag a circle around his head.
-
To finalize the size and position:
- Choose Select > Transform Selection.
-
Adjust the size with the resize handles (do NOT hold Shift), and drag anywhere inside the selection to position it as shown below (some of his hat should be outside the circle).
To finish the transform selection, hit Return (Mac) or Enter (Windows).
- In the Layers panel, at the bottom click the Add a mask button .
- In the Layers panel, rename the layer to guy
- To create a solid backdrop for the design, we’ll use a fill layer. This is a special kind of layer that is just used to fill an area with a solid color. At the bottom of the Layers panel, click the Create new fill or adjustment layer button
 , and from the menu, choose Solid Color.
 - Choose black and click OK.
-
In the Layers panel:
Drag the fill layer below the guy layer.
Select the guy layer’s mask (the black and white thumbnail which shows a circle).
- If you don’t see the Properties panel (it should be above the Layers panel), open it by choosing Window > Properties.
-
In the Properties panel, drag the Feather slider to the right until the circle’s edge become soft (blurry).
NOTE: This is a non-destructive setting that can be adjusted or removed at any time.
- We’re ready to make the hat pop out of the circle. For that we’ll need a copy of the guy layer. In the Layers panel, select the guy layer.
-
Press Cmd–J (Mac) or CTRL–J (Windows) to duplicate it.
NOTE: This is the same as choosing Layer > New > Layer Via Copy which is like doing a copy and paste all in one quick step.
- Name the new layer from guy copy to hat.
- Select the hat layer’s mask (the black and white thumbnail which shows a circle).
- In the Properties panel, set Feather to 0 (we don’t want the hat edge to be blurry).
- Choose Select > Select and Mask.
-
In the Properties panel the right:
- Next to View click the thumbnail and choose On Black.
- Set Opacity to 100%
-
In the Options bar at the top of the window, click Select Subject.
- If warned about it discarding your current selection, click OK.
-
To see how this will look on top of the existing layer background, next to View click the thumbnail and choose On Layers.
We’re only concerned with the hat part that protrudes outside the circle. It’s a bit of a hard edge, so adjust it as follows. On the right, set:
- Feather: 3px
- Shift Edge: +20%
Click OK.
- In the Tools panel, click and hold on the Elliptical Marquee tool and choose the Rectangular Marquee tool .
-
We don’t want the guy to stick out the bottom of the circle, so select the bottom part of the guy as shown below:
- Near the bottom of the Tools panel, click the Default Colors icon so your background color is black or hit D on your keyboard.
- In the Layers panel, select the hat layer’s mask thumbnail.
- Hit Delete (Mac) or Backspace (Windows) to fill the selected area of the mask with black, which hides the guy.
-
Press Cmd–D (Mac) or CTRL–D (Windows) to deselect.
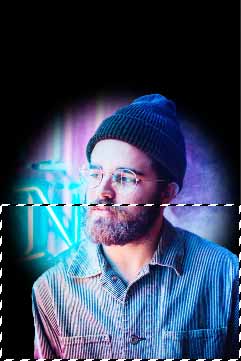
- The image is looking nice!
- Even though we like this, let’s see how it would look with the circle being a hard edge again instead of feathered (soft).
- In the Layers panel, select the guy layer’s mask thumbnail.
In Properties panel, reduce the Feather amount to see that this remains editable at any point!
Optional Bonus: Cropping the Image
- Choose the Crop tool
 .
. - Hold Shift and draw a crop area that’s a perfect square. Don’t worry about being perfect with the position or size yet.
-
Once you release, adjust the crop area as follows:
- Drag inside the crop area to move it:
- Hold Shift when using the handles to adjust the size (to keep it a perfect square.)
- You can go outside the original document size to add space (the area will look transparent during the crop, but will become filled with black one you accept the crop).
When you’re satisfied with the size and position, hit Return (Mac) or Enter (Windows) to apply it.
