Discover the power of editing RAW files in Photoshop, with this detailed tutorial covering everything from opening RAW files to making lens-specific corrections and workflow adjustments.
This exercise is excerpted from Noble Desktop’s past Photoshop training materials and is compatible with Photoshop updates through 2020. To learn current skills in Photoshop, check out our Photoshop Bootcamp and graphic design classes in NYC and live online.
Topics Covered in This Photoshop Tutorial:
Opening & Editing RAW Files
Exercise Preview
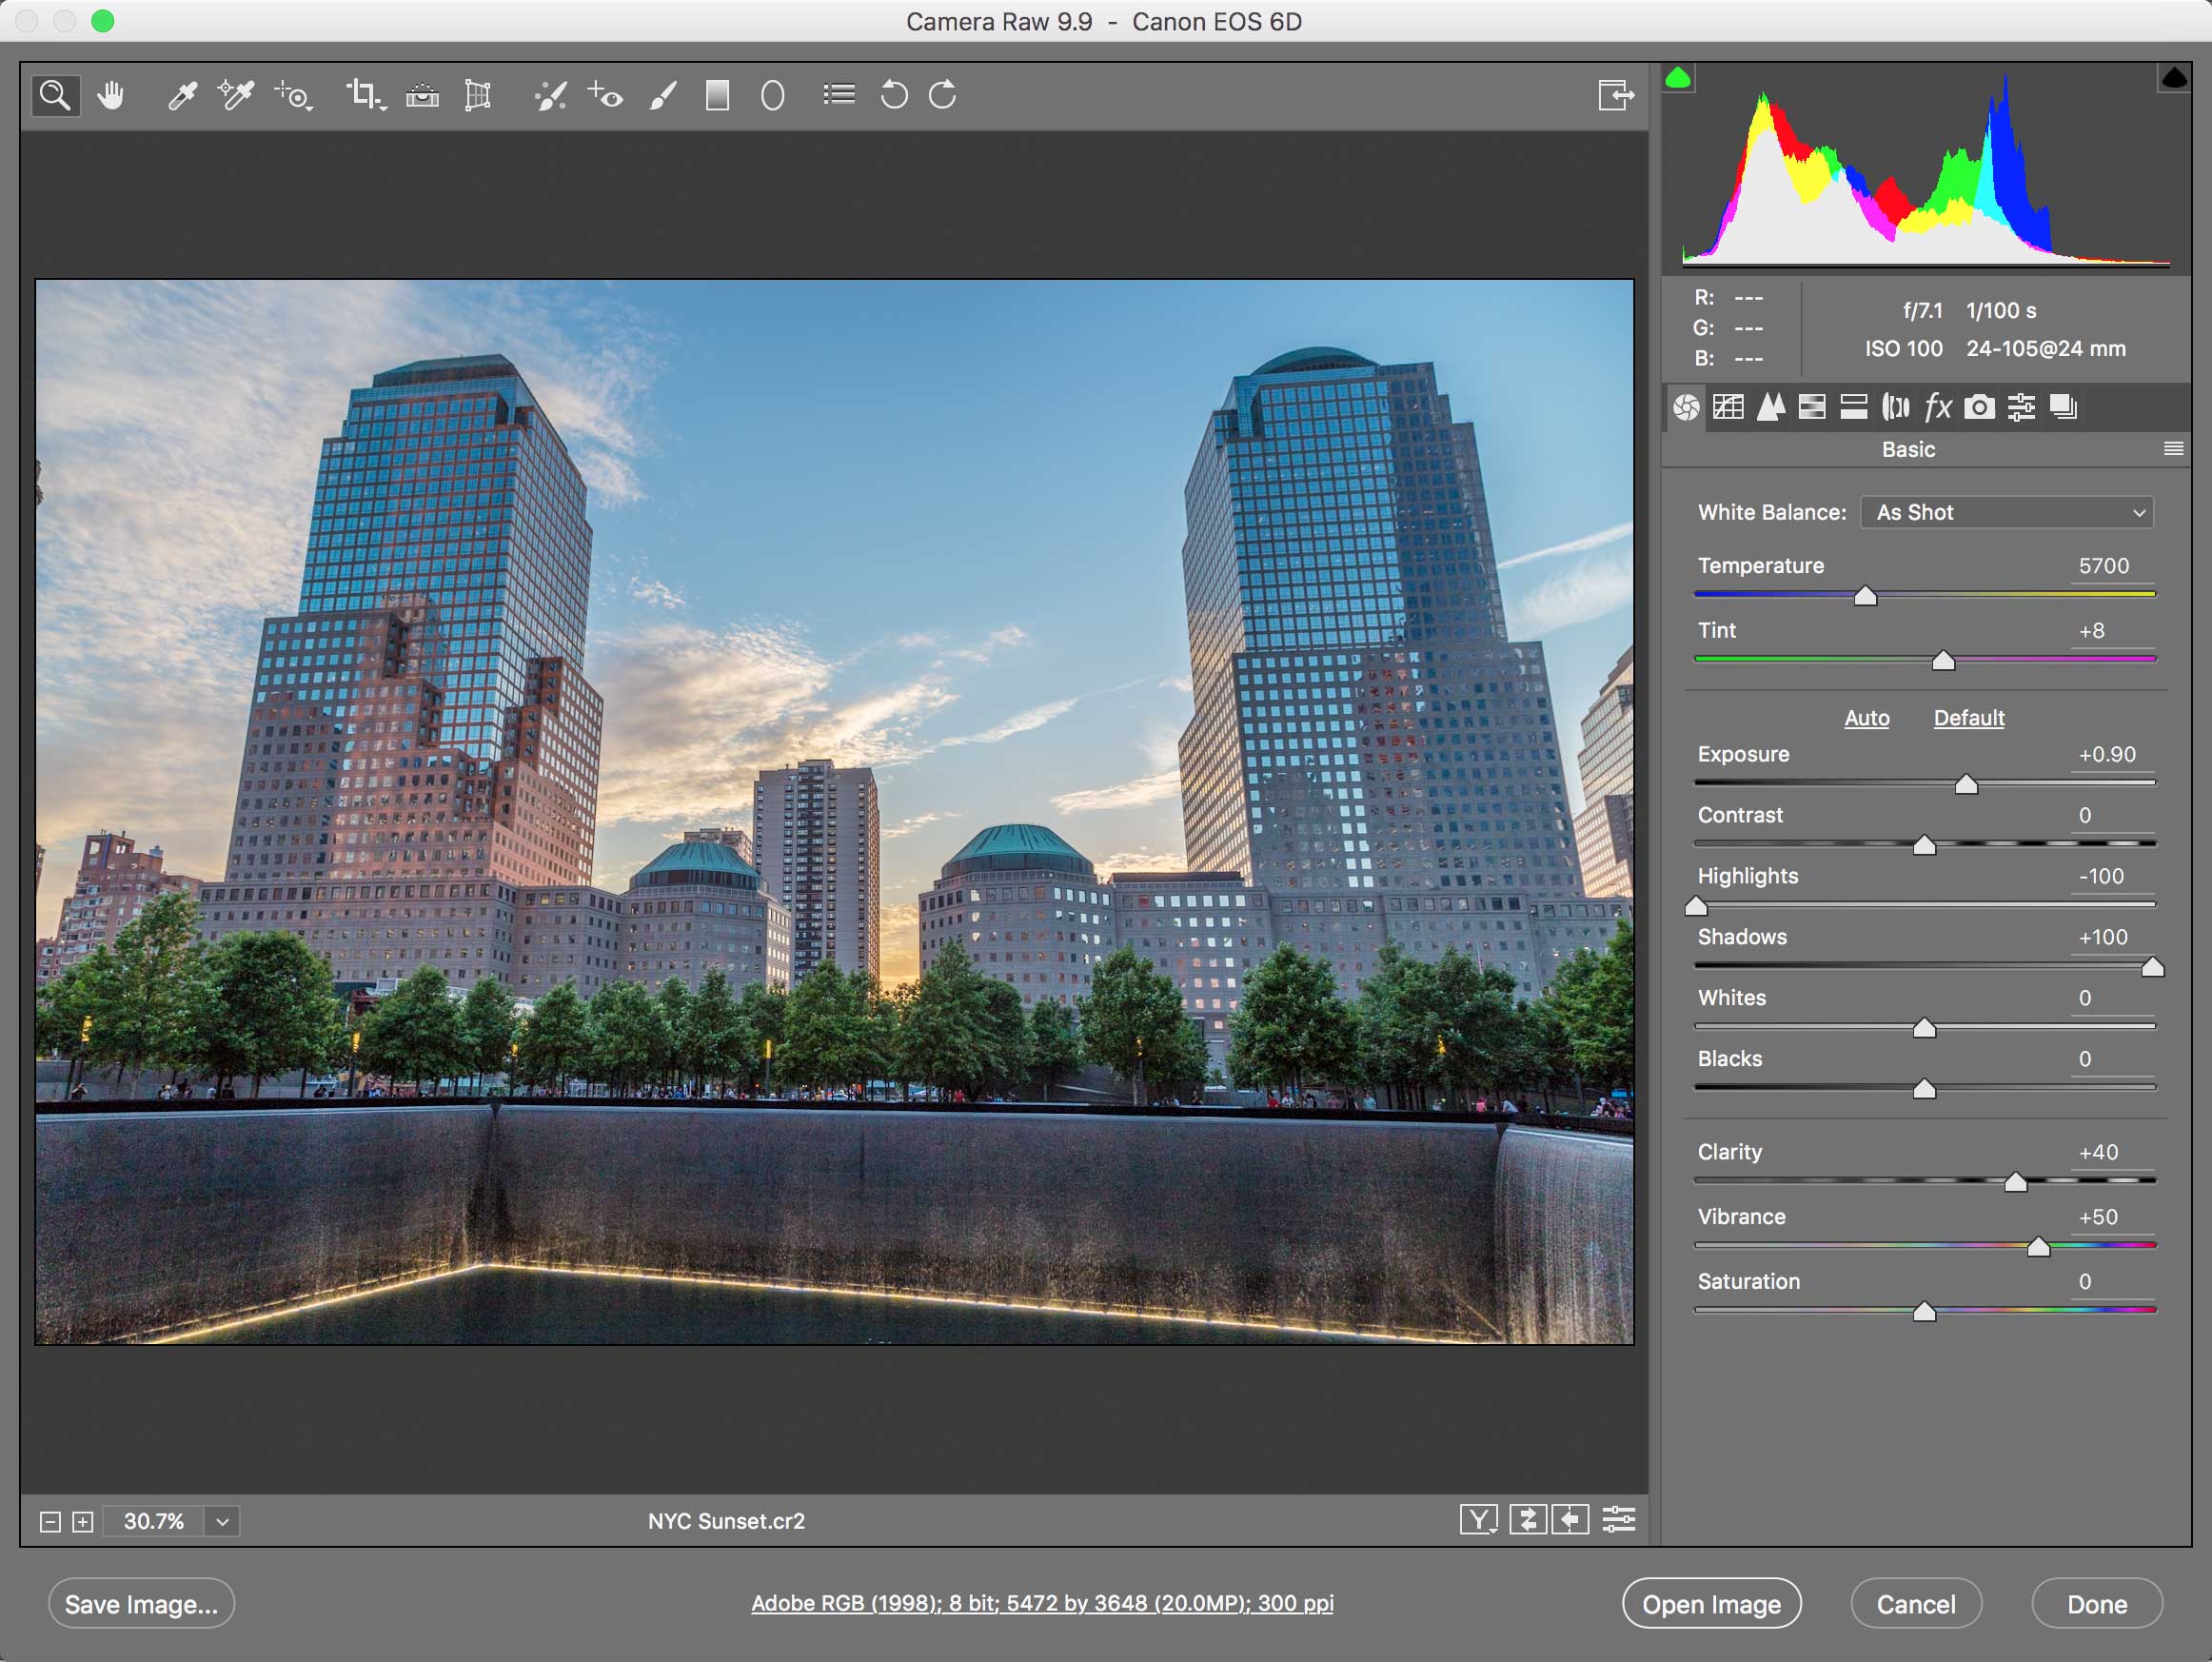
Photo Copyright © Dan Rodney, danrodney.com

Exercise Overview
Higher end digital cameras can save photos as either JPEG or RAW files. RAW files contain the raw data from the camera’s sensor, and therefore produce higher quality images. JPEGs lose some of the information that is retained in a RAW file. If you want the best quality, set your camera to save images as RAW.
RAW files are merely raw data, so they need to be processed into an image. Photoshop contains something called Adobe Camera Raw which processes RAW files. Let’s see how to use it.
Opening a RAW File
In Photoshop go to File > Open.
-
Double–click NYC Sunset.cr2 to open it.
Because this is a RAW file, Photoshop automatically opens the Adobe Camera Raw dialog. Making tweaks here will often yield better results (than making these changes later) because you’re working with the original imaging data.
NOTE: Different camera makers use different file extensions for their RAW files (such as .cr2 for Canon or .nef for Nikon).
Editing a RAW File
-
At first glance you may think this image can’t be saved because it’s too dark. But digital cameras retain more information in shadows than in highlights. It’s best to expose for the highlights and let shadows be dark. You can pull detail out of shadows better than you can recover detail from a blown out highlight.
In the settings on the right, start by dragging the Shadows slider to the right. Notice the dark areas get brighter. End up with Shadows set to 100.
The image could still be brighter, so let’s adjust the exposure (which is an overall brightness). Set Exposure to 0.90.
-
That’s better, but the highlights in the sky could stand to be a bit darker. Drag the Highlights slider to the left, and notice the highlights get darker.
End up with Highlights set to –100.
NOTE: Keep in mind this image was taken as the sun was setting, so it’s not meant to be too bright.
-
The colors are a bit dull. Boost them by setting Vibrance to 50.
NOTE: What’s the difference between Vibrance and Saturation? They both adjust color saturation, but in slightly different ways. Vibrance is a bit more subtle and can be more natural. Sometimes Saturation can oversaturate colors in an unrealistic way. But feel free to compare them and see which one you like better. It really depends on the particular image and type of subject.
-
Camera Raw has a great adjustment called Clarity. It adds contrast, but localized around specific details. It can really add punch to an image when used properly (don’t overdo it). Let’s try it out.
As you watch the image, drag the Clarity slider to the right. We think a Clarity setting around 40 looks nice.
-
Let’s compare the before and after:
Press the P key to see the original image (turning off the preview).
Press P again to see the final image with our changes. Wow, what a difference!
Camera & Lens Specific Corrections
- This image was shot at 24mm. Lens distortion is common at this focal length, but Camera Raw can compensate for that! Above all the settings on the right is a row of tabs. Each tab contains different settings. Click the Lens Corrections tab
 .
. - Below that, make sure you’re in the Profile tab.
- Check on Enable Profile Corrections and notice the distortion is removed. How did Camera Raw know how to do that? Notice under Lens Profile it lists the specific camera and lens used for this photo. Camera Raw contains a large database of popular cameras and lenses so it knows how to counteract the right amount of lens distortion for each. The camera wrote this information into the RAW file. Adobe Camera RAW reads that info and refers to its database so it knows what to do. Cool!
- On the far right side of the photo, there’s part of a building that’s mostly cut off. If you’re not already in the Zoom tool
 , at the top of the window, choose the Zoom tool .
 - Click on that building a few times to zoom in. Around 300% is a good zoom level (you can see this at the bottom left of the window).
- The edges of the buildings have pronounced green and magenta coloring. These are called chromatic aberrations. Depending on the camera and lens combination, these aberrations may be extreme, or so subtle you may not even notice them. Once again Camera Raw can help us.
- Check on Remove Chromatic Aberration and notice the green and magenta are mostly gone from the edges. Much better.
Camera Raw Workflow Options
There’s a lot more Camera Raw can do, but let’s call this image done. Before continuing though, let’s check the workflow options. At the bottom of the window click on the link that should say something like Adobe RGB (1998); 8-bit; 5472 × 3648 (20MP); 300ppi.
-
In the dialog that opens, you’ll want to set the following according to what you plan to do with the image:
-
Print:
Color Space: Adobe RGB
Resolution: 300 pixels/inch -
Web:
Color Space: sRGB
Resolution: 72 pixels/inch
-
Print:
Click OK.
-
To finish you can do one of the following:
If you want to continue working on this picture in Photoshop, making additional changes, click Open Image to open it in Photoshop.
If you just want to save the changes, but not open the file in Photoshop, click Done.
Regardless of which you choose, your Camera Raw edits are saved into a metadata file (called yourfilename.xmp) alongside the original RAW file (yourfilename.cr2). If you open the RAW file later, your changes will still be there. When browsing files on your computer, you will be able to see the.xmp file. If you didn’t know what it’s for you may be tempted to trash the file, but don’t! That’s where your edits are stored.
Camera Raw & Non-Destructive Changes
All work in Camera Raw is non-destructive, so any change you make cannot hurt the original image! Photoshop keeps the changes in the.xmp metadata file (instead of changing the actual pixel data). Repetitive editing in Camera Raw will not degrade the quality of the image or toss out any information, so play around with any setting and experiment as much as you like!
If at any point you don’t like the changes you have made in Camera Raw, you can revert an image back to the default settings. In the Camera Raw dialog, on the right side of the tabbed settings area, go to the panel menu  and choose Reset Camera Raw Defaults. That’s the nice thing about non-destructive editing—you can always revert!
