Our Lightroom tutorial provides a detailed guide on flagging and rating photos, allowing users to efficiently organize their work with the use of flags, filters and star ratings.
This exercise is excerpted from Noble Desktop’s past Lightroom training materials and is compatible with Lightroom updates through 2020. To learn current skills in Lightroom, check out our Photo Retouching Certificate and graphic design classes in NYC and live online.
Topics covered in this Lightroom tutorial:
Flagging & rejecting photos, Rating photos, Filtering flagged & rated photos
Exercise Preview

Exercise Overview
In this exercise, you’ll learn more about how to flag photos as picks or rejects, as well as how to assign star ratings to photographs.
Flagging Photos
If you have not completed the previous exercises (1A–1F), finish them now before beginning this exercise.
Make sure you’re in the Library module.
In the Folders panel on the left, select the Wyoming subfolder.
Click on the first photo, the motel (20110820_YourName_10).
Press E to switch into Loupe View.
Press L to dim the lights.
Press L again to completely fade the lights out.
You’re going to pick around five photos and flag them. Press the Right Arrow key to navigate through the photos.
Press P to pick photos to flag. Press P on approximately 5 photos.
To undo flagging, press U on a photo you flagged.
Press X to reject a couple of photos you don’t like.
When you’re done, press L once more to return to Lightroom.
Press G to re-enter Grid View.
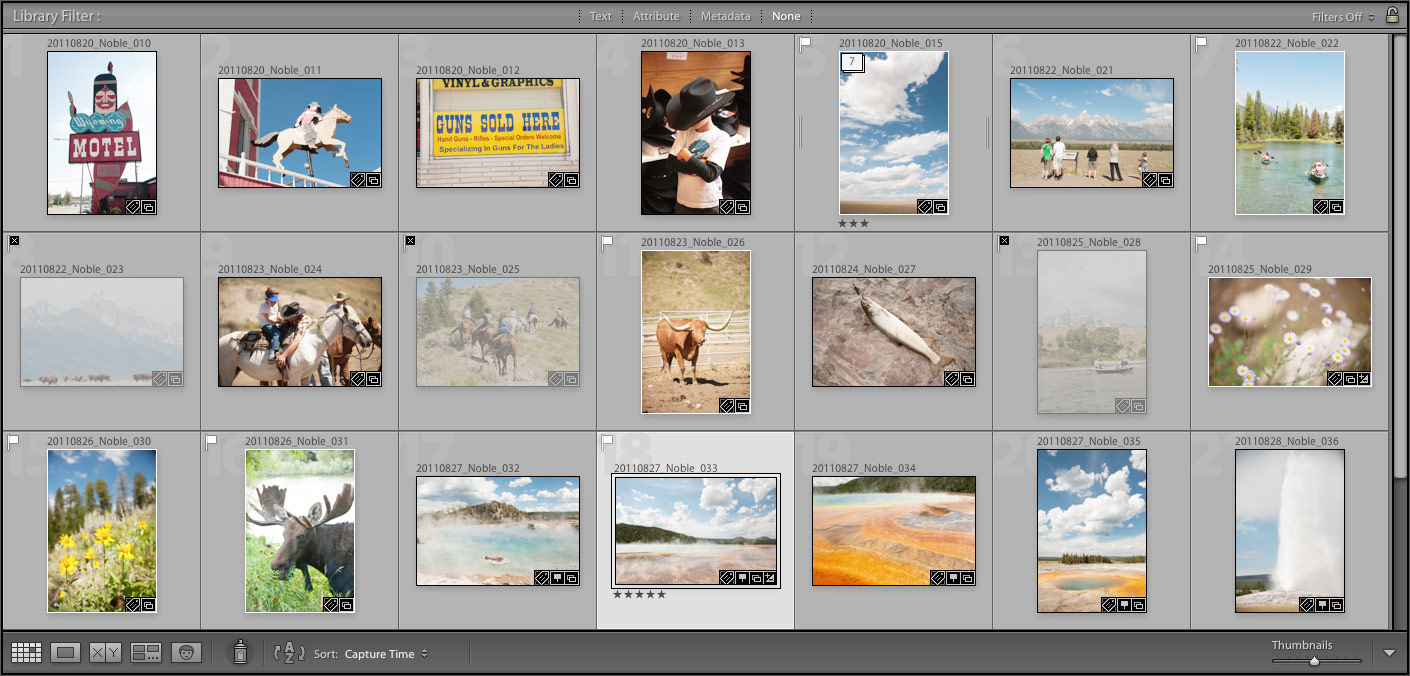
Notice the flagged photos have white flag icons in the top-left corners, while rejected photos have black flags with an x and are grayed out.
Flags & Filters
At the bottom right of the screen, from the menu above the Filmstrip panel that currently says Filters Off, select Flagged.
This pulls up only the photos you flagged earlier. Click on the first photo.
Directly below the first photo’s thumbnail, click on the third dot to give this photo a 3-star rating.
Click on the photo you like most.
Click on the fifth dot below that photo’s thumbnail to give it a 5-star rating.
-
At the top of the screen, in the Library Filter panel, click on the third star.
This filters only the photos with a 3-star or higher rating.
Next to Rating, click on the greater than or equal to ≥ icon and select Rating is equal to. Now only the photo you assigned exactly three stars to is displayed.
At the top of the screen, in the Library Filter panel, click on None.
At the bottom right of the screen, from the menu that says Flagged, select Filters Off (this may have occurred automatically by clicking None in the previous step).
On the left, in the Folders panel, select the Wyoming subfolder if it’s not already selected. Notice how the star ratings appear underneath the photos you rated.
