Enhance your photography organization and editing skills with this detailed tutorial on using Lightroom. With a focus on creating subfolders and locating lost images, this tutorial can be a catalyst to progressing your career in photography or digital media.
Key Insights:
- This tutorial guides you through the process of creating subfolders in Lightroom, a crucial skill in efficient photo organization.
- It provides specific steps to locate a photo within the program that has been moved or lost, further enhancing the user's ability to manage their images effectively.
- The tutorial offers an exercise that integrates these skills, allowing learners to apply the knowledge in a practical scenario.
- It emphasizes the importance of properly organizing images in a professional context, as mismanagement can lead to lost files and wasted time.
- This tutorial is a resource for individuals interested in photography, digital media, or any careers that involve extensive use of imagery and digital files.
- Noble Desktop provides this comprehensive tutorial as a part of its commitment to offering quality, relevant, and accessible training resources for aspiring professionals in the tech and creative fields.
Our comprehensive Lightroom tutorial guide will assist you in mastering the art of creating subfolders and locating lost images effectively, ensuring an organized and efficient workflow.
This exercise is excerpted from Noble Desktop’s past Lightroom training materials and is compatible with Lightroom updates through 2020. To learn current skills in Lightroom, check out our Photo Retouching Certificate and graphic design classes in NYC and live online.
Topics Covered in This Lightroom Tutorial:
Creating Subfolders, Locating Lost Images
Exercise Preview

Exercise Overview
In this exercise, you will learn how to add subfolders to folders in the Catalog. You’ll also find out how to locate a photo that has been moved or lost.
Creating Subfolders
If you have not completed the previous exercises (1A–1C), do them before proceeding with this exercise.
Make sure you’re in the Library module.
We’ll use the Folders panel located in the left side panel to create our subfolders. Expand the Folders panel if it is not already open.
In the Folders panel, select the Library folder.
Click on the first lighthouse image (20090503_YourName_001).
Shift–click on the field image (20090503_YourName_009) to select that group of photos.
In the Folders panel, click Create New Folder
 and choose Add Subfolder.
Name the folder England.
Make sure the Include selected photos box is checked.
Click Create.
Select the motel sign photo (20110820_YourName_010).
Shift–click on the last image of the elk (20110901_YourName_040).
At the top right of the Folders panel, click the Create New Folder button
 and from the menu choose Add Subfolder.
Name the folder Wyoming.
Make sure the Include selected photos box is still checked.
Click Create.
In the Folders panel, expand the Library folder. The folders you just created are subfolders in the Library.
Click on the Wyoming folder.
If all the photos are still selected, go to Edit > Select None.
CTRL–click (Mac) or Right–click (Windows) on the thumbnail of the first image, the motel sign photo (20110820_YourName_010).
Click on Show in Finder (Mac) or Show in Explorer (Windows).
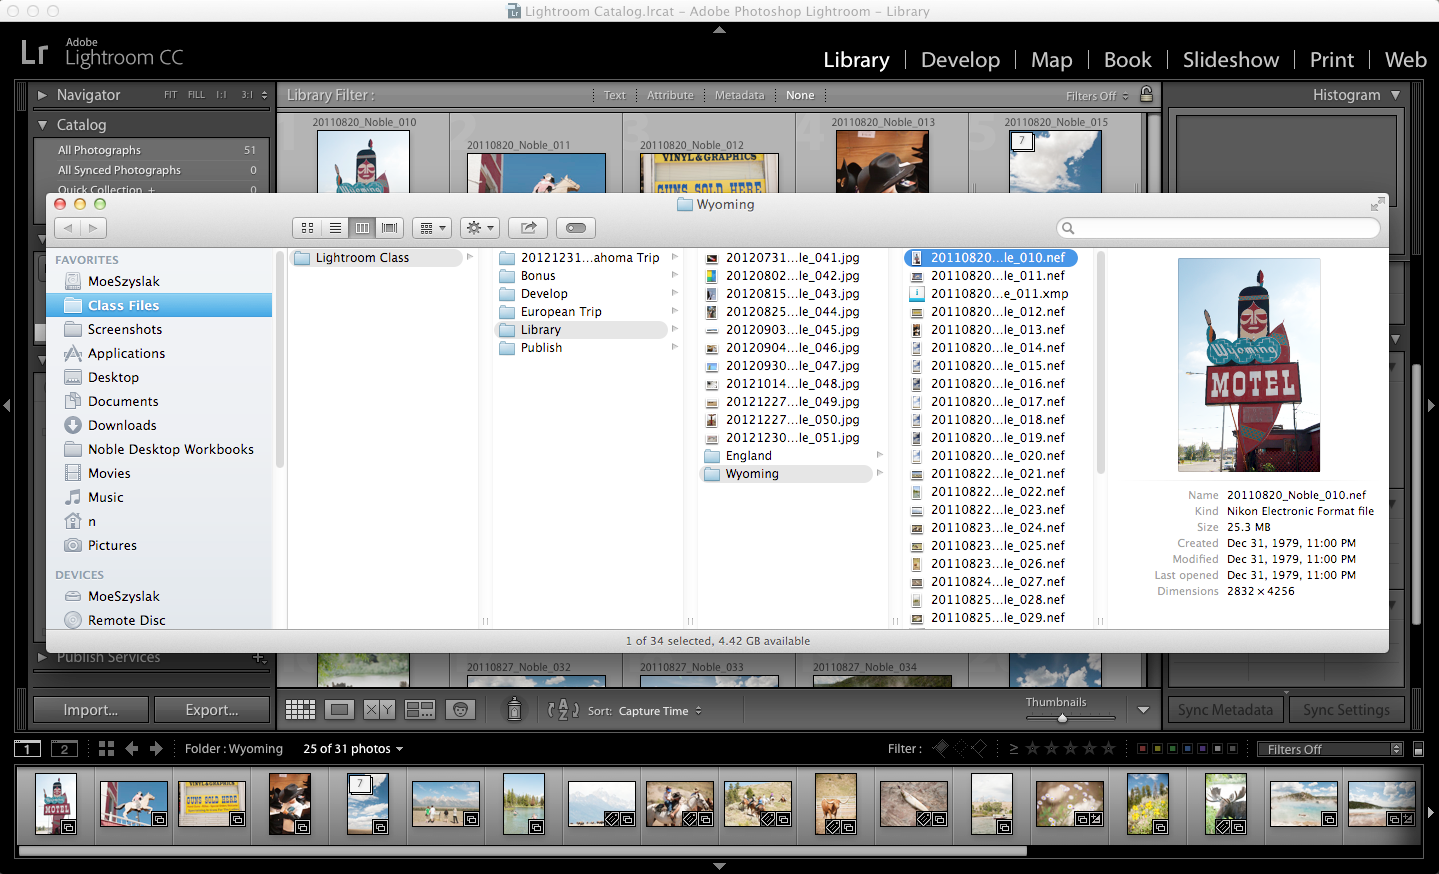
The image will open in a Finder (Mac) or Explorer (Windows) window.
Notice that the image is in a folder named Wyoming.
Navigate one level up to the Library folder (Desktop > Class Files > Lightroom Class > Library).
Notice that the two subfolders you created in Lightroom were created in the Library folder on your hard drive.
Locating Lost Images
In the Finder (Mac) or Explorer (Windows) window, go into the Wyoming folder. Select the first file in the folder (20110820_YourName_10).
Move the file out of the Wyoming folder and into the Library folder.
Switch back to Lightroom.
-
Find the thumbnail for the first Wyoming image, the motel photo.
Notice it has a exclamation point (!) in its upper right corner. This indicates that Lightroom cannot locate this image.
Click on the exclamation point (!).
Click Locate.
Navigate to the Library folder (Desktop > Class Files > Lightroom Class > Library).
Double–click the picture of the motel sign 20110820_YourName_010.
The file will reconnect, but notice it disappeared. That’s because we are only looking at the images in the Wyoming folder. Because we moved it out of the Wyoming folder it is no longer being shown. Let’s put it back in here where it belongs.
In the Folders panel, click on Library.
Find the motel photo (20110820_YourName_010).
Click on the thumbnail and drag it into the Wyoming folder in the Folders panel. (Make sure you are dragging it into the Wyoming folder and not the collection in the Collections panel.)
If a Moving a File on Disk message appears, click Move.
In the Folders panel, click on the Wyoming folder and notice that the motel image is once again in this folder. Sweet!


