Improve your understanding of JavaScript and jQuery by learning how to handle cookies, code cookies, clear cookies, update cookies, and submit cookie information with a form in our detailed tutorial, while also gaining insight into tracking visitor information and solving browser-related issues.
This exercise is excerpted from Noble Desktop’s past JavaScript training materials. Noble Desktop now teaches JavaScript and the MERN Stack in our Full Stack Development Certificate. To learn current skills in web development, check out our coding bootcamps in NYC and live online.
Topics Covered in This JavaScript & JQuery Tutorial:
Using a JavaScript API for Handling Cookies, Coding Cookies, Clearing Cookies, Updating a Cookie: Incrementing the Number of Visits, Submitting the Cookie Info with the Form
Exercise Preview
Exercise Overview
Every website should use analytics to track information about their visitors. That anonymous info is useful, but you can take things a step further if you combine forms with JavaScript—to find users’ information such as their landing page, how many times they’ve visited, where they came from, etc.—and store it in a cookie. When that user submits a form, their info is sent along (invisibly to them), offering you more insight into your customers.

Previewing Issues to Keep in Mind
Many browsers do not handle cookies consistently when working with local files. They all support cookies on a live site, and all the techniques shown will work fine on a live site. For security and other reasons, cookies at the local level do not always work as expected. Here are some problems we’ve discovered:
- Older versions of Safari on the Mac sometimes had issues when a parent folder has a space in the name.
- Google Chrome and Microsoft Edge do not display local cookies at all.
For the above reasons, we will do all previewing in this exercise with Firefox.
Setting Firefox Preferences
Let’s make sure Firefox is set up to accept cookies. It is by default, but you or someone else on your computer may have changed the preferences and we want to ensure it works properly for this exercise.
Launch Firefox.
Windows users only: Hit ALT to display the menu at the top of the screen.
Go to Firefox > Preferences (Mac) or Tools > Options (Windows).
On the left, click on Privacy & Security.
Under History, next to Firefox will choose Remember history.
Close the window or tab.
Initial Setup Before Moving on
If you are doing this exercise in a classroom (or are doing it for a second time), you must complete the following steps before moving on. If you are doing this exercise at home/work for the first time, you can skip this section.
- Launch Firefox.
- Hit Cmd–O (Mac) or CTRL–O (Windows) to open a file.
- Navigate to Desktop > Class Files > yourname‑JavaScript jQuery Class and open the Tracking‑Visitors-With-Cookies folder.
- Double–click set-up.html to open it.
- Click the Clear Cookies button and then click OK. You are done! This has cleared the cookies so you will not be confused by old leftover cookies.
Previewing in Firefox
In Firefox, hit Cmd–O (Mac) or CTRL–O (Windows) to open a file.
Navigate to Desktop > Class Files > yourname-JavaScript jQuery Class > Tracking-Visitors-With-Cookies. Find enews.html and hit Open.
This is the page where we’ll set some cookies to track user info. Keep this page open in your browser as you work, so you can reload the page to see the changes you make in your code.
Using a JavaScript API for Handling Cookies
A cookie is a small piece of data that is stored in your browser. Cookies are the easiest way to maintain basic user info and are very versatile—they can perform functions such as tracking your visits to websites, enabling you to log in to sites, and storing your shopping cart. Cookies contain the following information:
- A key-value pair containing the actual data
- An expiry date after which it is no longer valid
- The domain and path of the server it should be sent to
Open your code editor if it isn’t already open.
Close any files you may have open.
-
For this exercise we’ll be working with the Tracking-Visitors-With-Cookies folder located in Desktop > Class Files > yourname-JavaScript jQuery Class. You may want to open that folder in your code editor if it allows you to.
We’ll use js.cookie.js, a simple, lightweight JavaScript API (application programming interface) for reading, writing, and deleting cookies developed by Klaus Hartl and Fagner Brack. You can download it and get the documentation from GitHub.com/js-cookie/js-cookie
NOTE: This API has no dependencies on other JavaScript libraries, so we’ll keep our setup as lean as possible by using standard JavaScript instead of loading jQuery.
The first order of business is to link to this script. In your code editor, open enews.html from the Tracking-Visitors-With-Cookies folder.
-
Above the link to main.js (around line 44), add the following bold code:
<script src="js/vendor/js.cookie.js"></script>
<script src="js/main.js"></script>
Save the file.
Open main.js from the js folder in the Tracking-Visitors-With-Cookies folder.
-
We want to track how many times a user came to our site before signing up for the newsletter. Create a cookie to store the number of visits by adding this bold code:
window.onload = function() {
   Cookies.set( 'visits', 1, {expires:,000} );
};
NOTE: Cookies.set() is a method defined in js.cookie.js. This line of code creates a cookie named visits. We’ve set it to a value of 1 because it’s their first visit. The cookie will expire in ,000 days. We’d like to store this cookie for a very long time. If you do not specify the optional expiration time, the cookies will expire when the user quits the browser.
-
Next we’ll create a cookie that saves the page they first enter on. JavaScript can look at the current page’s href (URL) and save it into a cookie. Add the bold code below:
Cookies.set( 'visits', 1, {expires:,000} ); Cookies.set( 'entryPage', document.location.href, {expires:,000} ); }); -
Now we’ll create a cookie that saves the date and time of their first visit. For that, we’ll use JavaScript’s built-in Date() object. Add this bold code:
Cookies.set( 'visits', 1, {expires:,000} );
Cookies.set( 'entryPage', document.location.href, {expires:,000} );
Cookies.set( 'entryDateTime', Date(), {expires:,000} );
NOTE: The time will be in 24-hour (military) time with the time zone. The Date() object can be reformatted to AM/PM, etc., but the default formatting will suit our needs just fine.
-
Lastly we want to find out the webpage that sent them to the site. JavaScript can get the referring page’s href (URL) and save it into a cookie. Add this bold code:
Cookies.set( 'visits', 1, {expires:,000} );
Cookies.set( 'entryPage', document.location.href, {expires:,000} );
Cookies.set( 'entryDateTime', Date(), {expires:,000} );
Cookies.set( 'cameFrom', document.referrer, {expires:,000} );
NOTE: document.referrer is the URL of the page the user came from. This will be blank if they directly typed in the URL for the page/site.
Save the file.
Reload enews.html in Firefox. As we mentioned earlier in this exercise, other browsers may have problems with local cookies, so be sure to use Firefox.
In Firefox, don’t fill out the form, just click Sign Me Up! to submit it.
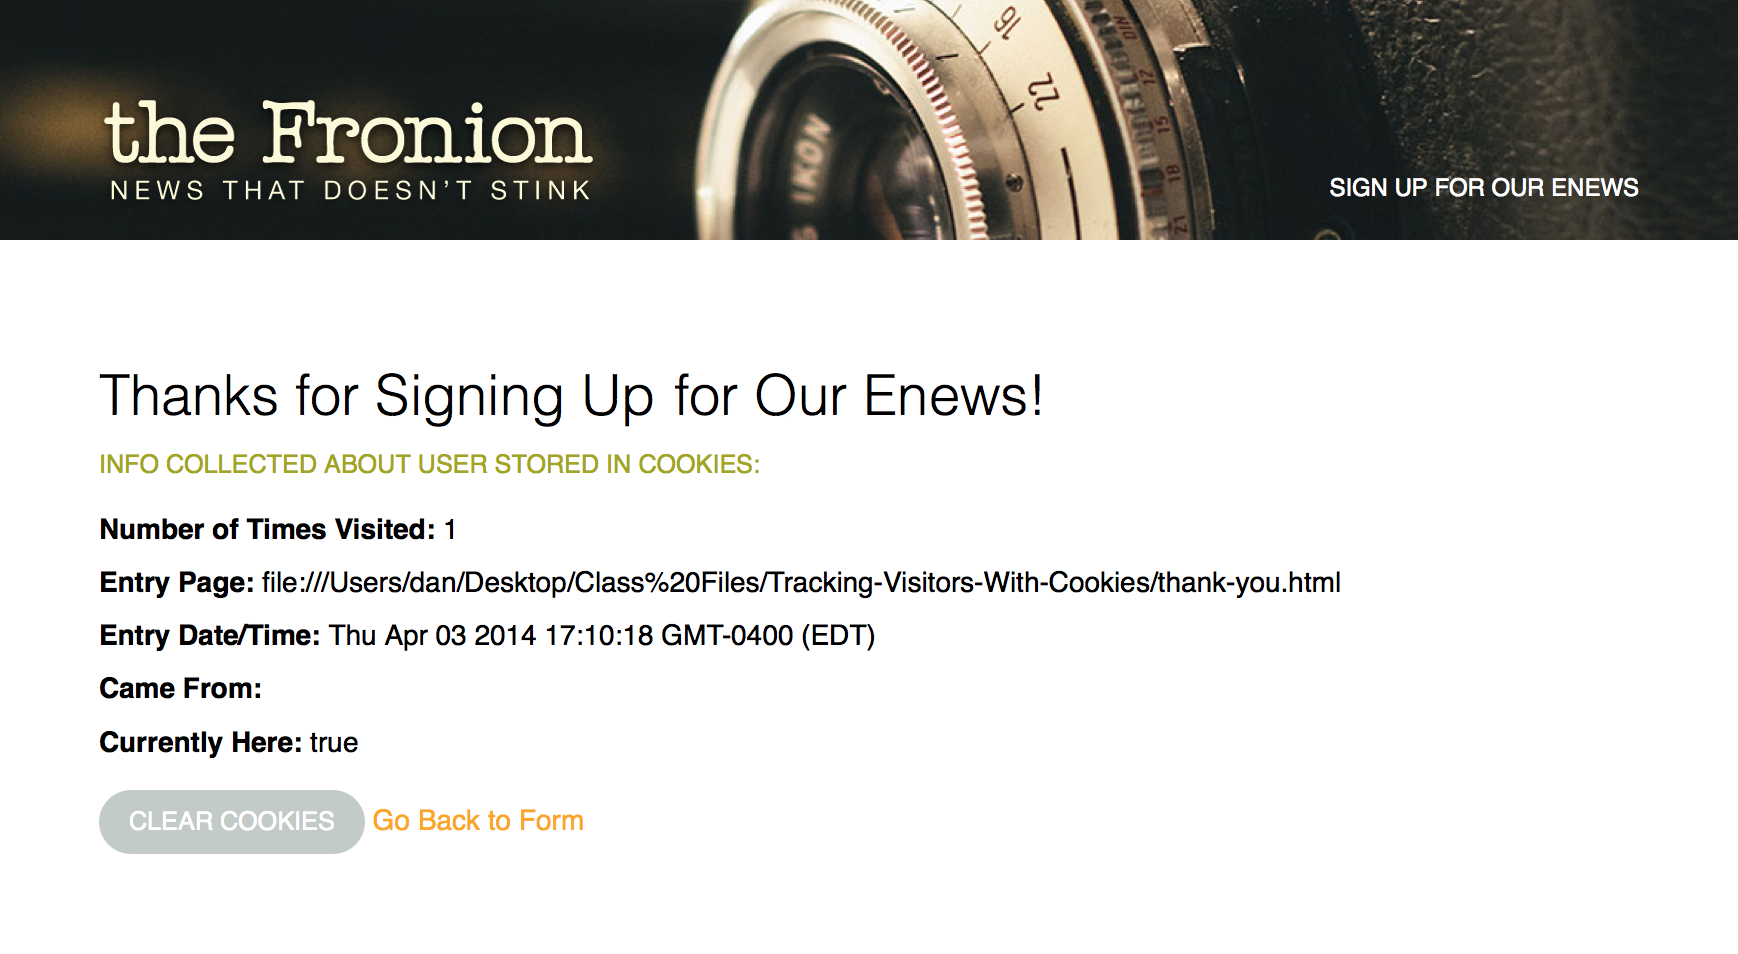
- On the Thanks for Signing Up page that appears, check out the values for:
- Number of Times Visited
- Entry Page
- Entry Date/Time
NOTE: Came From will be blank because we are testing locally. You’ll have to trust us that it works. We will make the Currently Here cookie work later.
Find the time part of Entry Date/Time and make a note of the time.
Click the Go Back to Form link (to the right of the Clear Cookies button).
Click Sign Me Up! to submit the form again.
Notice that the time changes. Currently, all these cookies are being set every time the user visits the page, but they should only be set on their first visit. Let’s fix this.
Switch back to main.js in your code editor.
-
We need to check to see if the visits cookie has been created yet. We can use Cookies.get() to do so. If it hasn’t, then it is a user’s first visit and we should create the cookies. Otherwise, nothing should happen. Add the following bold code:
window.onload = function() {
   var v = Cookies.get('visits');
   if ( v == undefined ) {
      Cookies.set( 'visits', 1, {expires:,000} );
      Cookies.set( 'entryPage', document.location.href, {expires:,000} );
      Cookies.set( 'entryDateTime', Date(), {expires:,000} );
      Cookies.set( 'cameFrom', document.referrer, {expires:,000} );
   }
};
NOTE: We’re using v as a variable name because it’s short for visits. We already have a visits cookie, so we didn’t want to use that as a variable name again.
Save the file.
Switch to Firefox and reload enews.html.
-
Click Sign Me Up! to submit the form.
Notice that the entry time is still an older time from when you previewed earlier. Hmm. We need to reset our cookies to see if the code we wrote is working.
Clearing Cookies
Switch back to your code editor.
Open thank-you.html from the Tracking-Visitors-With-Cookies folder.
-
Let’s write some code that will clear out our cookies when we click the Clear Cookies button that’s on this page. Around line 66, add the following bold code to watch for when our button is clicked:
// Clear Cookies document.getElementById('clearCookies').onclick = function() { }; }; </script> -
Next, add the following bold code to clear out our cookies:
// Clear Cookies document.getElementById('clearCookies').onclick = function() { Cookies.remove('visits'); Cookies.remove('entryPage'); Cookies.remove('entryDateTime'); Cookies.remove('cameFrom'); Cookies.remove('currentlyHere'); }; -
To make sure our code works, let’s get the value of our cookies and write them to the Console so we can see that they’ve been cleared. Add the following bold code:
document.getElementById('clearCookies').onclick = function() {
   Cookies.remove('visits');
   Cookies.remove('entryPage');
   Cookies.remove('entryDateTime');
   Cookies.remove('cameFrom');
   Cookies.remove('currentlyHere');

   console.log(
      Cookies.get('visits'),
      Cookies.get('entryPage'),
      Cookies.get('entryDateTime'),
      Cookies.get('cameFrom'),
      Cookies.get('currentlyHere')
   );
};
Save the file.
Switch to Firefox and reload enews.html.
Click Sign Me Up! to submit the form.
Before we clear the cookies, let’s open up the Console to make sure it works. CTRL–click (Mac) or Right–click (Windows) on the page and select Inspect Element to bring up the Web Developer Tools.
Click the Console tab at the top of the Web Developer Tools.
Click the Clear Cookies button on the page.
In the Console, you should see undefined 5 times, once for each cookie. This means our cookies have been successfully cleared.
Close the Web Developer Tools.
Click the Go Back to Form link (to the right of the Clear Cookies button).
-
Click Sign Me Up! to resubmit the form.
The date should now be just a few seconds old, indicating that the cookies are properly set again.
Click the Go Back to Form link and then Sign Me Up! to submit the form again. Notice that the time does not change. Perfect!
Updating a Cookie: Incrementing the Number of Visits
The visits cookie is currently stuck at 1, but it should increment every time the user visits the site. We can increment the value of v and then re-save the cookie using the updated value. Return to your code editor.
Switch to main.js.
-
Add the following bold code:
window.onload = function() {
   var v = Cookies.get('visits');
   if ( v == undefined ) {
Code Omitted To Save Space
}
   else {
      v++;
      Cookies.set( 'visits', v, {expires:,000} );
   }
};
NOTE: v++ says to take the value of v and increment it by 1. Then we set the cookie equal to that new value.
Save the file.
Return to thank-you.html in Firefox and click the Go Back to Form link.
Click Sign Me Up! to submit the form again.
-
Go back and submit the form several times and watch the Number of Times Visited increase. (Nothing else should change, just the number of visits.)
The visits cookie should increase every time the user visits the site—but not every time they load a page! We want the visits to increase once per session. (A session ends when the user quits the browser.) This will give a more accurate number of how many times the user has visited your site over time.
Return to main.js in your code editor.
-
To fix this we will create a cookie called currentlyHere. We’ll use that to see whether the user is on the site. By not specifying an expiration, it will expire at the end of the session. Add the following bold code:
else { v++; Cookies.set( 'visits', v, {expires:,000} ); } Cookies.set( 'currentlyHere', 'true' ); }; -
Now let’s check to see if the currentlyHere cookie exists. If it does not (meaning they have not previously visited the site in this session), we will increase the number of visits. Add the following bold code (there are two places you need to add code):
window.onload = function() {
   var v = Cookies.get('visits');
   var c = Cookies.get('currentlyHere');
   if ( v == undefined ) {
Code Omitted To Save Space
}
   else if ( c == undefined ) {
      v++;
      Cookies.set( 'visits', v, {expires:,000} );
   }
   Cookies.set( 'currentlyHere', 'true' );
};
Save the file.
Return to thank-you.html in Firefox.
-
Click the Go Back to Form link and then Sign Me Up! to submit the form again and:
- Resubmit the form a few times. Notice that the Number of Times Visited does not increase.
- Stop submitting the form and, on thank-you.html, take note of the current Number of Times Visited. (You will want to make sure it increases by one in a moment.)
- Quit Firefox.
- Preview enews.html in Firefox and submit the form again.
- Notice the Number of Times Visited should be one number higher than it was before you quit. This proves our session cookie is working!
Submitting the Cookie Info with the Form
Our cookies are working, but when a signup form is submitted, it does NOT submit any of the cookie data to the web server. This means the cookie data is only stored on the user’s machine and the website owner would never know what it is. We can fix that by creating hidden field inputs in our form. We can then use JavaScript to set the values of those hidden inputs. The values of those hidden inputs can be submitted (along with the rest of the form inputs) so the website owner can see this useful info. Sneaky, huh?
Switch back to your code editor.
Switch to enews.html.
We need to create an input for each cookie we want to submit along with the form. To save you some typing, we’ve coded up the HTML. From the snippets folder, open hidden-inputs.html.
Select and copy all the code.
Switch back to enews.html.
Around line 35, find the code for the Sign Me Up! submit button.
-
Below that button, paste the code so you end up with the following:
<input id="submit" type="submit" name="submit" value="Sign Me Up!">

<input type="text" name="visits" id="visits">
<input type="text" name="entryPage" id="entryPage">
<input type="text" name="entryDateTime" id="entryDateTime">
<input type="text" name="cameFrom" id="cameFrom">
NOTE: Notice these are text inputs, not hidden inputs. As we code we want them to be visible, so we can see their values. When we’re done testing, we’ll change their type to hidden.
-
We need to set the values of these text fields equal to the contents of our cookies. We could add this code to main.js, but it’s unique to this page. Let’s embed it to keep things simple. Add the following bold code before the closing
</body>tag:<script src="js/main.js"></script> <script> window.onload = function() { }; </script> </body> </html> -
First let’s get the value of the visits input. Add the following bold code:
<script> window.onload = function() { document.getElementById('visits').value; }; </script> -
Now we can set it to the value of the visits cookie. Add the following bold code:
window.onload = function() { document.getElementById('visits').value = Cookies.get('visits'); }; -
We have three other inputs/cookies, so copy and paste that line of code so you end up with a total of 4 lines as shown below.
window.onload = function() { document.getElementById('visits').value = Cookies.get('visits'); document.getElementById('visits').value = Cookies.get('visits'); document.getElementById('visits').value = Cookies.get('visits'); document.getElementById('visits').value = Cookies.get('visits'); }; -
We just have to change the names of the form fields and cookies. Make the changes shown in bold:
window.onload = function() {
   document.getElementById('visits').value = Cookies.get('visits');
   document.getElementById('entryPage').value = Cookies.get('entryPage');
   document.getElementById('entryDateTime').value = Cookies.get('entryDateTime');
   document.getElementById('cameFrom').value = Cookies.get('cameFrom');
};
Save the file.
-
Switch to Firefox, reload enews.html, and:
- Below the Sign Me Up! button notice there are some new text fields. These are the ones we just added.
- The first field should have a number in it. That’s the number of visits.
- The next field should have a URL. That’s the entry page.
- The next field should be the date and time.
- The last field is empty because there was no referring page, but this would work on a live site.
Now that we know they are working, we can change the type from text to hidden so the user doesn’t see these. Return to enews.html in your code editor.
-
Find the input tags starting around line 37 and change the type from text to hidden. TIP: In Visual Studio Code you can select the first copy of text. Then hit Cmd–D (Mac) or CTRL–D (Windows) a few times to select the other copies. Once all four are selected, type hidden to update them all at once!
<input type="hidden" name="visits" id="visits">
<input type="hidden" name="entryPage" id="entryPage">
<input type="hidden" name="entryDateTime" id="entryDateTime">
<input type="hidden" name="cameFrom" id="cameFrom">
Save the file.
-
Switch to Firefox and reload enews.html to see that the fields are hidden. Don’t worry though, they still work when hidden!
That’s all we have to do for the front-end. You may need to adjust your server-side script that processes the form, so it will include the info from these hidden inputs. The info is there for the taking, though! We hope this lets you gain powerful insights into your web visitors and customers.
NOTE: If you want to refer to our final code example, go to Desktop > Class Files > yourname-JavaScript jQuery Class > Done-Files > Tracking-Visitors-With-Cookies.
