Follow along this in-depth tutorial to create a photo gallery in JavaScript and jQuery, covering topics like populating arrays, programming filters, enhancing user experience, and more.
This exercise is excerpted from Noble Desktop’s past JavaScript training materials. Noble Desktop now teaches JavaScript and the MERN Stack in our Full Stack Development Certificate. To learn current skills in web development, check out our coding bootcamps in NYC and live online.
Topics Covered in This JavaScript & JQuery Tutorial:
Populating a Standard JavaScript Array Using JQuery, Using JavaScript to Skip over the Zero Index, Hiding the Photos, Testing the Checkbox’s Functionality, Programming the Inclusive & Exclusive Filters, Rerunning the Filter When the Checkbox is Toggled, Improving the User Experience
Exercise Preview
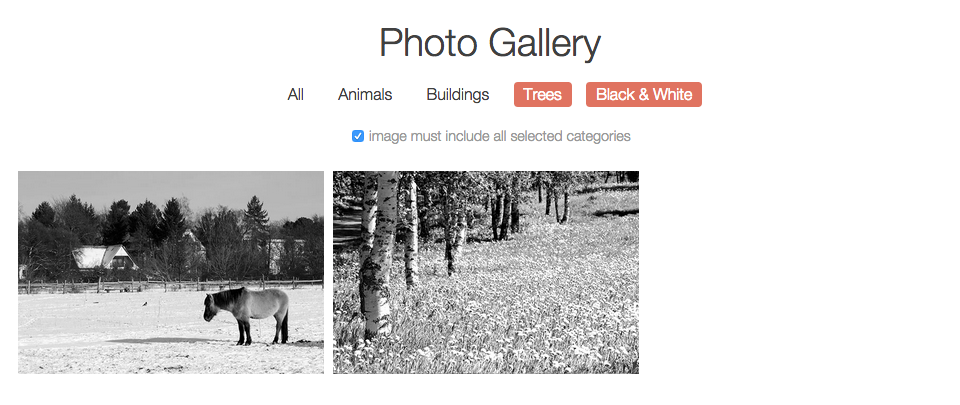
Exercise Overview
In this exercise, we’ll continue where the previous exercise left off, creating the photo gallery using jQuery. In the last exercise, we got the buttons in the nav to select/deselect when clicked. In this exercise, we’ll write the code to filter the photos.

-
If you completed the previous exercise, gallery-with-jQuery.html and gallery-with-js.html should still be open in your code editor, and you can skip the following sidebar. We recommend you finish the previous exercise (B5) before starting this one. If you haven’t finished it, do the following sidebar.
If You Did Not Do the Previous Exercise (B5)
- Close any files you may have open.
- Go into Desktop > Class Files > yourname-JavaScript jQuery Class and open the Photo-Filter-jQuery-2 folder.
- Open gallery-with-jQuery.html. This is the photo gallery that we’ll be editing with jQuery.
- Also open gallery-with-js.html from the Photo-Filter-jQuery-2 folder. This is the photo gallery that we completed in exercise 3D using JavaScript. We’ll use this as a reference.
Populating a Standard JavaScript Array Using JQuery
In the last exercise, we got the navigation elements working. We also created an empty array to store the selected photo data-filter attributes. Next we need to populate the array by cycling through, grabbing the data-filter attributes of each element, and putting the selected items into the array.
To see which function we used to populate the array with standard JavaScript, go to gallery-with-js.html in your code editor and look around line 256.
-
Switch to gallery-with-jQuery.html. Around line 180, call the populateArray() function as shown in bold:
$filterNav.on('click', function() {
   toggleCategory($(this));
   populateArray();
});
Refer back to gallery-with-js.html around lines 181–196 to check out the standard JavaScript version of the populateArray() function.
-
In gallery-with-jQuery.html around line 178, add the function as shown in bold:
function deselectOthers(filterChoice) {Code Omitted To Save Space
} function populateArray() { } $filterNav.on('click', function() { -
The first thing we need to do in the populateArray() function is take the selected array and reset it back to an empty array. Add same JavaScript code as before:
function populateArray() { selectedArray = []; } -
Add an conditional statement to check if the All button is selected:
function populateArray() { selectedArray = []; if($allButton.attr('data-selected') == 'yes') { } else { } } -
Next we want to go through every filter except for all, take their data-filter values, and push them onto the selected array. To see how we did this using standard JavaScript, go to gallery-with-js.html and find the for loop around lines 185–187.
Earlier in the workbook, you learned that if you want to use a jQuery method such as click() to apply something to everything in a group of elements (e.g., all the buttons in the navigation), you don’t need to write a loop because jQuery automatically performs a implicit loop over all of the matched elements.
Because selectedArray is not a jQuery object, we have to use a different approach. We can use the handy jQuery .each() method. You can think of this explicit loop as a less complicated version of JavaScript’s for loop.
-
Add the each method inside the if statement around line 181 and also add a console.log() line (around line 187), so we can see exactly what the selectedArray looks like at this point:
function populateArray() {
   selectedArray = [];
   if($allButton.attr('data-selected') == 'yes') {
      $filterNav.each(function() {
         selectedArray.push($(this).attr('data-filter'));
      });
   } else {

   }
   console.log(selectedArray);
}
Save the file.
Preview index.html in Chrome to see what we have so far (we’ll use its DevTools).
Open the Console by hitting Cmd–Opt–J (Mac) or CTRL–Shift–J (Windows).
Click the All button in the nav to deselect it. You should see
[]print to the Console, indicating an empty array.Click the All button again to select it. In the Console, you should see all the filter values in the array: [
"all","animals","buildings","trees","bw"]
Using JavaScript to Skip over the Zero Index
The only problem is it also grabbed "all" which we don’t want because we don’t have an all class we can apply. How do we get rid of it? This is an example of the limitations of trying to use just jQuery; sometimes when you want to do something more advanced you’ll also need to use JavaScript.
Leave gallery-with-jQuery.html open in Chrome so we can come back to it later.
Return to your code editor.
In gallery-with-jQuery.html look at the code inside the each() method around line 182 to see that it’s going through the entire array and grabbing all the filter choices. We don’t have a way to skip over the 0 index (which would be the first item)!
-
Let’s try using the native JavaScript shift() method to skip over the All selector and shift the other values. Around line 185, add the following bold code:
if($allButton.attr('data-selected') == 'yes') {
   $filterNav.each(function() {
      selectedArray.push($(this).attr('data-filter'));
   });
   selectedArray.shift();
} else {
NOTE: The shift() method deletes the first item in the Array and “shifts” the other values so that 1 becomes 0,2 becomes 1, etc.
Save the file.
Go to Chrome and reload gallery-with-jQuery.html.
Open the Console if it’s not already open.
Click the All button in the nav to deselect it. As before, you should see
[]print to the Console, indicating an empty array.Click the All button again to select it. In the Console, you should see all the array’s filter values, minus
"all": ["animals","buildings","trees","bw"]
Selecting Buttons Other Than the All Button
In the case that a user clicks on any filter button other than the All selector, we want to run through the filters again, but this time we only want to push to the array if the data-selected attribute is set to "yes".
Return to your code editor.
-
Add the following bold code inside the else statement starting around line 186:
} else {
   $filterNav.each(function() {
      if($(this).attr('data-selected') == 'yes') {
         selectedArray.push($(this).attr('data-filter'));
      }
   });
}
console.log(selectedArray);
Save the file.
Go to Chrome and reload gallery-with-jQuery.html.
Open the Console if it’s not already open.
Click any of the filter buttons besides All and you should see the filter values appear in the Console. Great, the array is being populated successfully!
Hiding the Photos
Switch back to your code editor.
-
Still in gallery-with-jQuery.html, call the filterPhotos() function around line 198:
$filterNav.on('click', function() {
   toggleSelector($(this));
   populateArray();
   filterPhotos();
});
Around line 192, delete the console.log(selectedArray); line as well as any leftover whitespace.
-
Around line 194, declare the filterPhotos() function as shown in bold:
}

function filterPhotos() {

}

$filterNav.on('click', function() {
Refer back to gallery-with-js.html (around line 237 near the beginning of the filterPhotos() function) to see that the first thing we did in this function was hide all the photos.
-
First let’s call the function to hide the photos. Back in gallery-with-jQuery.html, add the following code in bold:
function filterPhotos() { hideAllPics(); } -
We need to declare this actual function. Above the filterPhotos() function, around line 194, add the following code in bold:
function hideAllPics() {

}

function filterPhotos() {
In gallery-with-js.html, look around lines 199–202 to see that the hideAllPics() function contains a loop that says to take all the imageContainers (the divs with the gallery class) and set them to display =
'none'.-
Because we are referencing these divs using jQuery, we can simply use either jQuery’s hide() or css() method and jQuery will perform an implicit loop. In gallery-with-jQuery.html around line 195, add the bold code shown below:
function hideAllPics() {
   $imageContainers.hide();
}
NOTE: Instead of.hide(); we could have used.css(
'display','none'); Save the file.
Go to Chrome and reload gallery-with-jQuery.html.
Click any of the filter buttons and you should see all the images disappear… It’s working so far!
Testing the Checkbox’s Functionality
Next we need to get the checkbox to filter exclusively (if checked) or filter inclusively (if not checked). Let’s test the functionality in the JavaScript Console.
Switch back to your code editor.
-
In the filterPhotos() function, add the following bold code around line 200:
function filterPhotos() {
   hideAllPics();
   if($exclusive.is(':checked')) {
      console.log('checked');
   } else {
      console.log('not checked');
   }
}
NOTE: :checked is a pseudo-class, like :hover.
Save the file.
Let’s test if this is working. Go to Chrome and reload the page.
Make sure the Console is open.
Click one of the filter buttons and you should see not checked print to the Console because the checkbox is not checked by default.
Check on the checkbox, then click one of the filter buttons. You should see checked print to the Console. Cool, it’s working as expected!
Programming the Inclusive Filter
Let’s start by creating the inclusive filter (for searches that include any filter).
Back in your code editor, delete the console.log() s around lines 207 and 209.
-
In the else statement around line 209, call the function we’re about to write:
function filterPhotos() { hideAllPics(); if($exclusive.is(':checked')) { } else { filterInclusive(); } } -
Declare the actual function around line 198, between the hideAllPics() and filterPhotos() functions:
} function filterInclusive() { } function filterPhotos() { -
Look back at gallery-with-js.html to check out the filterInclusive() function around lines 213–221. This is what we did:
- First we created a variable called group.
- Then we cycled through the selectedArray using a for loop.
- If the condition is met, JavaScript takes everything inside the selectedArray, attaches a
'.'to make it a class, puts it into the querySelectorAll() method, and saves that to the group variable. - Finally, the other loop sets the group’s display property to inline-block.
-
We need to run through the values in the selectedArray and apply a function to them. It sounds like it would make sense to use the.each() method, but it won’t work as expected. In gallery-with-jQuery.html, add the bold code around line 199 to see what happens:
function filterInclusive() {
   selectedArray.each(function() {
      console.log('hello');
   });
}
Save the file.
Go to Chrome and reload the page.
-
Make sure the Console is open, then click on a filter button in the nav. In the Console, you’ll see an error: selectedArray.each is not a function.
The problem is that selectedArray is not a jQuery object. While we normally can’t call jQuery functions on non-jQuery objects, there is a way around this.
Let’s figure this out. In a new browser tab or window, go to: api.jQuery.com
In the search bar towards the top right, search for: $.each
-
In the results, click on jQuery.each() (this is the same as $.each()—remember that $ is an alias for jQuery).
This function allows you to call jQuery and attach a non-jQuery array as the first argument. For the second argument, you put the callback or function you want to apply to the array.
Switch back to your code editor.
-
Delete the selectedArray.each() function (around lines 199–201):
selectedArray.each(function() { console.log('hello'); }); -
We want to pass in a function that we’ll apply to each item in the array. Replace the deleted code with the jQuery.each() method that includes multiple arguments:
function filterInclusive() {
   $.each(selectedArray, function(i) {

   });
}
NOTE: The function takes a counter variable called i as an argument. We are passing it in as an index for whatever we’re cycling through in the selectedArray.
-
Around line 200, add the following bold code:
function filterInclusive() {
   $.each(selectedArray, function(i) {
      $('.' + selectedArray[i]).show();
   });
}
NOTE: We’re using the jQuery.each() method to pass in the selectedArray (a non-jQuery object) and perform the function on it (where we’ll be using the index of whatever we’re cycling through). Then we add the
'.'to add a class selector onto the results, add the selectedArray value, and show the appropriate photos. Save the file.
Go to Chrome and reload the page.
Click the Black & White button (you could click any, but it’s easiest to spot the effect). You should see just the black and white photos filter.
Click Trees and you’ll see photos that are either black & white OR have trees.
Programming the Exclusive Filter
Switch back to your code editor.
-
In the filterPhotos() function, around line 204, specify the following bold functionality that will run if the $exclusive checkbox is checked:
function filterPhotos() { hideAllPics(); if($exclusive.is(':checked')) { filterExclusive(); } else { filterInclusive(); } } -
Around line 204, between the filterInclusive() and filterPhotos() functions, declare the filterExclusive() function as shown in bold:
} function filterExclusive() { } function filterPhotos() { -
Look back at gallery-with-js.html to check out the filterExclusive() function around lines 223–235 to see what we did in the standard JavaScript version.
We put together a queryString and cycled through everything in the array. Then we took everything out of the array and added it to the queryString. Once we had a queryString (that wasn’t empty), we set it to display inline-block. Fortunately, jQuery’s going to help us simply this significantly.
-
Back in gallery-with-jQuery.html, around line 205, declare the queryString variable and set it to be an empty string:
function filterExclusive() { var queryString = ''; } -
We need to cycle through the array and add it to the queryString. To do that, we’ll use the.each() method again. Around line 206, add:
function filterExclusive() {
   var queryString = '';
   $.each(selectedArray, function(i) {
      queryString += ('.' + selectedArray[i]);
   });
   console.log(queryString);
}
Save the file.
Go to Chrome and reload the page. Make sure the Console is open.
Check on the checkbox under the nav.
Click the Trees button. You should see .trees print to the Console.
Click the Buildings button. You should see .buildings.trees print to the Console.
Click the All button and you’ll see .animals.buildings.trees.bw print to the Console. Great, the correct classes are being selected.
-
Back in your code editor, around line 209, replace console.log(queryString); with the following bold if statement:
function filterExclusive() {
   var queryString = '';
   $.each(selectedArray, function(i) {
      queryString += ('.' + selectedArray[i]);
   });
   if(queryString) {
      $(queryString).show();
   }
}
Save the file, go to Chrome, and reload the page.
Check on the checkbox under the nav.
Click the Animals and Black & White buttons. Now only black & white photos with animals are showing!
Rerunning the Filter When the Checkbox is Toggled
Now we need to specify what will happen whenever the checkbox is checked or unchecked (toggled on or off). The process will be pretty similar to how we did it with JavaScript. Return to gallery-with-jQuery.html in your code editor.
-
Below the end of the filterPhotos() function, around line 223, add:
}

$exclusive.on('change', function() {
   populateArray();
   filterPhotos();
});

$filterNav.on('click', function() {
Save the file, go to Chrome, and reload the page.
Click any two filter buttons in the nav.
Check on the checkbox. Exclusive filtering should turn on.
Uncheck the checkbox. It should start inclusive filtering.
Improving the User Experience
The finished photo filter page works wonderfully unless a user deselects all buttons. Let’s fix this.
Switch back to your code editor.
-
We’ll need to create a function that will address the issue. Around line 223, add the following function:
} function noFilterSelection() { } $exclusive.on('change', function() { -
All we need to do is check to see if selectedArray is empty. If it’s empty, we can just assume they meant to “start again” with all the photos showing:
function noFilterSelection() { if(selectedArray.length == 0) { $imageContainers.show(); } } -
We will also want the All button to highlight, to let the users know what’s going on. Add the following:
function noFilterSelection() { if(selectedArray.length == 0) { $imageContainers.show(); $allButton.attr('data-selected', 'yes'); } } -
Finally, we’ll need to call this function. Around line 216, call the function inside the filterPhotos() function, as follows:
function filterPhotos() {
   hideAllPics();
   noFilterSelection();
   if($exclusive.is(':checked')) {
      filterExclusive();
   } else {
      filterInclusive();
   }
}
Save the file.
-
Return to gallery-with-jQuery.html in Chrome and reload the page. Deselect all filter buttons. Perfect!
So in summary, we were able to redo the photo gallery in jQuery and it was simpler and faster and required less code.
NOTE: If you want to refer to our final code example, go to Desktop > Class Files > yourname-JavaScript jQuery Class > Done-Files > Photo-Filter-jQuery-2.
