Learn how to quickly and efficiently recreate a filtering system for a photo gallery website using jQuery in this comprehensive tutorial that covers topics such as adding variable references and attaching a click event handler using the on() method.
This exercise is excerpted from Noble Desktop’s past JavaScript training materials. Noble Desktop now teaches JavaScript and the MERN Stack in our Full Stack Development Certificate. To learn current skills in web development, check out our coding bootcamps in NYC and live online.
Topics Covered in This JavaScript & JQuery Tutorial:
Adding Variable References: JQuery Vs. JavaScript Syntax, Attaching a Click Event Handler Using the On() Method, Toggling the Filter Buttons Using JQuery, the All Button Vs. the Rest of the Buttons
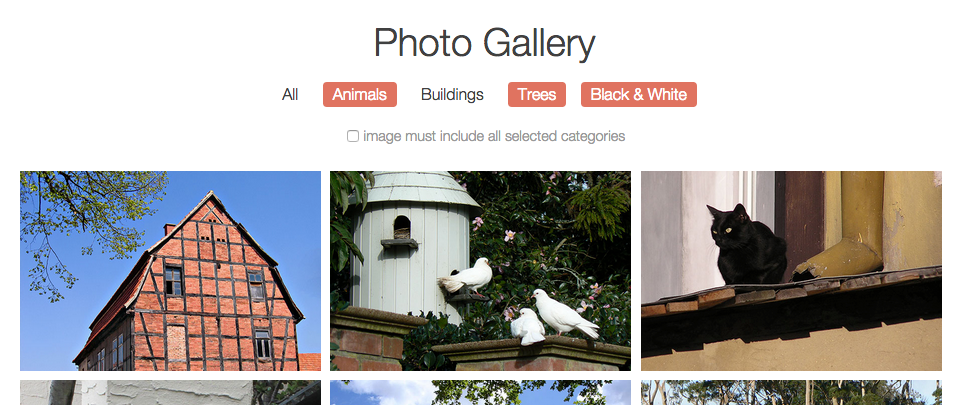
Exercise Preview
Exercise Overview
In the previous exercises we programmed a filtering system for a photo gallery website using standard JavaScript. In this series of two exercises, you’ll see how to more quickly and easily recreate this functionality using jQuery. In this first part, we’ll work on getting the buttons in the nav to select/deselect. We’ll get the photos to filter later.

Getting Started
Open your code editor if it isn’t already open.
Close any files you may have open.
For this exercise we’ll be working with the Photo-Filter-jQuery-1 folder located in Desktop > Class Files > yourname-JavaScript jQuery Class. You may want to open that folder in your code editor if it allows you to (like Visual Studio Code does).
Open gallery-with-js.html from the Photo-Filter-jQuery-1 folder. This is the photo gallery filter page that uses standard JavaScript.
Open gallery-with-jQuery.html. This is the photo gallery without any JavaScript added, ready for us to add jQuery.
Preview gallery-with-jQuery.html in Chrome (we’ll be using its DevTools later).
All the photos show by default and none of the filters work yet. Leave the page open in Chrome so we can come back to it later.
Switch back to your code editor.
Open gallery-with-js.html. As we recreate the filtering system using jQuery, we will use the same logic and structure that we used in the JavaScript version. We’ll be referencing this file, but not be editing it.
Open gallery-with-jQuery.html. This is the file we’ll be editing.
Adding Variable References: JQuery Vs. JavaScript Syntax
-
The first thing we need to do in gallery-with-jQuery.html is attach jQuery and add script tags where we’ll write our custom code. Around line 151, add the bold code:
</div>
   <script src="js/jquery-2.1.0.min.js"></script>
   <script>

   </script>
</body>
</html>
Refer back to gallery-with-js.html. Around line 152, we used the window.onload function.
-
There is a better way to do this in jQuery. In gallery-with-jQuery.html, on line 153, add jQuery’s document ready code:
<script src="js/jquery-2.1.0.min.js"></script>
<script>
   $(document).ready(function() {

   });
</script>
Back in gallery-with-js.html, look around line 154 to find the // grabbing elements comment. The first thing we want to do is grab the navigation items and save them to variables.
-
A common practice whenever you’re saving a jQuery object to a variable is to put a $ in front of the variable name so you can tell it apart from non-jQuery variables. Return to gallery-with-jQuery.html around line 155, declare a jQuery variable:
<script> $(document).ready(function() { var $filterNav = $('nav a'), }); </script> -
Next we want to grab the all-button. Add the bold code:
$(document).ready(function() {

   var $filterNav = $('nav a'),
       $allButton = $('#all-button'),

});
NOTE: We are grouping multiple variable declarations into one statement. These declarations are comma-delineated. The semi-colon is reserved for the last one. You can reference gallery-with-js.html to see what we’ll be grabbing next.
-
The next variable (selectedArray) we’re going to declare is actually not a jQuery object, so we’ll just write it as JavaScript. Add:
$(document).ready(function() { var $filterNav = $('nav a'), $allButton = $('#all-button'), selectedArray = [], }); -
Add two remaining vars: the imageContainers, and the exclusive filter checkbox:
$(document).ready(function() {

   var $filterNav = $('nav a'),
       $allButton = $('#all-button'),
       selectedArray = [],
       $imageContainers = $('.gallery div'),
       $exclusive = $('#exclusive');

});
Attaching a Click Event Handler Using the On() Method
-
In gallery-with-js.html, scroll to the active code section and around line 253, locate the for loop. At this point, we cycled through all of the navigation items and added an onclick method to each of them. To accomplish this in JavaScript, we had to loop through them all, add onclick and assign a function.
In jQuery, it’s much easier. If you are going to add a method that exists in jQuery onto a group of elements, it will do it automatically in the background without having to cycle through an explicit loop.
-
In gallery-with-jQuery.html, around line 161, add the following click() method and message that we will test in the JavaScript Console:
$(document).ready(function() {Five Vars Omitted To Save Space
$exclusive = $('#exclusive');

   $filterNav.click(function() {
      console.log('clicked');
   });

});
Save the file.
Go to Chrome where you should still have gallery-with-jQuery.html open. Reload it.
Cmd–Opt–J (Mac) or CTRL–Shift–J (Windows) to bring up the Console.
-
Click any of the buttons in the nav. You should see it say clicked in the Console.
Using the click() method in jQuery is perfectly fine, however, there is a slightly better practice in jQuery whenever you’re attaching event handlers like this: using the on() method and passing in the value for the kind of event you want to use.
Open a separate browser tab or window and navigate to: api.jQuery.com
In the search bar at the upper right of the page, search for: .on()
In the results below, click: .on()
-
Scroll down under Direct and delegated events and find the code shown below.

If you want to attach something with click, this is an example of how you’d write it. Likewise, you could replace click with change or hover or focus, etc. The value of doing this is that if you want to attach multiple actions on that click, you can do that in multiple different places. For example, you could specify this element does one thing on click, and then later on in your code you could specify that it also does another thing on click. They will be combined together into one. On the other hand, if you just used.click() it would override everything.
Switch back to your code editor.
-
Around line 161, replace click(function() with the following bold code:
$filterNav.on('click', function() {
   console.log('clicked');
});
Save the file.
Go to Chrome and reload gallery-with-jQuery.html.
Open the Console if it isn’t already.
Click the buttons in the nav to see that they still print clicked to the Console.
Toggling the Filter Buttons Using JQuery
Switch back to your code editor.
Delete the console.log(
'clicked'); code around line 162.-
Let’s see the standard JavaScript version of the code that’ll replace console.log(). In gallery-with-js.html around line 255, notice the code: toggleCategory(this);
The next thing we want to do is call the toggleCategory(filterChoice) function that was declared around line 164. This will highlight/unhighlight a filter button when it is clicked. The syntax will be slightly different in the jQuery version because we are working in the jQuery object.
-
In gallery-with-jQuery.html within the on() method, add the following bold code around line 162:
$filterNav.on('click', function() {
   toggleCategory($(this));
});
NOTE: Remember that we’re calling $(this) because we’re working inside the jQuery object.
-
Around line 161, write the function for toggleCategory(filterChoice):
$exclusive = $('#exclusive'); function toggleCategory(filterChoice) { } $filterNav.on('click', function() { toggleCategory($(this)); }); -
Let’s see how we coded the standard JavaScript version of this function. In gallery-with-js.html in the toggleCategory(filterChoice) function, find the conditional statement around lines 163–168.
We want to set the data-selected attribute to either
'yes'or'no'. The jQuery code will be similar but more terse. -
In gallery-with-jQuery.html add the following bold if statement:
function toggleCategory(filterChoice) {
   if(filterChoice.attr('data-selected') == 'no') {
      filterChoice.attr('data-selected', 'yes');
   } else {
      filterChoice.attr('data-selected', 'no');
   }
}
Save the file, switch to Chrome, and reload gallery-with-jQuery.html.
Select, then deselect any of the nav buttons to see that the function is working.
The All Button Vs. the Rest of the Buttons
Next we want to make it so that when the All category is selected, none of the other buttons are highlighted. Likewise, if Animals, Buildings, Trees, or Black & White are selected, the All button should not be. Switch back to your code editor.
In gallery-with-js.html around line 164, find the deselectOthers(filterChoice); line of code. First, when a filter button is clicked, we need to deselect others.
-
In gallery-with-jQuery.html around line 163, add the code as shown:
function toggleCategory(filterChoice) {
   if(filterChoice.attr('data-selected') == 'no') {
      deselectOthers(filterChoice);
      filterChoice.attr('data-selected', 'yes');
   } else {
      filterChoice.attr('data-selected', 'no');
   }
}
Now we need to write the function for deselecting others. Look at gallery-with-js.html starting around line 171 to see the function we originally wrote.
-
In gallery-with-jQuery.html around line 170, add the function as shown:
function toggleCategory(filterChoice) {Code Omitted To Save Space
} function deselectOthers(filterChoice) { } $filterNav.on('click', function() { -
We need to determine if the All button is selected or not. In JavaScript we used filterChoice == allButton but in jQuery we’ll use the.is() method. Add the following if statement:
function deselectOthers(filterChoice) {
   if(filterChoice.is($allButton)) {
      console.log('yes');
   } else {
      console.log('no');
   }
}
Save the file, switch to Chrome, and reload gallery-with-jQuery.html.
Open the Console if it isn’t already.
Click any of the nav filter buttons (besides the All button) and you should see no print to the Console.
Click the All button to deselect it, then click it again to select it. You should see yes print to the Console. Now we know the function is properly detecting if All is selected or not.
Switch back to your code editor.
Look at gallery-with-js.html around lines 173–175 to find the for loop. Though we had to write a for loop in JavaScript, luckily we won’t need to rewrite that loop version because jQuery will take care of that for us. Instead all we need to do is grab all the navigation items and set data-selected to no.
-
In gallery-with-jQuery.html around line 172, replace console.log(
'yes'); with:function deselectOthers(filterChoice) { if(filterChoice.is($allButton)) { $filterNav.attr('data-selected', 'no'); } else { console.log('no'); } } -
In the case that the All button isn’t selected, we need to turn it off. Around line 174, replace console.log(
'no'); with:function deselectOthers(filterChoice) { if(filterChoice.is($allButton)) { $filterNav.attr('data-selected', 'no'); } else { $allButton.attr('data-selected', 'no'); } } Save the file, switch to Chrome, and reload gallery-with-jQuery.html.
Notice the All button is still selected by default. Click any of the other buttons and it turns off.
Click the All button and the other buttons become deselected. That’s exactly what we want.
-
Leave the files open in your code editor so you can continue working on them in the next exercise.
NOTE: If you want to refer to our final code example, go to Desktop > Class Files > yourname-JavaScript jQuery Class > Done-Files > Photo-Filter-jQuery-1.
