Delve into the process of using JavaScript and jQuery to build a dynamic postcard generator with our detailed tutorial, guiding you through topics like getting input from menus, using anonymous functions, and adding event handlers in JavaScript.
This exercise is excerpted from Noble Desktop’s past JavaScript training materials. Noble Desktop now teaches JavaScript and the MERN Stack in our Full Stack Development Certificate. To learn current skills in web development, check out our coding bootcamps in NYC and live online.
Topics Covered in This JavaScript & JQuery Tutorial:
Getting Input from the Menu, Anonymous Functions, Adding Event Handlers in JavaScript
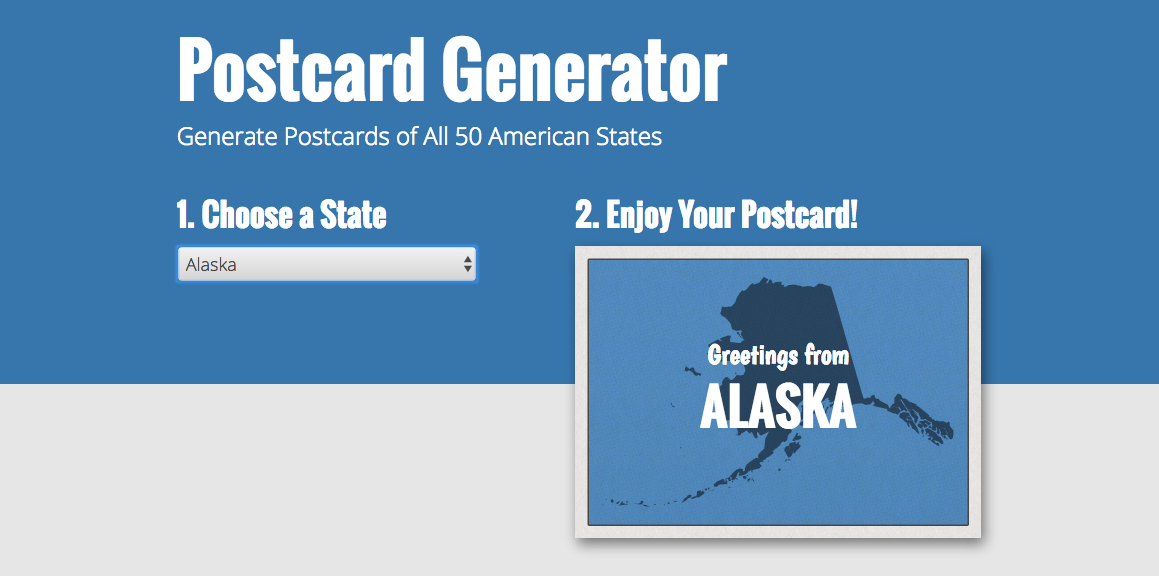
Exercise Preview
Exercise Overview
In this exercise, you’ll build a postcard generator. We’ll have a single page where the user will choose from a list of U.S. states and the page will dynamically generate a postcard for that state. You’ll learn about pulling values from a menu list, and use those values to change the text and image on the page.

Getting Started
- Open your code editor if it isn’t already open.
- Close any files you may have open.
- For this exercise we’ll be working with the Postcard-Generator folder located in Desktop > Class Files > yourname-JavaScript jQuery Class. You may want to open that folder in your code editor if it allows you to (like Visual Studio Code does).
- Open index.html from the Postcard-Generator folder.
-
Preview index.html in Chrome (we’ll be using its DevTools later).
Notice the Choose a State menu on the left. When the user selects a state, we want to use JavaScript to generate a postcard with that state’s name and a photo (showing the shape of the state).
- Leave the page open in Chrome so we can come back to it later.
- Let’s take a look at the provided files. On your Desktop, navigate into Class Files > yourname-JavaScript jQuery Class > Postcard-Generator folder.
-
Open the img folder inside the Postcard-Generator folder.
Within this folder there are 52 images: one for each of the 50 states, one for D.C., and one for the default “empty-state”. We’ve named each state’s image with the appropriate 2-letter abbreviation for that state.
- Switch back to index.html in your code editor.
-
On line 21, find the select tag.
The select tag creates the Choose a State menu. Notice it has an ID of states.
-
Within the select tag, notice there are option tags for each state.
Each option tag has a value attribute, which we have assigned a 2-letter state abbreviation. These abbreviations match our corresponding image filenames. To generate the postcard, we will get the specific value from the option that the user chooses. We’ll then use that value to know which image to display.
- On line 78, locate the div tag with an ID of postcard. We’ll be assigning the selected state’s image (as a background-image) to this div.
On line 80, locate the p tag with an ID of state-heading. We’ll be changing this text to the state’s name.
Getting Input from the Menu
Now that we have an idea of how the menu will work, we can use JavaScript to figure out which state the user has selected.
-
Add the following bold code before the closing
</body>tag (around line 90):</footer> <script> </script> </body> -
To make it easier to refer to the states select menu, let’s store it in a variable. Type the following bold code:
<script> var states = document.getElementById('states'); </script> -
When a user selects a new state from the menu, the menu fires an onchange event which we can listen for. We’ll add a function that will only be triggered when the user selects a new state. Add the following code shown in bold:
var states = document.getElementById('states');
states.onchange = function() {

}
Unlike in previous exercises, notice that we are using an onchange event handler directly in JavaScript. This way we don’t have to add it to the HTML.
Secondly, notice we did not give the function a name. These are called anonymous functions. Because it’s a function, it will prevent the code we’re going to put inside it from being executed right away. But we don’t need to give this function a name, because it will be automatically executed when the states menu changes.
Unobtrusive JavaScript
Previously, whenever we wanted to trigger a function (when the user clicked on, focused on, or blurred off of an element), we’d add an event like onclick on the HTML element which calls a JavaScript function.
Unobtrusive JavaScript is an approach that separates JavaScript and HTML code. By keeping all the JavaScript together, it’s easier to find and edit.
-
The states menu contains all of the option values, which are also stored in an options array. We can figure out which option (state) the user selected from the menu, based on its position in the array (its “index”).
We can use states.selectedIndex to get the position (index) of the selected menu option within the array. Add the following bold code:
states.onchange = function() { console.log('state index: ' + states.selectedIndex); } - Let’s test this out. Save the file.
- Preview index.html in Chrome.
- Open Chrome’s Console by hitting Cmd–Opt–J (Mac) or CTRL–Shift–J (Windows).
-
Select Alabama from the menu.
It should return state index: 1. Alabama has an index of 1 because the default “empty-state” (United States of America) is the first option (0) in the array.
- Choose a different state to see that the Console returns a different index number for that selected state.
- Return to index.html in your code editor.
-
Let’s see if we can get a state’s name. Add the following bold code:
states.onchange = function() { console.log('state index: ' + states.selectedIndex); console.log('state name: ' + states.options[0].text); } - Save the file.
- Switch to index.html in Chrome and reload the page.
-
From the menu, choose a state. Then choose a second state.
Notice that the Console will show the appropriate state index of the selected state, but state name will always show United States of America. This is because we told the options array to only look for the first value (index 0).
- Return to index.html in your code editor.
-
Instead of 0, let’s feed states.selectedIndex into the options[] array so we’ll get the name of the selected state. Add the following bold code:
states.onchange = function() { console.log('state index: ' + states.selectedIndex); console.log('state name: ' + states.options[states.selectedIndex].text); } - Save the file, switch to Chrome, and reload the page.
- Choose a state from the menu. The Console now returns both the appropriate state index and state name. Now we know how to get the values we need, we can continue on!
- Switch back to your code editor.
-
We also need an image for the postcard, so we’ll get the path to the image for the selected state. Add the following bold code:
states.onchange = function() { console.log('state index: ' + states.selectedIndex); console.log('state name: ' + states.options[states.selectedIndex].text); console.log('img/' + states.value + '@2x.jpg'); } - Save the file, switch to Chrome, and reload the page.
- Choose a state from the menu to see that the Console now also returns the image path to the corresponding image for the selected state. For example, if you choose Alabama you should see
img/al@2x.jpgin the Console. - Switch back to your code editor.
-
Now that we know the image path works, let’s use it to change the background-image of the postcard element. Add the following bold code (keep it on one line):
states.onchange = function() { console.log('state index: ' + states.selectedIndex); console.log('state name: ' + states.options[states.selectedIndex].text); console.log('img/' + states.value + '@2x.jpg'); document.getElementById('postcard').style.backgroundImage = 'url(img/' + states.value + '@2x.jpg)'; } - Save the file, switch to Chrome, and reload the page.
- Choose a few states, and notice on the postcard, that the background image behind Choose a State should change to the state you selected.
- Switch back to your code editor.
-
We want the name of the selected state to appear on the postcard. We’ve already seen how to get the value from the selected menu option, so now we can use this to change the state-heading text. Add the following bold code (keep it on one line):
document.getElementById('postcard').style.backgroundImage = 'url(img/' + states.value + '.jpg)';
   document.getElementById('state-heading').innerHTML = states.options[states.selectedIndex].text;
}
NOTE: We use innerHTML to refer to the contents inside an HTML element.
- Save the file, switch to Chrome, and reload the page.
- Choose a few states, and notice on the postcard, that Choose a State should change to the name of the state you selected.
- Switch back to your code editor.
-
Finally, we’ll finish off the postcard by changing the greeting element’s text to Greetings from. Add the following bold code:
document.getElementById('postcard').style.backgroundImage = 'url(img/' + states.value + '.jpg)'; document.getElementById('greeting').innerHTML = 'Greetings from'; document.getElementById('state-heading').innerHTML = states.options[states.selectedIndex].text; - Save the file, switch to Chrome, and reload the page.
-
Choose a state, and notice that To Generate a Postcard should change to Greetings from.
Everything should be working now. Every time you choose a state, a complete postcard should be generated.
- Switch back to your code editor.
-
We’re done testing, so comment out the three console.log() lines by adding // to the beginning of each line.
TIP: In most code editors you can select the lines and hit Cmd–/ (Mac) or CTRL–/ (Windows) to comment them out.
NOTE: When you’re done troubleshooting, it’s a best practice to either delete the Console code or comment it out.
-
Save the file.
NOTE: If you want to refer to our final code example, go to Desktop > Class Files > yourname-JavaScript jQuery Class > Done-Files > Postcard-Generator.
