Improve your JavaScript and jQuery skills with our comprehensive tutorial that covers topics such as setting up data attributes for photo categories, creating an array to store filter choices, and more.
This exercise is excerpted from Noble Desktop’s past JavaScript training materials. Noble Desktop now teaches JavaScript and the MERN Stack in our Full Stack Development Certificate. To learn current skills in web development, check out our coding bootcamps in NYC and live online.
Topics Covered in This JavaScript & JQuery Tutorial:
Setting up Data Attributes for Photo Categories, Creating an Array to Store the Filter Choices, Getting the All Button to Show All Filter Values, Getting the Rest of the Buttons to Select the Other Filters, Initially Hiding the Photos, Getting the Photos to Filter, Optional Bonus: Fixing a Usability Issue
Exercise Preview
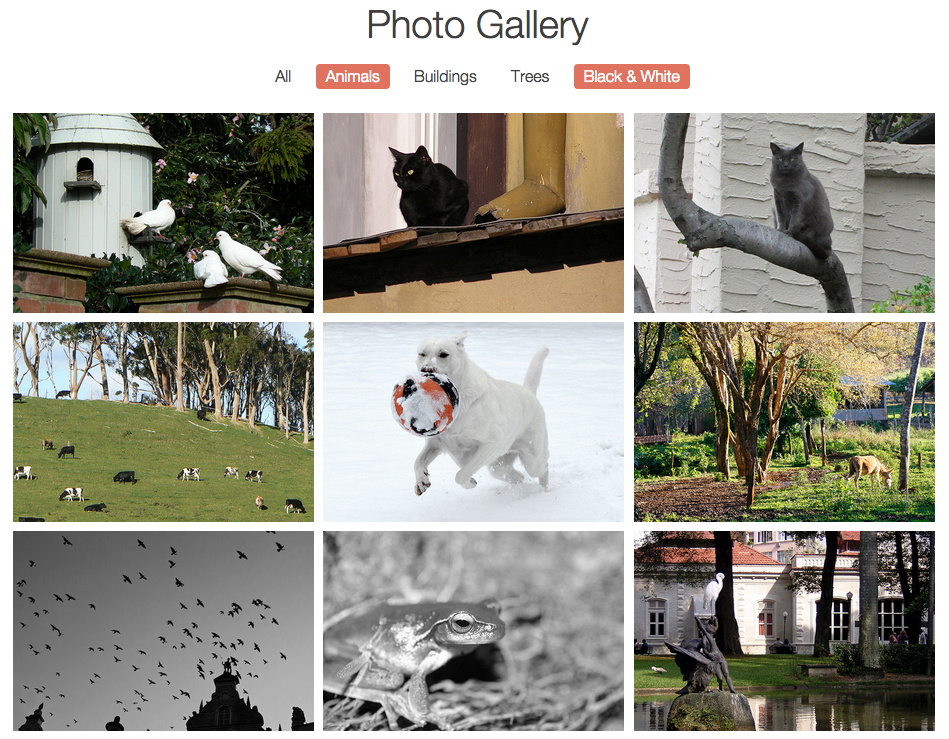
Exercise Overview
In this exercise, we’ll continue building the functionality of the photo gallery website. In the last exercise, we programmed the filter buttons in the navigation to show a user whether a filter is selected or not. Now we’ll get them to actually filter the photos.

Getting Started
Open your code editor if it isn’t already open.
Close any files you may have open.
For this exercise we’ll be working with the Photo-Site-Filter folder located in Desktop > Class Files > yourname-JavaScript jQuery Class. You may want to open that folder in your code editor if it allows you to (like Visual Studio Code does).
Open index.html from the Photo-Site-Filter folder.
Preview index.html in Chrome (we’ll be using its DevTools later).
Click the links in the navigation at the top to see that they only look functional. When users click on one or more categories, we want the photos in the main area of the page to actually filter based on their selections.
Leave the page open in Chrome so we can come back to it later.
Setting up Data Attributes for Photo Categories
Go back to index.html in your code editor.
Let’s take a look at how the images have been categorized in the markup. Starting around line 24, notice that each image is wrapped with a div tag that contains one to four classes that’ll assign it to various categories. We can use these classes to make the filter functional.
-
Let’s begin by adding data attributes to the navigation items to enable us to store and access the info about what type of photo the user would like to see. Add the following bold code:
<ul> <li><a data-filter="all" id="all-button" data-selected="yes" href="JavaScript:;">All</a></li> <li><a data-filter="animals" data-selected="no" href="javascript:;">Animals</a></li> <li><a data-filter="buildings" data-selected="no" href="javascript:;">Buildings</a></li> <li><a data-filter="trees" data-selected="no" href="javascript:;">Trees</a></li> <li><a data-filter="bw" data-selected="no" href="javascript:;">Black & White</a></li> </ul>NOTE: The values we’ve added to the data-attributes here match the classes assigned to the image holders.
Creating an Array to Store the Filter Choices
Bear in mind that there are always numerous ways to program functionality, and what we’ll do in this exercise is one of many possible solutions. Breaking down your goals into small, manageable chunks is always a good strategy. Let’s add the most basic functionality and work from there.
The first chunk of code we need to write is a function that captures the filter choices and stores them in an array. We will then use the data in the array to filter the photos. To lay the groundwork, let’s call the function and declare the array.
Switch back to your code editor.
-
In the active code that starts around line 174, near the end of the for loop, add the following bold code to call the populateArray() function we’ll add soon:
// active code for(var i = 0; i < filterNav.length; i++) { filterNav[i].onclick = function() { toggleCategory(this); populateArray(); } } -
In the grabbing elements code that starts around line 150, declare the following bold empty array that’ll get populated when the user clicks on a category:
// grabbing elements var filterNav = document.querySelectorAll('nav a'); var allButton = document.getElementById('all-button'); var selectedArray = []; -
Now it’s time to write the function itself. At the end of the functions section of the code, add the following bold code (around line 175):
function populateArray() { } // active code -
If a user has already chosen a selector, the array will already be populated. To make sure no info gets duplicated when these users make a new choice, we need to clear out the array every time the function runs. Add this bold code:
function populateArray() {
   selectedArray = [];
}
Getting the All Button to Show All Filter Values
We need to separate the functionality we’re about to code into two different scenarios: either the user will select the All button or the user will select one or more of the other filter buttons, which are much more specific.
-
Take a look at the markup for the nav, starting around line 15. You should see the following data-filter values:
Category Data-Filter Value All "all"Animals "animals"Buildings "buildings"Trees "trees"Black & White "bw"All the data-filter values except
"all"match a class associated with the gallery content. There are no classes in the markup named all. This means that if the user selects the All button, we’ll need to cycle through the data-filter values of the other buttons in the navigation (animals, buildings, trees, and bw) to create the appropriate array. Otherwise, we want to create an array that only includes the active choices. -
Around line 177, add the following bold code to the populateArray() function:
function populateArray() { selectedArray = []; if(allButton.getAttribute('data-selected') == 'yes') { // cycle through every data filter except for 'all' } else { // get only the active filter choices } } -
To cycle through all the photo categories, we can reference the filterNav variable. If we cycle through starting on 1 instead of 0, we can successfully exclude the all-button, which is the first item. Add the bold loop shown below:
if(allButton.getAttribute('data-selected') == 'yes') { // cycle through every data filter except for 'all' for(var i = 1; i < filterNav.length; i++) { } } else { // get only the active filter choices } -
Now that we’re cycling through the navigation items, we want to take the data-filter for each and put it into the selectedArray variable. Use the push() method to add these values to the array, as shown in bold:
if(allButton.getAttribute('data-selected') == 'yes') { // cycle through every data filter except for 'all' for(var i = 1; i < filterNav.length; i++) { selectedArray.push(filterNav[i].getAttribute('data-filter')); } } else { -
Add a console.log() line so we can test how the selectedArray looks so far:
for(var i = 1; i < filterNav.length; i++) {
   selectedArray.push(filterNav[i].getAttribute('data-filter'));
}
   console.log(selectedArray);
} else {
Save the file and reload index.html in Chrome.
Open the Console by hitting Cmd–Opt–J (Mac) or CTRL–Shift–J (Windows).
-
Click the All button to deselect the category, then click it again to select it.
The Console should output [
"animals","buildings","trees","bw"]. Success—all the values for the data-filter attribute have been added to the selectedArray! Leave the Console open in Chrome so we can use it again when we reload the page.
Getting the Rest of the Buttons to Select the Other Filters
-
Switch back to your code editor.
Now we need to specify what will happen in the else condition—where the All category is not selected and one or more of the other buttons are. We still need to cycle through all the options, but we only want to add them to the selectedArray if they have their data-selected attribute set to
"yes". -
In the else statement under the comment, add that functionality by typing the following bold code (around line 185):
} else { // get only the active filter choices for(var i = 1; i < filterNav.length; i++) { if(filterNav[i].getAttribute('data-selected') == 'yes') { selectedArray.push(filterNav[i].getAttribute('data-filter')); } } } -
Move the console.log() line from the end of the if statement to the area between the end of the conditional and the function (around line 190), as shown:
for(var i = 1; i < filterNav.length; i++) {
         selectedArray.push(filterNav[i].getAttribute('data-filter'));
      }
   } else {
      // get only the active filter choices
      for(var i = 1; i < filterNav.length; i++) {
         if(filterNav[i].getAttribute('data-selected') == 'yes') {
            selectedArray.push(filterNav[i].getAttribute('data-filter'));
         }
      }
   }
   console.log(selectedArray);
}
Save the file, reload index.html in Chrome, and make sure the Console is open.
In the nav, click the Animals button. In the Console, you should see: [
"animals"]Click the Buildings category and it should add the buildings selector: [
"animals","buildings"]Click the Animals button again to see that only
"buildings"remains selected. Great, it’s working!
Initially Hiding the Photos
So how are we actually going to get the photos to filter? All the photos are displaying by default when the page loads. They are displayed inline-block, which is helpful because we don’t need to worry about collapsing containers when images are removed.
Every time a button is clicked, we want to show/hide images based on the selection. The easiest way to do this is to initially hide all photos when a button is clicked, then show only the ones corresponding to the selected value.
Go to index.html in your code editor.
Delete the console.log() line around line 190, along with any extra whitespace.
-
Around line 192, declare a function we can use every time we need to hide images:
function hideAllPics() { } // active code -
We should grab all the image containers and save them to a variable. This will make it easier for us to cycle through all the containers and set them to display: none. At the end of the list of variable declarations (around line 154), add the following:
// grabbing elements var filterNav = document.querySelectorAll('nav a'); var allButton = document.getElementById('all-button'); var selectedArray = []; var imageContainers = document.querySelectorAll('.gallery div'); -
Now that we’ve created the container variable, we want to cycle through them and hide them. Around line 194, add functionality to the hideAllPics() function as shown in bold below:
} function hideAllPics() { for(var i = 0; i < imageContainers.length; i++) { imageContainers[i].style.display = 'none'; } } // active code -
Just to test that this function is working, temporarily call it around line 204:
// active code
for(var i = 0; i < filterNav.length; i++) {
   filterNav[i].onclick = function() {
      toggleCategory(this);
      populateArray();
      hideAllPics();
   }
}
Save the file.
Go to Chrome and reload index.html.
Click any of the buttons and all the images should disappear. Now we know that this functionality is working, we can write the chunk of code that will display only the photo categories the user chooses.
Getting the Photos to Filter
Switch back to your code editor.
Delete the hideAllPics(); code around line 204 and make sure to remove any whitespace left over. We’ll place it into a new function we’ll write next.
-
At long last, let’s write the function for filtering the photos. Around line 199, add:
function hideAllPics() { for(var i = 0; i < imageContainers.length; i++) { imageContainers[i].style.display = 'none'; } } function filterPhotos() { hideAllPics(); } // active code -
Next we want to cycle through the selectedArray and find all the items stored inside it. Add the following bold loop to add that functionality:
function filterPhotos() { hideAllPics(); for(var i = 0; i < selectedArray.length; i++) { } } -
Let’s create a group variable and then use it to store the selected images. Add the following bold lines of code to the filterPhotos() function as shown:
function filterPhotos() { var group; hideAllPics(); for(var i = 0; i < selectedArray.length; i++) { group = document.querySelectorAll('.' + selectedArray[i]); } } -
Then we’ll take the selected classes from the group and make them display inline-block. Add another loop inside this loop:
for(var i = 0; i < selectedArray.length; i++) {
   group = document.querySelectorAll('.' + selectedArray[i]);
   for(var j = 0; j < group.length; j++) {
      group[j].style.display = 'inline-block';
   }
}
NOTE: Whenever you’re writing a loop within a loop, you can’t use the same variable for both. Conventionally, the first loop’s variable will be i and the second loop’s variable will be j but you could name them whatever you want.
-
Now call the function near the end of the active code (around line 216):
// active code
for(var i = 0; i < filterNav.length; i++) {
   filterNav[i].onclick = function() {
      toggleCategory(this);
      populateArray();
      filterPhotos();
   }
}
Save the file.
Switch back to Chrome and reload index.html.
Try clicking the Black & White button. Now only black & white photos should be showing!
Click the Animals button. Now black & white photos as well as photos with animals are showing.
-
Go ahead and click any of the filters on/off. They should all work!
In summation, this is what’s happening: After a selector is toggled, an array is populated. Then the filterPhotos() function fires, which initially hides all photos, goes through the array, sets up queries for everything inside the array, and finally sets the selected images to inline-block.
Optional Bonus: Fixing a Usability Issue
You may have noticed that, if you deselect all the categories and/or toggle the All button off, no photos will be displayed. We’ll need to tackle this issue with one final function.
Switch back to your code editor.
-
Around line 199, add the following new function that will check to see if we’re dealing with an empty array:
function hideAllPics() { for(var i = 0; i < imageContainers.length; i++) { imageContainers[i].style.display = 'none'; } } function noFilterSelection() { if(selectedArray == 0) { } } -
If the user deselects all categories and the array is empty, let’s just assume they meant to “start again” with all photos showing. Let’s loop through the image containers again and set them to display inline-block once more. Add the following bold code:
function noFilterSelection() { if(selectedArray == 0) { for(var i = 0; i < imageContainers.length; i++) { imageContainers[i].style.display = 'inline-block'; } } } -
We can call the new function inside the filterPhotos() function. Add the following bold code:
function filterPhotos() {
   hideAllPics();
   for(var i = 0; i < selectedArray.length; i++) {
      group = document.querySelectorAll('.' + selectedArray[i]);
      for(var j = 0; j < group.length; j++) {
        group[j].style.display = 'inline-block';
      }
    }
    noFilterSelection();
  }
Save the file.
Switch back to Chrome and reload index.html, making sure to deselect all filter choices. Better! But we should give the user a visual aid to show they are now seeing All photos once more.
Switch back to your code editor.
-
Add the following bold code to the noFilterSelection() function:
function noFilterSelection() {
   if(selectedArray == 0) {
      for(var i = 0; i < imageContainers.length; i++) {
         imageContainers[i].style.display = 'inline-block';
      }
      allButton.setAttribute('data-selected', 'yes');
   }
}
Save the file.
-
Switch back to Chrome and reload index.html. Super!
NOTE: If you want to refer to our final code example, go to Desktop > Class Files > yourname-JavaScript jQuery Class > Done-Files > Photo-Site-Filter.
