Dive into this comprehensive tutorial on iOS development that covers topics such as setting iPad-only code, connecting the master and detail view controllers, and more, and includes exercises for hands-on learning.
This exercise is excerpted from Noble Desktop’s past app development training materials and is compatible with iOS updates through 2021. To learn current skills in web development, check out our coding bootcamps in NYC and live online.
Topics Covered in This IOS Development Tutorial:
Setting IPad-only Code, Connecting the Master & Detail View Controllers, Getting the Detail View to Appear in Split View on Load, Setting an Initial Detail View
Exercise Preview
Exercise Overview
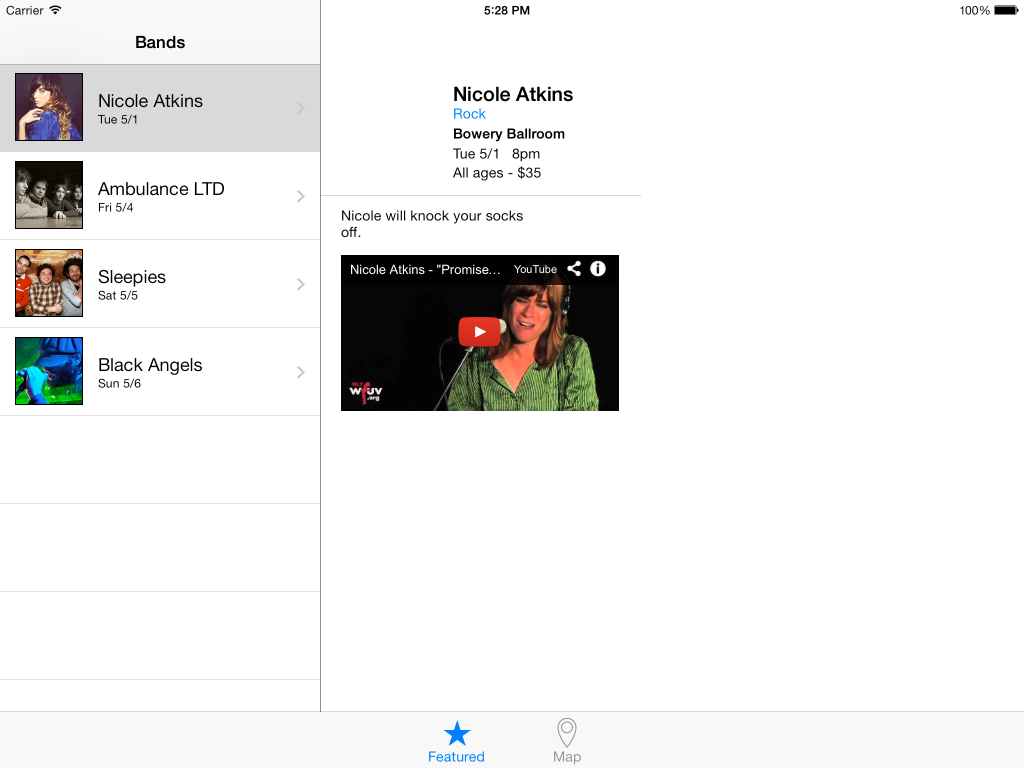
In the previous exercise we created a Split View Controller, but it’s not finished. When you tap on a band, the appropriate details should be displayed on the right. In this exercise, you’ll learn how to program that functionality.

Getting Started
-
If you completed the previous exercise you can skip the following sidebar. We recommend you finish the previous exercises (B1–B2) before starting this one.
If you completed the previous exercise, Jive Factory.xcworkspace should still be open. If you closed it, re-open it (from yourname-iOS Dev Level 2 Class > Jive Factory).
If You Did Not Complete the Previous Exercises (B1–B2)
- Close any files you may have open and switch to the Desktop.
- Navigate to Class Files > yourname-iOS Dev Level 2 Class.
- Duplicate the Jive Factory Ready for Split View Programming folder.
- Rename the folder to Jive Factory.
- Open Jive Factory > Jive Factory.xcworkspace.
Setting IPad Only Code
- In the Project navigator, click on BandsTableViewController.swift.
-
Find the code for the prepare method.
If you remember from a previous exercise, the prepare method is called when we segue from the Table View Controller to the Bands Detail View Controller. We use this method to pass along the information for each band to the Table View Controller. The segue was also responsible for displaying the Detail View Controller. We don’t have this segue in our iPad storyboard, so this method is never called. We need to find another way to display the Detail View Controller and pass along the details for each band.
-
Below the MARK:—Navigation comment, add the following method:
// MARK:—Navigation

override func tableView(_ tableView: UITableView, didSelectRowAt indexPath: IndexPath) {

}

// In a storyboard-based application, you will often want to do a little preparation
Notice that we added override before the keyword func in our code.
This method is called when a user taps on one of the band rows in the Table View Controller, and will be perfect for passing along the band detail information. However, one important thing to be aware of is that this code is being used for both the iPhone and iPad versions of the app. The iPhone app is currently fine using just the segue. We need to add some code so that the code in this method will only be executed if the user is using an iPad.
-
Add the following bold code to check to see if the user is using an iPad rather than an iPhone:
override func tableView(_ tableView: UITableView, didSelectRowAt indexPath: IndexPath) {
   if (UIDevice.current.model.range(of: "iPad")!= nil) {

   }
}
Now we have a place to pass along the band detail info for the iPad, but we still need to pass that info to the Bands Detail View Controller in the SplitViewController. Right now, only the SplitViewController has references to both the Master View Controller (BandsTableViewController) and Detail View Controller (BandsDetailViewController). We need to be able to reference the Detail View Controller from the Master View Controller in the code.
To do that, we will create a property in the BandsTableViewController class (Master) that will reference the BandsDetailViewController (Detail). We’ll then assign the BandsDetailViewController (Detail) reference in a SplitViewController class (which we’ll create shortly) and set the property on the BandsTableViewController (Master).
-
Scroll up to the top of the file. At the top of the class, add the following bold code:
let bandsModel = BandsModel()
var detailViewController: BandsDetailViewController!

override func viewDidLoad() {
Connecting the Master & Detail View Controllers
Now that we have a property we can use to reference the BandsDetailViewController, we need to get into the code of the SplitViewController and assign its Detail View Controller reference to our new property. To do that we need to create a class and assign it to the existing Split View Controller on the storyboard.
- In the Project navigator, select MapViewController.swift (so the new file will be created after it).
- Hit Cmd–N to create a new file.
- Under iOS and Source, double–click on Cocoa Touch Class to choose it.
- From the Subclass of menu, choose UISplitViewController (or start typing it and let Xcode autocomplete it for you).
- Edit the name of the Class to be: MySplitViewController
- Make sure Also create XIB file is NOT checked.
- Make sure Language is set to Swift.
- Click Next.
- You should already be in the Jive Factory folder, so click Create.
- In the Project navigator, notice MySplitViewController.swift has been added.
- In the Project navigator, click on Main_iPad.storyboard.
- Click on a blank area of the Editor so nothing is selected.
- Select the Split View Controller so that it’s outlined in blue.
- In the Utilities area, click on the Identity inspector tab
 .
. - Next to Class, type M and it should autocomplete to MySplitViewController. Hit Return to apply it. Now it’s connected to the new class.
- In the Project navigator, click on MySplitViewController.swift.
- Find the viewDidLoad method.
- To save you some typing, we’ve already written the code that sets the views in the split view. Go to File > Open.
- Navigate to the Desktop > Class Files > yourname-iOS Dev Level 2 Class > Code Snippets and open the file splitViewConnectMasterDetail.txt.
- Press Cmd–A to select all the code.
- Press Cmd–C to copy all the code.
Close the file.
-
Paste the code over the comment in the viewDidLoad method:
override func viewDidLoad() {
   super.viewDidLoad()

   let leftNavController = self.viewControllers.first as! UINavigationController
   let masterViewController = leftNavController.topViewController as! BandsTableViewController
   let detailViewController = self.viewControllers.last as! BandsDetailViewController
   masterViewController.detailViewController = detailViewController
}
This creates a property called detailViewController on our masterViewController so we can set the current band when a row is tapped. It asks the masterViewController to assign the view controller on the right to its detailViewController property. That way we can tell the detailViewController which band to display after a tap.


The navigation controller has a stack of view controllers which is stored in an array. The third line of code returns the BandsDetailViewController, as it is the last object stored in that array (the last method grabs the last index of an array).

Now that we’re connected to both the Master and the Detail View Controllers in the Split View Controller, let’s start working on passing along the band detail info.
- Hit Cmd–S to save.
In the Project navigator, click on BandsTableViewController.swift.
-
Scroll to the Navigation MARK and find the following code statement that checks if a user is on an iPad:
if (UIDevice.current.model.range(of: "iPad")!= nil) { -
We need to set the currentBandDetail object in the detailViewController (in the Split View Controller) to the object at that position in the bandDetails mutable array. If you remember, bandDetails holds the four objects with all the info for the four bands. Add the following bold code:
if (UIDevice.current.model.range(of: "iPad")!= nil) {
   let bandDetail = bandsModel.bandDetails[indexPath.row]
}
Getting the Detail View to Appear in Split View on Load
There is some other code that worked for us on iPhone, which we now need to change to work on iPad.
In the Project navigator, click on BandsDetailViewController.swift.
-
Find the viewDidLoad method that’s currently commented out.
The view is currently being updated in the viewDidLoad method of the Bands Detail View Controller. It takes all the values from the currentBandDetail and sets them on the appropriate outlet for the view. This worked before for iPhone because each time a row was selected, it used a segue, which created a new view controller. Therefore, the viewDidLoad was called and it changed the labels.
Right now, in the iPad design, we’re using a Split View Controller, which only creates the Master and Detail View Controllers once. We’re setting a new currentBandDetail each time a row is selected, and we need the view updated every time that happens, not just when the Band Detail View Controller is created.
In order to do this, we need to move the code from the viewDidLoad method (that sets the band detail info) into a new method we can call anytime.
-
Select the following code within the viewDidLoad method shown below:
//        bandNameLabel.text = currentBandDetail?.bandName
//        bandTypeLabel.text = currentBandDetail?.bandType
//        venueLabel.text = currentBandDetail?.venue
//        showDateLabel.text = currentBandDetail?.nextShowDate
//        showTimeLabel.text = currentBandDetail?.nextShowTime
//        showDetailsLabel.text = currentBandDetail?.showDetails
//        bandDescriptionLabel.text = currentBandDetail?.bandDescription
//        bandImage.image = UIImage(named: currentBandDetail!.fullImageName!)
//
//        let htmlString = "<html><body><iframe style=\"position:absolute; top:0; left:0; width:100%; height:100%;\" src=\"\(currentBandDetail!.videoURL!)\" allowfullscreen></iframe></body></html>"
//
//        videoWebView.loadHTMLString(htmlString, baseURL: nil)
Uncomment the lines by hitting Cmd–/.
With the lines still selected, hit Cmd–X to cut them.
-
Below the viewDidLoad method, create a new method by adding the following code. It should start after the ending } of the viewDidLoad method.
func refreshView() { } -
Paste the code into this new method:
func refreshView() { bandNameLabel.text = currentBandDetail?.bandName bandTypeLabel.text = currentBandDetail?.bandType venueLabel.text = currentBandDetail?.venue showDateLabel.text = currentBandDetail?.nextShowDate showTimeLabel.text = currentBandDetail?.nextShowTime showDetailsLabel.text = currentBandDetail?.showDetails bandDescriptionLabel.text = currentBandDetail?.bandDescription bandImage.image = UIImage(named: currentBandDetail!.fullImageName!) let htmlString = "<html><body><iframe style=\"position:absolute; top:0; left:0; width:100%; height:100%;\" src=\"\(currentBandDetail!.videoURL!)\" allowfullscreen></iframe></body></html>" videoWebView.loadHTMLString(htmlString, baseURL: nil) } -
For the iPhone app we still need to run this code inside the viewDidLoad method. Add the following bold code to the viewDidLoad method:
override func viewDidLoad() { super.viewDidLoad() if (UIDevice.current.model.range(of: "iPad") == nil) { self.refreshView() } } - Hit Cmd–S to save.
- In the Project navigator, click on BandsTableViewController.swift.
We want this method to run when a user taps a band row on the iPad. Find the if statement that checks to see if a user is using an iPad (in the Navigation MARK section).
-
Add the following bold code:
if (UIDevice.current.model.range(of: "iPad")!= nil) {
   let bandDetail = bandsModel.bandDetails[indexPath.row]
   detailViewController.currentBandDetail = bandDetail
   detailViewController.refreshView()
}
Click the Run button.
Click on a couple of the band rows and their info should now load on the right!
Setting an Initial Detail View
You may not have noticed, but when we entered the Split View Controller for the first time (when the app first loaded), none of the rows were automatically selected. Because of this, the detail view on the right only shows the placeholder info. It would be better if one of the bands was selected by default and its details were displayed on the right. We’ll start with the first row.
-
Switch back to Xcode.
In the viewDidLoad method where we get our response from our model, we will set up the display so it defaults to having the top table cell selected and gives our details controller the appropriate data.
- To do this we will paste in some new code, which we have been conveniently provided. Go to File > Open.
- Navigate to the Desktop > Class Files > yourname-iOS Dev Level 2 Class > Code Snippets and open the file setInitialRow.txt.
- Press Cmd–A to select all the code.
- Press Cmd–C to copy all the code.
- Close the file.
-
Back in BandsTableViewController.swift, paste the code as shown in bold:
if let strongSelf = self { loader.stopAnimating() strongSelf.tableView.reloadData() let indexPath = IndexPath(row: 0, section: 0) if (UIDevice.current.model.range(of: "iPad")!= nil) { strongSelf.tableView.selectRow(at: indexPath, animated: false, scrollPosition: UITableViewScrollPosition(rawValue: 0)!) let bandDetail = strongSelf.bandsModel.bandDetails[indexPath.row] strongSelf.detailViewController.currentBandDetail = bandDetail strongSelf.detailViewController.refreshView() } } -
Click the Run button.
Cool, the first row is automatically selected!
- Click on some of the other band rows to see the info updates accordingly. We’re almost done! (We’ll further refine the layout in the next exercise.)
- Switch back to Xcode.
- Click the Stop button.
Leave the project open, we’ll continue working on it in the next exercise.