Explore our comprehensive InDesign tutorial which covers diverse topics including creating a bio section for authors, establishing a library for easy reuse, and making detailed modifications using a variety of guides and tools.
This exercise is excerpted from Noble Desktop’s past Adobe InDesign training materials and is compatible with InDesign updates through 2020. To learn current skills in InDesign, check out our InDesign Bootcamp and graphic design classes in NYC and live online.
Topics Covered in This InDesign Tutorial:
Libraries
Exercise Preview
Exercise Overview
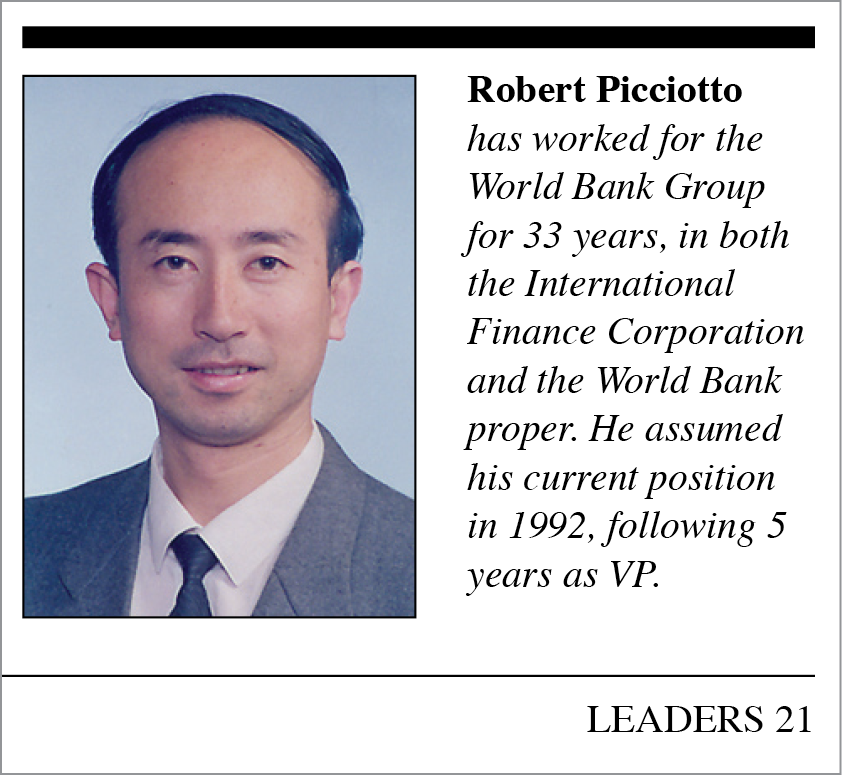
We want a section at the end of the articles in Leaders Magazine for info about the author. It will consist of a picture and text frame. A line above will separate it visually from the article text. Since the bio section occurs throughout the magazine, we will add it to a library for easy reuse.

- If you closed the file from the last exercise, re-open yourname-leaders.indd.
Making the Author’s Bio Section
Go to page 21.
-
To ensure that the bio section lines up with the bottom of the article text, we need a guide to make later positioning easier. Zoom in towards the bottom of the right-hand page (page 21).
Make sure you can see a bit of both pages as well as some of the pasteboard (empty space) off the right edge of the page.
From the top ruler, drag out a guide into the pasteboard to the right of the page. Line it up with the bottom of the bottommost line of text—you know it’s working if the guide goes across the spread instead of just the one page.
-
Once you drop it, the guide will still be selected. In the Control panel, the Y field should say about 67p4.
If not, change it to 67p4 and press Return (Mac) or Enter (Windows).
Thinking ahead to the future, we’ll want this guide on all 3-column full pages. That means it should really be on the master page, not just here on page 21. Click on the guide to make sure it’s still selected.
Go to Edit > Cut.
In the Pages panel, go to the B-3 Col Full Page master by double–clicking its name.
Choose Edit > Paste. (Pasted guides always retain the original position.)
Go back to page 21 by choosing Layout > Go Back (Command–Page Up (Mac) or CTRL–Page Up (Windows)).
On the right-hand page, at the bottom of the third column, use the Rectangle Frame tool
 to make a frame that is 7p6 wide by 10p4 tall.
-
In the Control panel, set the stroke weight to 0.5 pt, as shown below.
Move the frame to the bottom left of the third column, so the bottom of the frame snaps to the light blue guide (NOT the pink guide). The bottom of the frame should line up with the bottom (baseline) of the text on its left.
Use the Rectangle Frame tool
to make a frame to the right of the picture frame.Make it 6p7 wide by 10p4 tall.
Move it to the bottom right of that third column so it snaps to the light blue guide.
Select the Line tool
 .
.Above the frames you just made, hold Shift and draw a line the width of the column.
In the Control panel, click the middle left reference point
 .
.-
Set the following:
X: 36p L: 15p Y: 56p4 -
Make the stroke 5 pt.
Text may be running down into this section, so we need a text wrap to prevent this. (Even if it’s not the case now, it may be later.) Select the line you just drew.
Go into Window > Text Wrap.
At the top of the panel, click the Jump to next column button
 .
.Let’s group the line and two rectangles together so we can move them easily. With the Selection tool
 , click on one of the objects, then Shift–click the other two. (Be sure you don’t accidentally select the main body text frame. If you do, Shift–click the frame again to deselect it.)
Go to Object > Group.
Creating a Library & Adding Something to It
Let’s add this bio section to a library so we can reuse it later.
-
We’ll create a new library for this, so go into File > New > Library.
NOTE: If you see an alert about trying out CC Libraries, click Don’t show again, then click No.
Navigate into the InDesign Class folder, then into the Leaders Magazine folder. Name it yourname-leaders-library.indl.
A new, empty Library panel will appear on the screen. Drag the grouped bio section into that Library panel and let go of the mouse.
It should appear as an icon in the Library panel. Double–click it and name it author bio.
Just to see how the library works, delete the author bio section on the page.
From the Library panel, drag the author bio onto the page and snap it into place at the bottom of the column, aligning its bottom edge with the light blue guide. That’s all there is to using a library!
Move the Library panel to the side so it’s out of the way. You may use it again later.
Adding Content to This Article’s Author Bio
We need to add a picture and some text about this article’s author. Make sure nothing is selected by choosing Edit > Deselect All.
Go to File > Place and from the Leaders Magazine folder, choose bioPicture-picciotto.tif.
Click on the author’s picture frame (the left frame).
Using the Selection tool
, mouse over the picture and click on the circle that appears. A brown bounding box appears indicating the picture is selected (as opposed to the blue frame it’s inside).- Use one or more of the following methods to resize the picture to fill out the frame:
- Go to Object > Fitting > Fill Frame Proportionally.
- Hold Shift and drag one of the brown resize handles.
- Use the following keystrokes:
To make the image bigger by 5% increments: Cmd–Opt–> (Mac) or CTRL–ALT–> (Windows) (for 1%, don’t use Opt or ALT)
To make the image smaller by 5% increments: Cmd–Opt–< (Mac) or CTRL–ALT–< (Windows) (for 1%, don’t use Opt or ALT)
Make sure nothing is selected by choosing Edit > Deselect All.
Go to File > Place and from the Leaders Magazine folder, choose bio-picciotto.txt.
Click on the text frame to the right of the image so the text flows into it.
Styling the Author Text
With the Type tool
 , click anywhere in the bio text you just placed and look in the Paragraph Styles panel.
It’s possible the text will have the style body text, since that was the last style we used. If that’s the case, click on [Basic Paragraph] to reset it back to the default text style.
With the type cursor in the bio text, do an Edit > Select All.
Make the text 10/11 Minion Pro Italic.
Put the type cursor to the right of the author’s name, Robert Picciotto.
Press Return (Mac) or Enter (Windows).
If there is a space at the beginning of the second line, delete the space.
Select the name (Robert Picciotto) and make it Minion Pro Bold.
Let’s save these settings as styles. With the name still selected, go into the Paragraph Styles panel menu
 and choose New Paragraph Style.
Name it author name and make sure the box Apply Style to Selection is checked.
Click OK.
Click anywhere in the paragraph under the name.
Go into the Paragraph Styles panel menu
and choose New Paragraph Style.Name it author bio and click OK.
-
We haven’t saved in a while, so save now.
NOTE: Libraries are automatically saved.
Using a Library to Add the “Section Heading” Artwork
Make sure you can see the top of the left page.
This article is a world leadership issues article. We made section heading graphics and put them all in one convenient library. Go to File > Open. In the InDesign Class folder, go into the Leaders Magazine folder and choose Leaders-Library.indl.
A new Library panel will open, but the small icons are hard to see and the labels below are too long to fully read. From the panel menu
, choose List View.Drag world leadership issues from the library onto the top of the left page, snapping it into position with the topmost light blue guide.
- That should be all you need to do. But since this library wasn’t created on your computer, the graphic may be grayed out. That’s because InDesign isn’t properly finding the linked graphic. If it looks fine, continue to the next step. If it’s grayed out, we need to tell InDesign where the graphic is, so it can display it:
- With the graphic frame still selected, open the Links panel (Window > Links).
- The graphic’s filename should already be highlighted, so at the bottom of the panel, click the Relink button
 .
. - If prompted to find the file, go in the InDesign Class folder, then into the Leaders Magazine folder. Choose header-worldLeadershipIssues.eps and click Open.
- In the Links panel, to the right of the header-worldLeadershipIssues.eps, there will probably be a modified icon
 . If so, at the bottom of the Links panel, click the Update Link button
  .
.
NOTE: Library items created and used on the same computer shouldn’t have this issue.
Leave the Library panel open since we may use it later.
Adding Color to the Rules
Each section heading graphic at the top of an article’s first page (World Leadership Issues, Interview, etc.) has a different color rule. To make that rule visually “extend” across each article, we’ll create that color and apply it to the rule on the second page.
Make sure nothing is selected (Edit > Deselect All).
Open the Swatches panel (Window > Color > Swatches).
- From the Swatches panel menu , choose New Color Swatch and:
- Set the color to C:20, M:100, Y:50, and K:0.
- Uncheck Name with Color Value.
- Name it World Leadership Issues.
- Make sure Add to CC Library is unchecked if shown.
- Click OK.
Make sure you can see the black rule at the top of the right-hand page (page 21).
Choose the Selection tool
.The top rule was added through the master page, so to alter it only here on this page, we must unlock it from the master. Hold Cmd–Shift (Mac) or CTRL–Shift (Windows) and click on the rule.
-
With the rule selected, at the top left of the Swatches panel, make sure the Stroke swatch is in front (active). If it’s not, click it to make it active.

Click on the World Leadership Issues color swatch to apply it.
Zoom in and notice that the rule you just colored doesn’t quite match the header graphic.
Go to Edit > Deselect All to make sure there are no blue outlines on the colored rule.
If your preview is pixelated, go into View > Display Performance > High Quality Display. If the preview still doesn’t improve, the link to the image file probably needs updating. Go into the Links panel menu
and choose Update Link.Save the document since you’ll continue to use it in the next exercise.
Bonus If You Have Extra Time: Finishing the Second Article
If you did the bonus section at the end of the previous exercise and have created a second article, you can add the same finishing touches to that second article.
- Add an author bio section at the end of the second article using the following:
- The library item you created
- The picture bioPicture-palmer.tif
- The text file bio-palmer.txt
Style the author bio text.
Add the interview library item to the top of the second article’s first page.
Relink the graphic so the preview shows up properly, if needed.
Make a color swatch that is M:100 and Y:100 (name it Interview).
Apply the Interview color swatch to the rule at the top of the full page of text. (You’ll have to Cmd–Shift (Mac) or CTRL–Shift (Windows) click it to do that.)
