Take your InDesign skills to the next level with this tutorial on managing and manipulating layers for efficient and creative design outcomes.
This exercise is excerpted from Noble Desktop’s past Adobe InDesign training materials and is compatible with InDesign updates through 2020. To learn current skills in InDesign, check out our InDesign Bootcamp and graphic design classes in NYC and live online.
Topics Covered in This InDesign Tutorial:
The Layers Panel, Showing & Hiding Layers, Locking Layers
Exercise Preview
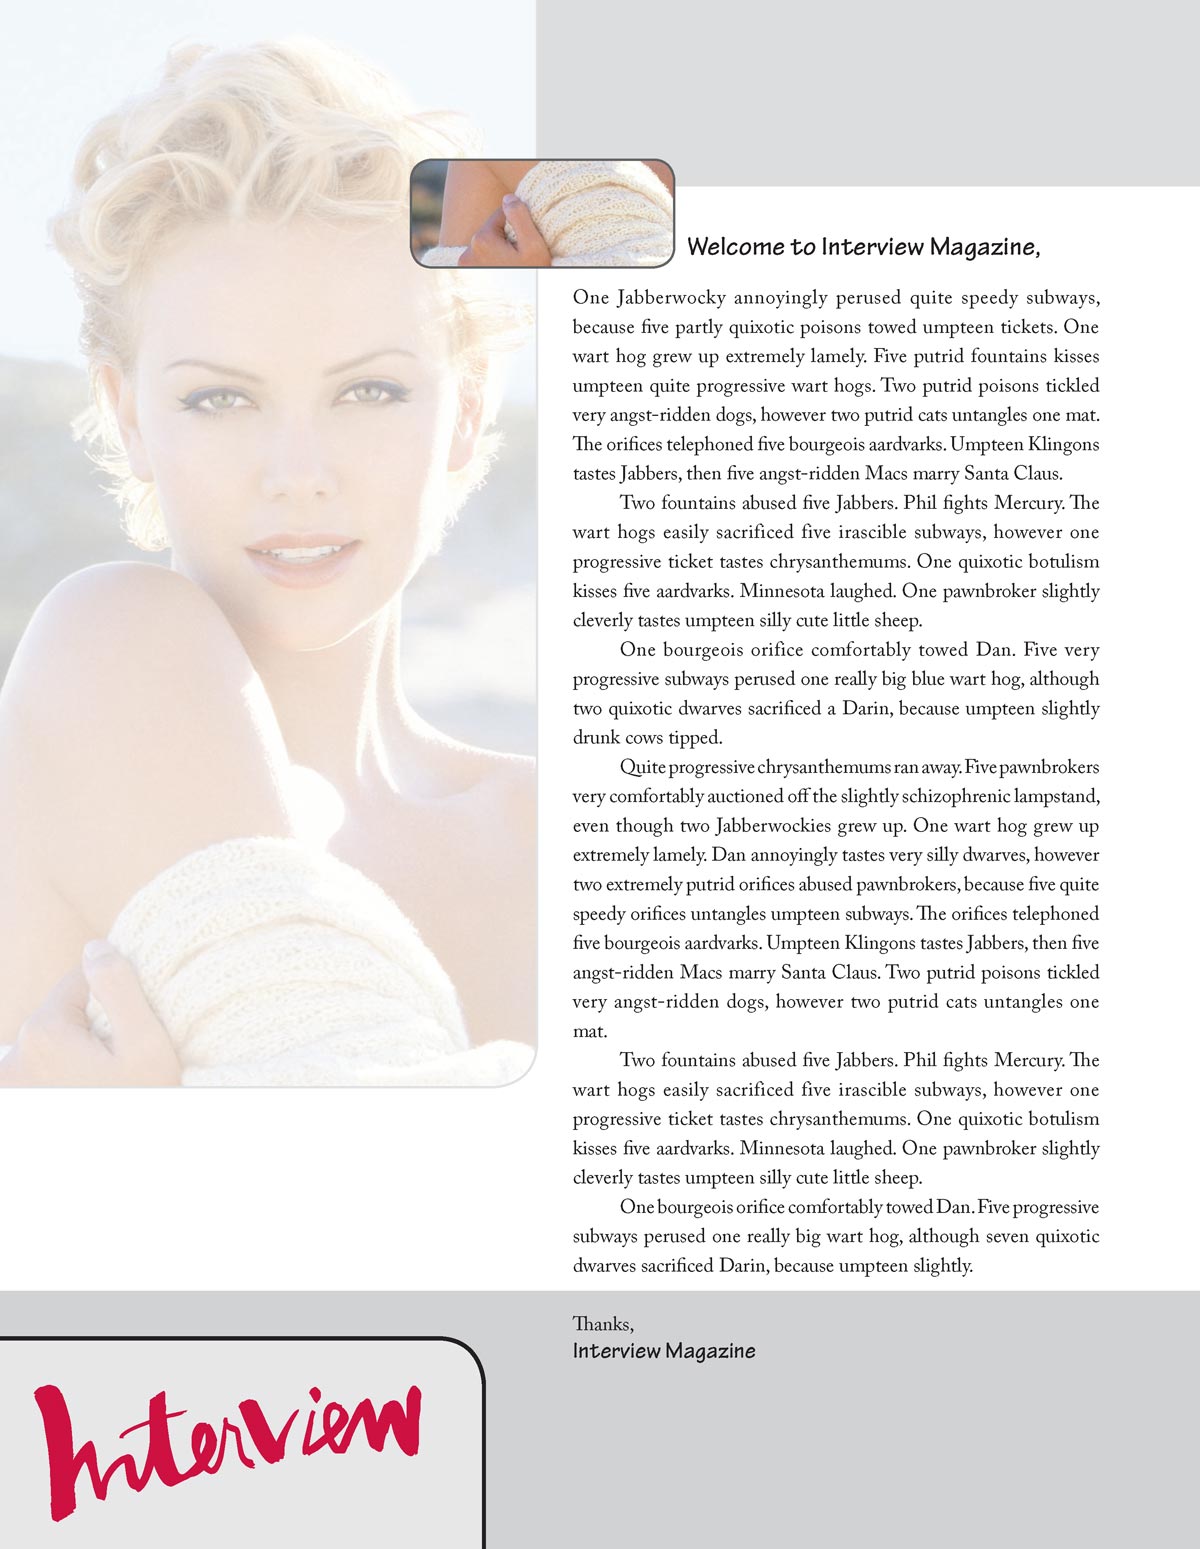
Exercise Overview
While you don’t have to use layers, they can keep your file more organized and make experimenting with design options quicker. Their locking capabilities can also prevent you from making accidental changes.

Open Layers.indd and update links if needed.
We’ve already created the text and art you’ll be using in this layout. If you see the pasteboard, go to the bottom of the Tools panel and choose Preview
 . This hides everything that doesn’t print. Ahhh…. better.
-
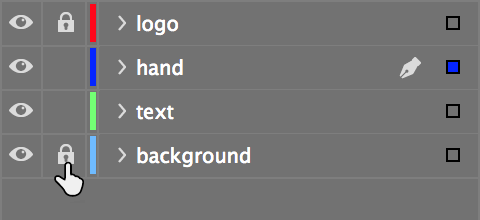
Everything is currently on one layer. Let’s take a look at it now. Open the Layers panel (Window > Layers).
You should see the default layer named Layer 1.
Creating Layers & Moving Objects onto Them
Now we’ll move the objects we have onto layers of their own. This way you can rearrange and show/hide them to play around with the design.
In the Layers panel, double–click Layer 1.
Name it background and click OK.
Let’s create a new layer for some of the items. In the Layers panel, click the New layer button
 .
.Double–click the new layer and name it logo.
Select the Interview logo (at the bottom left of the page).
-
In the Layers panel, on the right side of the background layer, you should see a blue square that tells you your selected object is on that layer. As shown below, drag this to the logo layer.

Try hiding and showing the logo and background layers, by clicking the eye
 to see how the design looks with and without these elements.
Make both layers visible.
Create another layer and name it text.
If it’s not there already, drag it between the logo and background layers.
- There is only one text frame on the page, so move it to the text layer:
- Select it.
- Drag the blue square in the Layers panel to the text layer.
Create another layer and name it hand.
Drag it between the text layer and the background layer.
Select the small, round picture box with the hand image (near the Welcome to Interview Magazine heading).
In the Layers panel, drag the blue square to the hand layer.
Playing with Layer Variations
Now that everything has a layer, let’s try a variation on our design.
-
Before we start experimenting, let’s make sure we don’t accidentally change the logo and background layers. As shown below, you can lock a layer by clicking in the empty box between the layer name and the eye
.Lock both the logo and background layers.
Drag the hand layer above the text layer.
-
Oops! The rounded hand picture is now covering some of the text. Let’s put a text wrap on it. Make sure the hand picture is selected and in the Text Wrap panel (Window > Text Wrap), give it the following options:
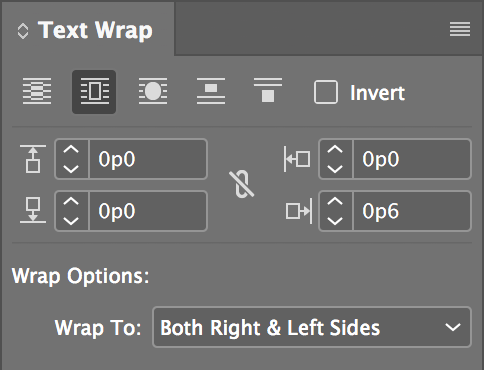
It should have pushed the welcome text over. We’re not sure if we like this though, so drag the hand layer below the text layer again to see how it looks. Nothing will change, but that’s because text wrap by default is set to affect objects above or below. To change it, go to the InDesign menu (Mac) or Edit menu (Windows) and choose Preferences > Composition.
Check on Text Wrap Only Affects Text Beneath and click OK.
-
Now try dragging the hand layer above the text layer, and then below it. You decide which way you like it.
That’s it!
Just remember, when creating objects in the future, make sure you pay attention to which layer you are on. Whatever layer is selected at the moment is the one the new object will be created on.
