Dive into this comprehensive Illustrator tutorial that covers topics such as 3D Extrude & Bevel, creating symbols from artwork, mapping symbols onto 3D objects, and creating lighting and shadows for 3D objects.
This exercise is excerpted from Noble Desktop’s past Adobe Illustrator training materials and is compatible with Illustrator updates through 2020. To learn current skills in Illustrator, check out our Illustrator Bootcamp and graphic design classes in NYC and live online.
Topics covered in this Illustrator tutorial:
3D Extrude & Bevel, Creating symbols from artwork, Mapping symbols onto 3D objects, Lighting & shadows for 3D objects
Exercise Preview
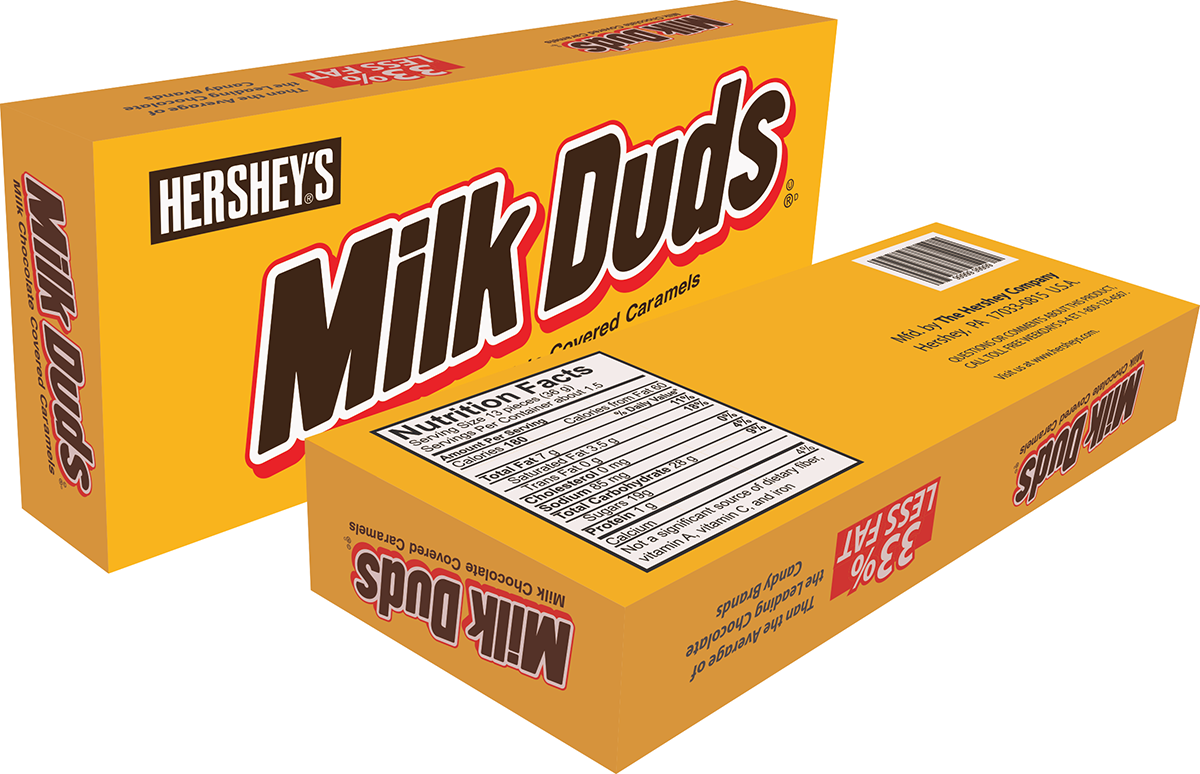
Exercise Overview
You won’t be an Illustrator dud once you finish this exercise. We’ll show you how to edit and create realistic 3D shapes from flat art. Sweet!

In the Illustrator Class folder, open the file MilkDuds.ai.
Go into File > Document Setup.
Make sure Units are set to Inches.
Click OK.
Select File > Save As and name it yourname-MilkDuds.ai.
Converting to Symbols
All the artwork for the product box has already been created, but it needs to be converted to symbols for the 3D box effect.
Select the front cover of the Milk Duds box artwork (the large panel in the center).
At the bottom of the Properties panel in the Quick Actions section, click the Save as Symbol button.
Name it front and click OK. The artwork has been converted into a symbol.
Open the Symbols panel (Window > Symbols) to see that a thumbnail of this art also appears in the Symbols panel.
-
Select the top panel (the one above the front panel you just selected).
This artwork will be the same for both the top and bottom, so we can make one symbol and reuse it for both.
This time, press F8 (or fn–F8 depending on your keyboard settings) as a shortcut to create a New Symbol.
Name it top-bottom and click OK to add this symbol to the Symbols panel.
- Do the same for the left side and nutrition info side:
- Select the artwork.
- Press F8 to create a New Symbol.
- Name the left side: left-right
- Name the nutrition info side: back
We’ve converted all the artwork needed to make the box, so we don’t need it anymore. Select all by pressing Cmd–A (Mac) or Ctrl–A (Windows).
Press Delete to delete everything.
Making the Box
Select the Rectangle tool
 .
.-
Hold Option (Mac) or Alt (Windows), click once in the middle of the document, then enter the following:
Width: 6.5 in Height: 2.5 in Click OK.
In the Properties panel, fill it with the yellow swatch named Box Color, and make sure no stroke is applied.
-
With the rectangle selected, go to Effect > 3D > Extrude & Bevel and set the following, BUT don’t click OK until we say!
- Check on Preview (at the bottom).
- Extrude Depth: Type in 1 in (the width of the box sides)
- Rotation around the X axis
 : −24°
- Rotation around the Y axis
 : −41°
- Rotation around the Z axis
 : 14°
: 14°
- Perspective: 80°
- Move the 3D Extrude & Bevel Options window so that you can see the entire box on the artboard behind the window.
- Click the Map Art button.
- Move the Map Art window so that you can see the entire box on the artboard.
- From the Symbol menu, choose front.
- The front symbol has been mapped onto the surface outlined in red.
-
Click the Next Surface button as shown below:

- Notice that Illustrator has now outlined the back surface in red.
- From the Symbol menu, choose back.
- Click the Next Surface button.
-
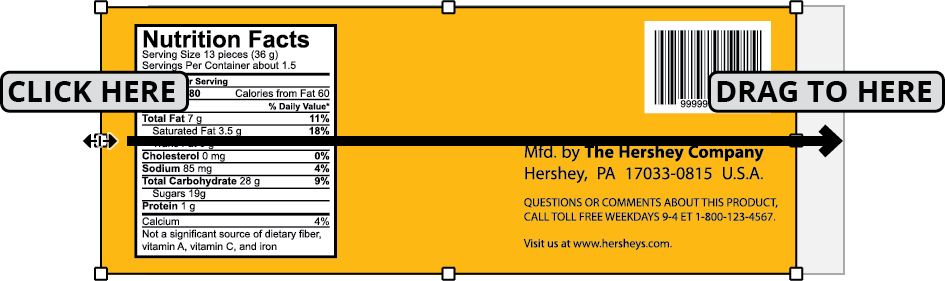
From the Symbol menu, choose left-right.
We want the symbol to be displayed upright, but the 3D box face it needs to fit onto (represented by the gray rectangle) is shown sideways in Illustrator’s preview. Currently, only the part of the symbol that covers the face will be displayed, which isn’t what we want. We need to rotate the symbol so it covers the entire face.
Click and drag the symbol down until you can see the white bounding box handles in the top corners.
Move the cursor over the upper left bounding box handle (a small white square) so that you can see the rotation icon
 .
.Hold Shift and click and drag it clockwise to rotate it 90°. It will be upside down.
Click and drag to reposition the symbol until it covers the entire gray rectangle.
Click the Next Surface button.
-
Continue mapping symbols onto the remaining three sides:
Surface 4: top-bottom (leave it upside down) Surface 5: left-right (it will need the same 90° rotation) Surface 6: top-bottom (leave it upside down) Now that the artwork is all mapped on, at the bottom of the window, check Shade Artwork.
Click OK to return to the 3D Extrude & Bevel Options window.
Light Settings
It’s looking good, but the box is too dark. We need to change the lighting options. If you don’t see the lighting options at the bottom, press More Options.
-
Do not click OK until we tell you to. Drag the light direction on the ball to match the one shown in the image below (and set the other options as well).
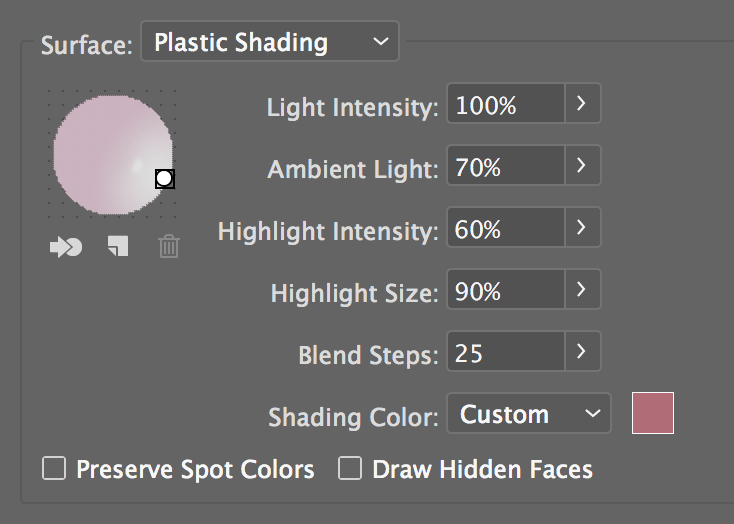
After setting all the options shown above, make sure Shading Color is set to Custom and click the color box that appears to the right of Custom.
In the Color Picker window, click Color Swatches.
Choose the Shadow Color swatch and click OK.
Click OK once more.
Double Time
Choose the Selection tool
 .
.With the box selected, hold Option (Mac) or Alt (Windows) and drag it to the right to create a copy.
With the new box selected, go into the Properties panel’s Appearance section. Next to the Effect icon
 , click the 3D Extrude & Bevel (Mapped) effect.
-
Change the following (do NOT click OK until we say!):
- Check on Preview (at the bottom).
- Rotation around the X axis : 129°
- Rotation around the Y axis : 48°
- Rotation around the Z axis : –155°
Oh no! Illustrator has placed the back artwork facing inwards. This happens sometimes. Click Map Art.
Click Next Surface to highlight Surface 2.
Click and drag the symbol slightly to the left, but make sure you can still see the left bounding box handle.
-
Click and drag the left center handle across the right side until it lines up with the right side of the gray box.
-
Click and drag the new left center handle to the left until it lines up with the left side of the gray box. The graphic will now be reversed.
NOTE: The graphics have been designed to perfectly fit this box size, so we know that it hasn’t been scaled out of proportion when it fills the entire gray box.
Click OK.
If you think the shading looks off, adjust the light settings to your delight.
Click OK again.
Move the right box closer to the left one. Congratulations, you’re ready for this summer’s blockbuster!
Select File > Save and close the file.
