Learn how to optimize and export HTML images in different formats such as GIF, PNG, or JPEG in our comprehensive tutorial.
This exercise is excerpted from Noble Desktop’s HTML Email training materials and is compatible with updates through 2021. To continue learning HTML Email with hands-on training, check out our coding bootcamps in NYC and live online.
Topics Covered in This HTML Email Tutorial:
Optimizing Slices As GIF, PNG, or JPEG, Exporting HTML & Images
Exercise Preview
Exercise Overview
Now that we have created and named the slices, we can get them ready for exporting. Each slice will be exported as a separate file, so in this exercise, we’ll learn how to optimize the slices as GIF, PNG, or JPEG. The goal of optimization is to choose the right format and settings so you get the smallest file size possible while maintaining visual quality. Each file type has its own advantages and disadvantages. After optimizing, we will export an HTML file and all the images.

If you finished the previous exercise (B1), yourname-Lunch Menu.psd should still be open. If you closed it, re-open it now. If you didn’t do the previous exercise, from the yourname-HTML Email Class folder, go into the Lunch Menu folder and open Lunch Menu-optimize.psd.
Go to File > Save As and name it: yourname-Lunch Menu-optimize.psd
If you get a warning about maximizing compatibility, just click OK.
Optimizing Slices As GIF, PNG, or JPEG
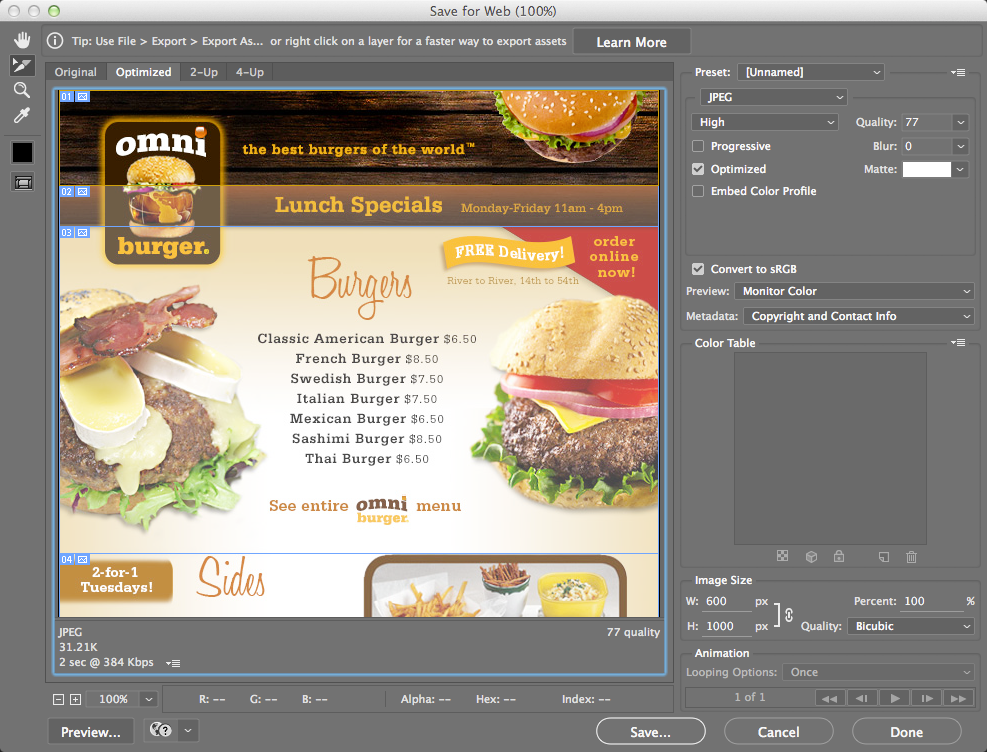
Go to File > Export > Save for Web (Legacy), or in older versions of Photoshop choose File > Save for Web.
At the top of the dialog, make sure that the Optimized tab is chosen. This will show the slices with the current settings applied.
On the left of the dialog, choose the Slice Select tool
 .
.Select the top wood slice.
-
In the settings on the right, from the menu below the Preset menu, choose JPEG.
JPEG is the best choice for graphics with thousands of colors (like photos and sometimes gradients).
In the settings on the right, set Quality to 100.
This is full quality. In the bottom-left corner, take note of the file size for the slice. It should be around 70,000. That’s pretty big.
Lower the Quality to 0.
This is the lowest quality and it looks pretty blurry and awful. In the bottom-left corner, take a look at the file size. It should be around 4,000.
Somewhere in the middle is a compromise between file size and visual quality. Adjust the slider to find a quality that you are happy with. Our recommendation is somewhere between 60 and 70 for this slice.
Select the Lunch Specials slice.
On the right from the menu below the Preset menu, make sure JPEG is selected.
Adjust the Quality slider to find a value that you are happy with.
The rest of the slices in the main body section are all photos, so they will look best as JPEGs. Continue this process for the rest of them, but don’t do the footer yet.
In the footer, select the left slice with the buildings.
-
On the right from the menu below the Preset menu, choose PNG-8.
The PNG-8 format shrinks file size by reducing the total number of colors in an image. PNG-8s may have up to 256 colors, but they generally need fewer than that.
From the Colors setting on the right, choose 16 colors. Clearly that isn’t enough colors for this image.
Set the Colors to 128. Even with 128 colors there is still some noticeable color banding, which means there are abrupt changes between shades of the same color.
Set the Colors to 256. At 256, this image looks nice and clean.
-
From the menu to the left of Colors, choose the Perceptual color palette.
Adaptive, Selective, and Perceptual base their color choices on the actual image. The other options are preset color palettes, and therefore are typically not desirable. We chose Perceptual in this case because it was the smallest file size and visually there was almost no difference between the three options.
The Dither option uses scattered pixels to represent intermediate colors, and often makes gradual blends look smoother, but at the cost of extra file size. In the menu immediately below Perceptual, choose Diffusion. Diffusion won’t add a lot to file size in this case, but will make it look a little nicer.
Comparing GIF to PNG-8
GIF and PNG-8 compressions work almost exactly the same, but PNG is newer. PNG files are often smaller than GIFs, but not always. Since all the settings are the same, we can do a quick test right now to see which is better for this graphic.
- Take note of the PNG’s current file size.
In the settings on the right, change PNG-8 to GIF.
Notice how the GIF is larger? In our experience, a PNG with the same settings as a GIF is typically 5–25% smaller. For regular text, GIF is sometimes smaller, so you should typically do a test and go with whichever format yields a smaller file size.
Change back to PNG-8.
Optimize the other two slices in the footer. They will also look best with PNG-8, but you may be able to get away with fewer than 256 colors, since they don’t use as many colors.
Exporting HTML & Images
Now that all the slices are optimized, we are ready to export. Photoshop can export an HTML file along with all the slices, which will include the URL and ALT text information we put in earlier. It’s not going to be a very flexible file, so any changes to the design will likely have to be done in Photoshop and then re-exported.
In the bottom-right corner, click Save.
Navigate to Class Files > yourname-HTML Email Class > Lunch Menu > lunch-menu-email.
At the bottom, set Format to HTML and Images.
Make sure Slices is set to All Slices.
Name it lunch-menu.html and click Save.
Save the file and close Photoshop.
To preview the email, launch a browser.
Hit Cmd–O (Mac) or CTRL–O (Windows) and navigate to Desktop > Class Files > yourname-HTML Email Class > Lunch Menu > lunch-menu-email.
-
Double–click on lunch-menu.html. Pretty nice!
There are a few modifications you will need to make to the HTML code that Photoshop generated. Most importantly, you’ll need to use absolute URLs for the image paths. You might also want to center the table, set a background color, and style the ALT text for the best results!
