Learn how to add movement and excitement to your designs using smart animate in Figma, with methods for setting up your frames, adding smart animate, and experimenting with different kinds of easing all included in this comprehensive tutorial.
This exercise is excerpted from Noble Desktop’s Figma training materials and is compatible with Figma updates through 2023. To learn current skills in Figma with hands-on training, check out Noble Desktop's Figma Bootcamp, web design classes, and graphic design classes in-person or live online.
Topics Covered in This Figma Tutorial:
The Basics of Smart Animate, Different Kinds of Easing
Exercise Preview
Exercise Overview
In this exercise, you’ll learn how to use smart animate to add movement and excitement to your designs.

Opening the File
-
In Figma, if you’re not on the homescreen (file browser), do the following:
- In the Desktop app: Click the
 Home tab (Mac users can also choose File > Open File Browser).
 - In the Web app: At the top left, click the Main menu button
 and choose Back to files.
- In the Desktop app: Click the
- To open a local file, click
 Import file (may be an icon near the top right).
 -
Navigate into Desktop > Class Files > Figma Class and double–click on Smart Animate.fig to choose it.
Once the file has uploaded, click Done and double–click on the file to open it.
Setting Things up
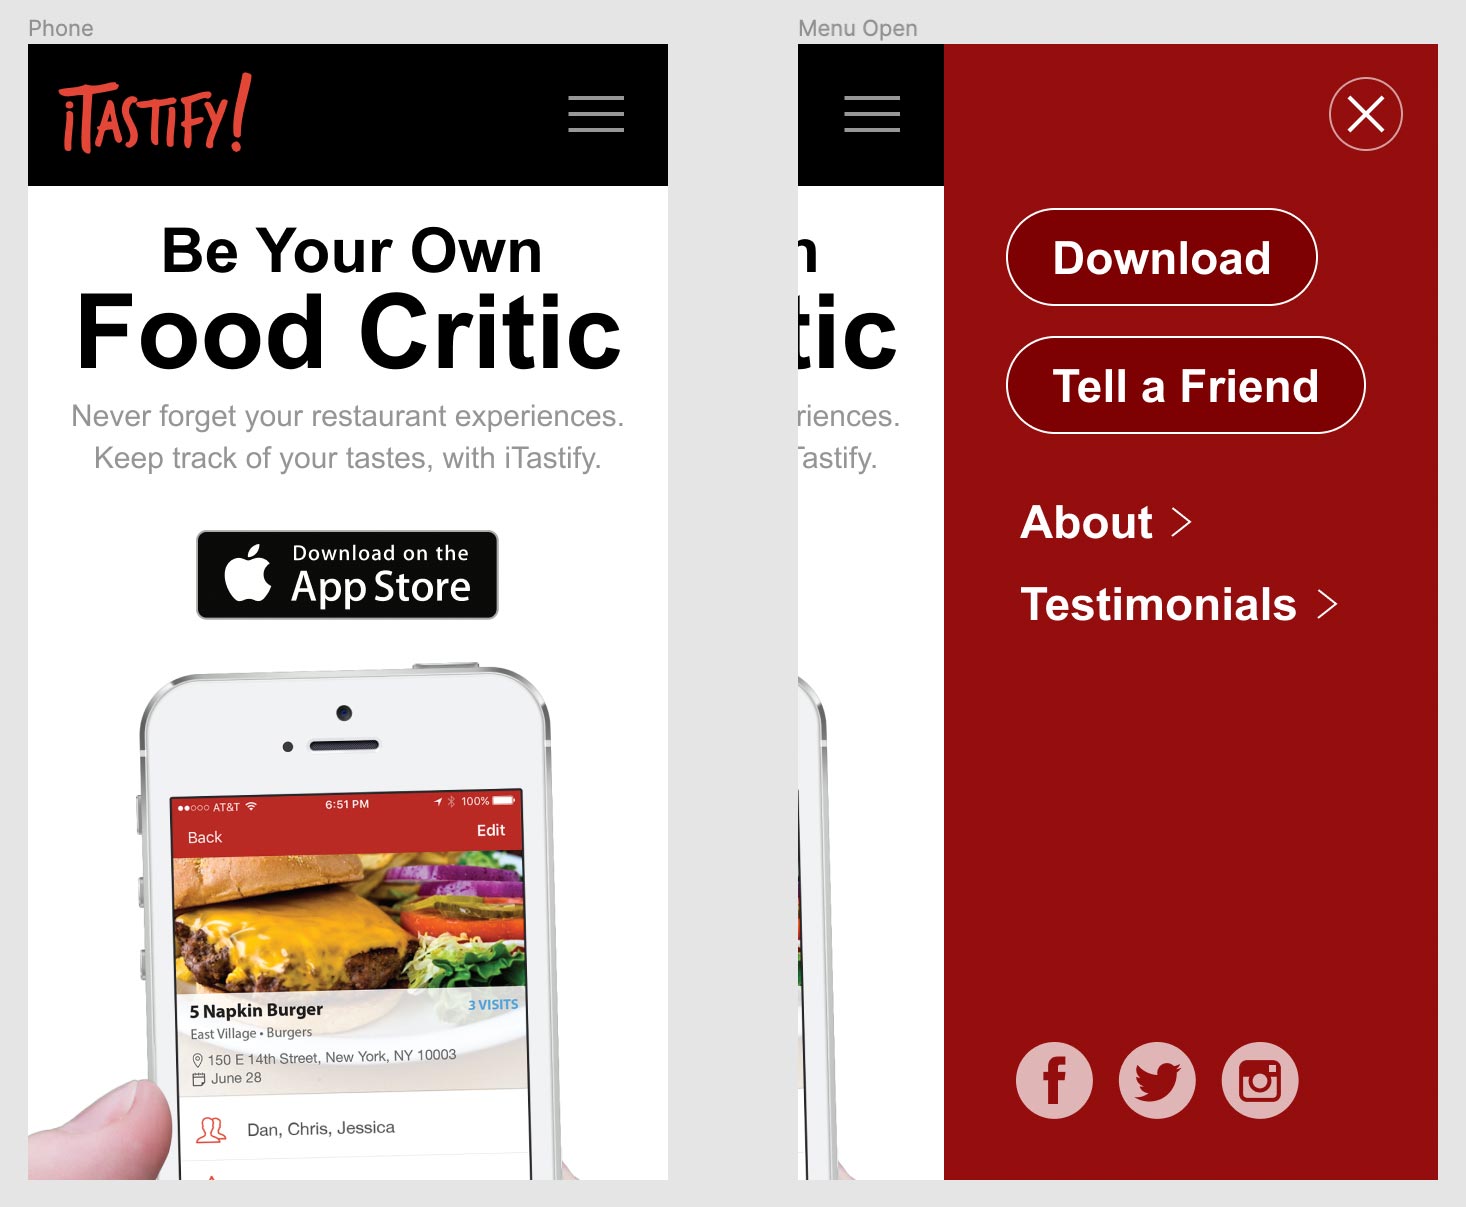
For smart animate to work, we need frames for each visual appearance. We want to make the menu slide in, pushing over the page’s content. We’ll need one frame with the menu hidden, and another with the menu visible (and the page content moved over). The layers that animate but be on both frames, even if they’re hidden.
We’ll start by moving the menu to the right of the page content.
- Click on the red menu to select it.
-
In the Design panel, set X to 320 (because that’s how wide this frame is).
NOTE: We did it this way because when you drag layers, it’s very easy to move them outside of the frame. We must keep the art structurally inside the frame (in the Layers panel), even though we don’t see it (because the frame is set to clip it contents, therefore hiding anything outside the frame boundaries).
- Select the frame by clicking on its name Phone (at the top left of the frame).
- Duplicate it by hitting Cmd–D (Mac) or CTRL–D (Windows).
- For the right frame, double–click on the name (Phone) and change it to Menu Open and hit Return (Mac) or Enter (Windows) to apply it.
Drag the Menu Open frame (by its name) down below the Phone frame.
- Click once on something in the Menu Open frame.
- Hit Cmd–A (Mac) or CTRL–A (Windows) to select everything in the Menu Open frame (but not the frame itself).
-
Starting on the right side of the frame, drag the art to the left until the red menu is fully visible and aligned to the right of the frame, as shown below.
AMAZING TIP! Hold the Spacebar as you drag (start dragging and then hold space) to prevent the items from coming out of the frame as you drag!

Adding Smart Animate
- In the right panel, at the top click on Prototype.
- At the top right of the Phone frame, select the 3-lined menu icon.
- On the right side of the menu icon, drag the blue circle to the Menu Open frame.
In the Interaction details that pop-up, under Animation change Instant to Smart animate.
- At the top right of the window, click Present
 or hit Cmd–Option–Return (Mac) or CTRL–ALT–Enter (Windows).
 - At the top right, click the 3-lined menu icon.
Let’s see that again. We haven’t made the close button work yet, so hit your Left Arrow key to go back to the previous frame.
Different Kinds of Easing
-
This time pay attention to the speed of the animation as you click the 3-lined menu icon.
This animation is using Ease out (which goes slower at the end). Easing is a standard concept used in most animation apps, but if you’re not familiar with the concept read the following sidebar.
Easing Explained
Easing controls the speed of the animation. Going “easy” means to go slow. In refers the beginning of an animation, and Out refers to the end. Here are easing types you’ll see in Figma:
- Ease in goes slowly at the beginning.
- Ease out goes slowly at the end.
- Ease in and out goes slowly at the beginning and end (fast in the middle).
- A back ease pulls back at the start and/or end, creating a bouncing effect.
- Close the presentation tab/window.
- If the Interaction details pop-up closed, in the Prototype panel, under Interactions click on the Tap interaction.
- In the Interaction details, change Ease out to Ease out back.
- At the top right of the window, click the Present button .
-
Click the 3-lined menu icon.
Notice the bounce at the end (out).
Close the presentation tab/window.
- In the Interaction details, change the easing to Ease in and out back.
- At the top right of the window, click the Present button .
-
Click the 3-lined menu icon.
Notice the bounce at the beginning (in) and the end (out).
Close the presentation tab/window.
- Let’s make the close button work. At the top right of the Menu Open frame, double–click on the close button to select it.
- On the right side of the close button, drag the blue circle to the Phone frame.
-
In the Interaction details that pop-up:
- Animation should already be set to Smart animate.
- Easing should already be set to Ease in and out back.
Click on a blank area to make sure nothing is selected.
At the top right of the window, click the Present button
.- Click the 3-lined menu icon.
-
Click the close button.
Nice! There is one small issue though, with the bounce that the ease back adds, we see some white areas:- To the left of the black navbar at the start of the animation.
- To the right of the red menu at the end of the animation.
We can extend the colored background to fill in those white areas.
Close the presentation tab/window.
Extending Objects to Make the Ease Back Look Better
- In the right panel, at the top click on Design.
-
On the Phone frame:
- Double–click on the black navbar background.
- Drag the left side a bit outside the frame, making the navbar wider so it will fill in the white space we just saw.
-
On the Menu Open frame:
- Double–click on the red menu background.
- Drag the right side a bit outside the frame, making the menu wider.
At the top right of the window, click the Present button
.Open and close the menu to see the white gaps should now be gone, and the animation is looking nice!
Smart Animate & the Importance of Names
Smart animate requires layers to be named the same across all frames. If you change the name on one frame, do it on the other frames too!
