Discover how to effectively use the Extend command in AutoCAD with this detailed tutorial, featuring step-by-step instructions and visuals to guide you through the process.
This exercise is excerpted from Noble Desktop’s past AutoCAD training materials and is compatible with Photoshop updates through 2020. To learn current skills in AutoCAD, check out AutoCAD Bootcamp and AutoCAD classes in NYC and live online.
Topics Covered in This AutoCAD Tutorial:
Extend Command
Exercise Preview
Exercise Overview
In this exercise, you will use the Extend command to extend edges from the drawing of one view to other views and then use Trim to cut away the excess lines.

The Extend Command
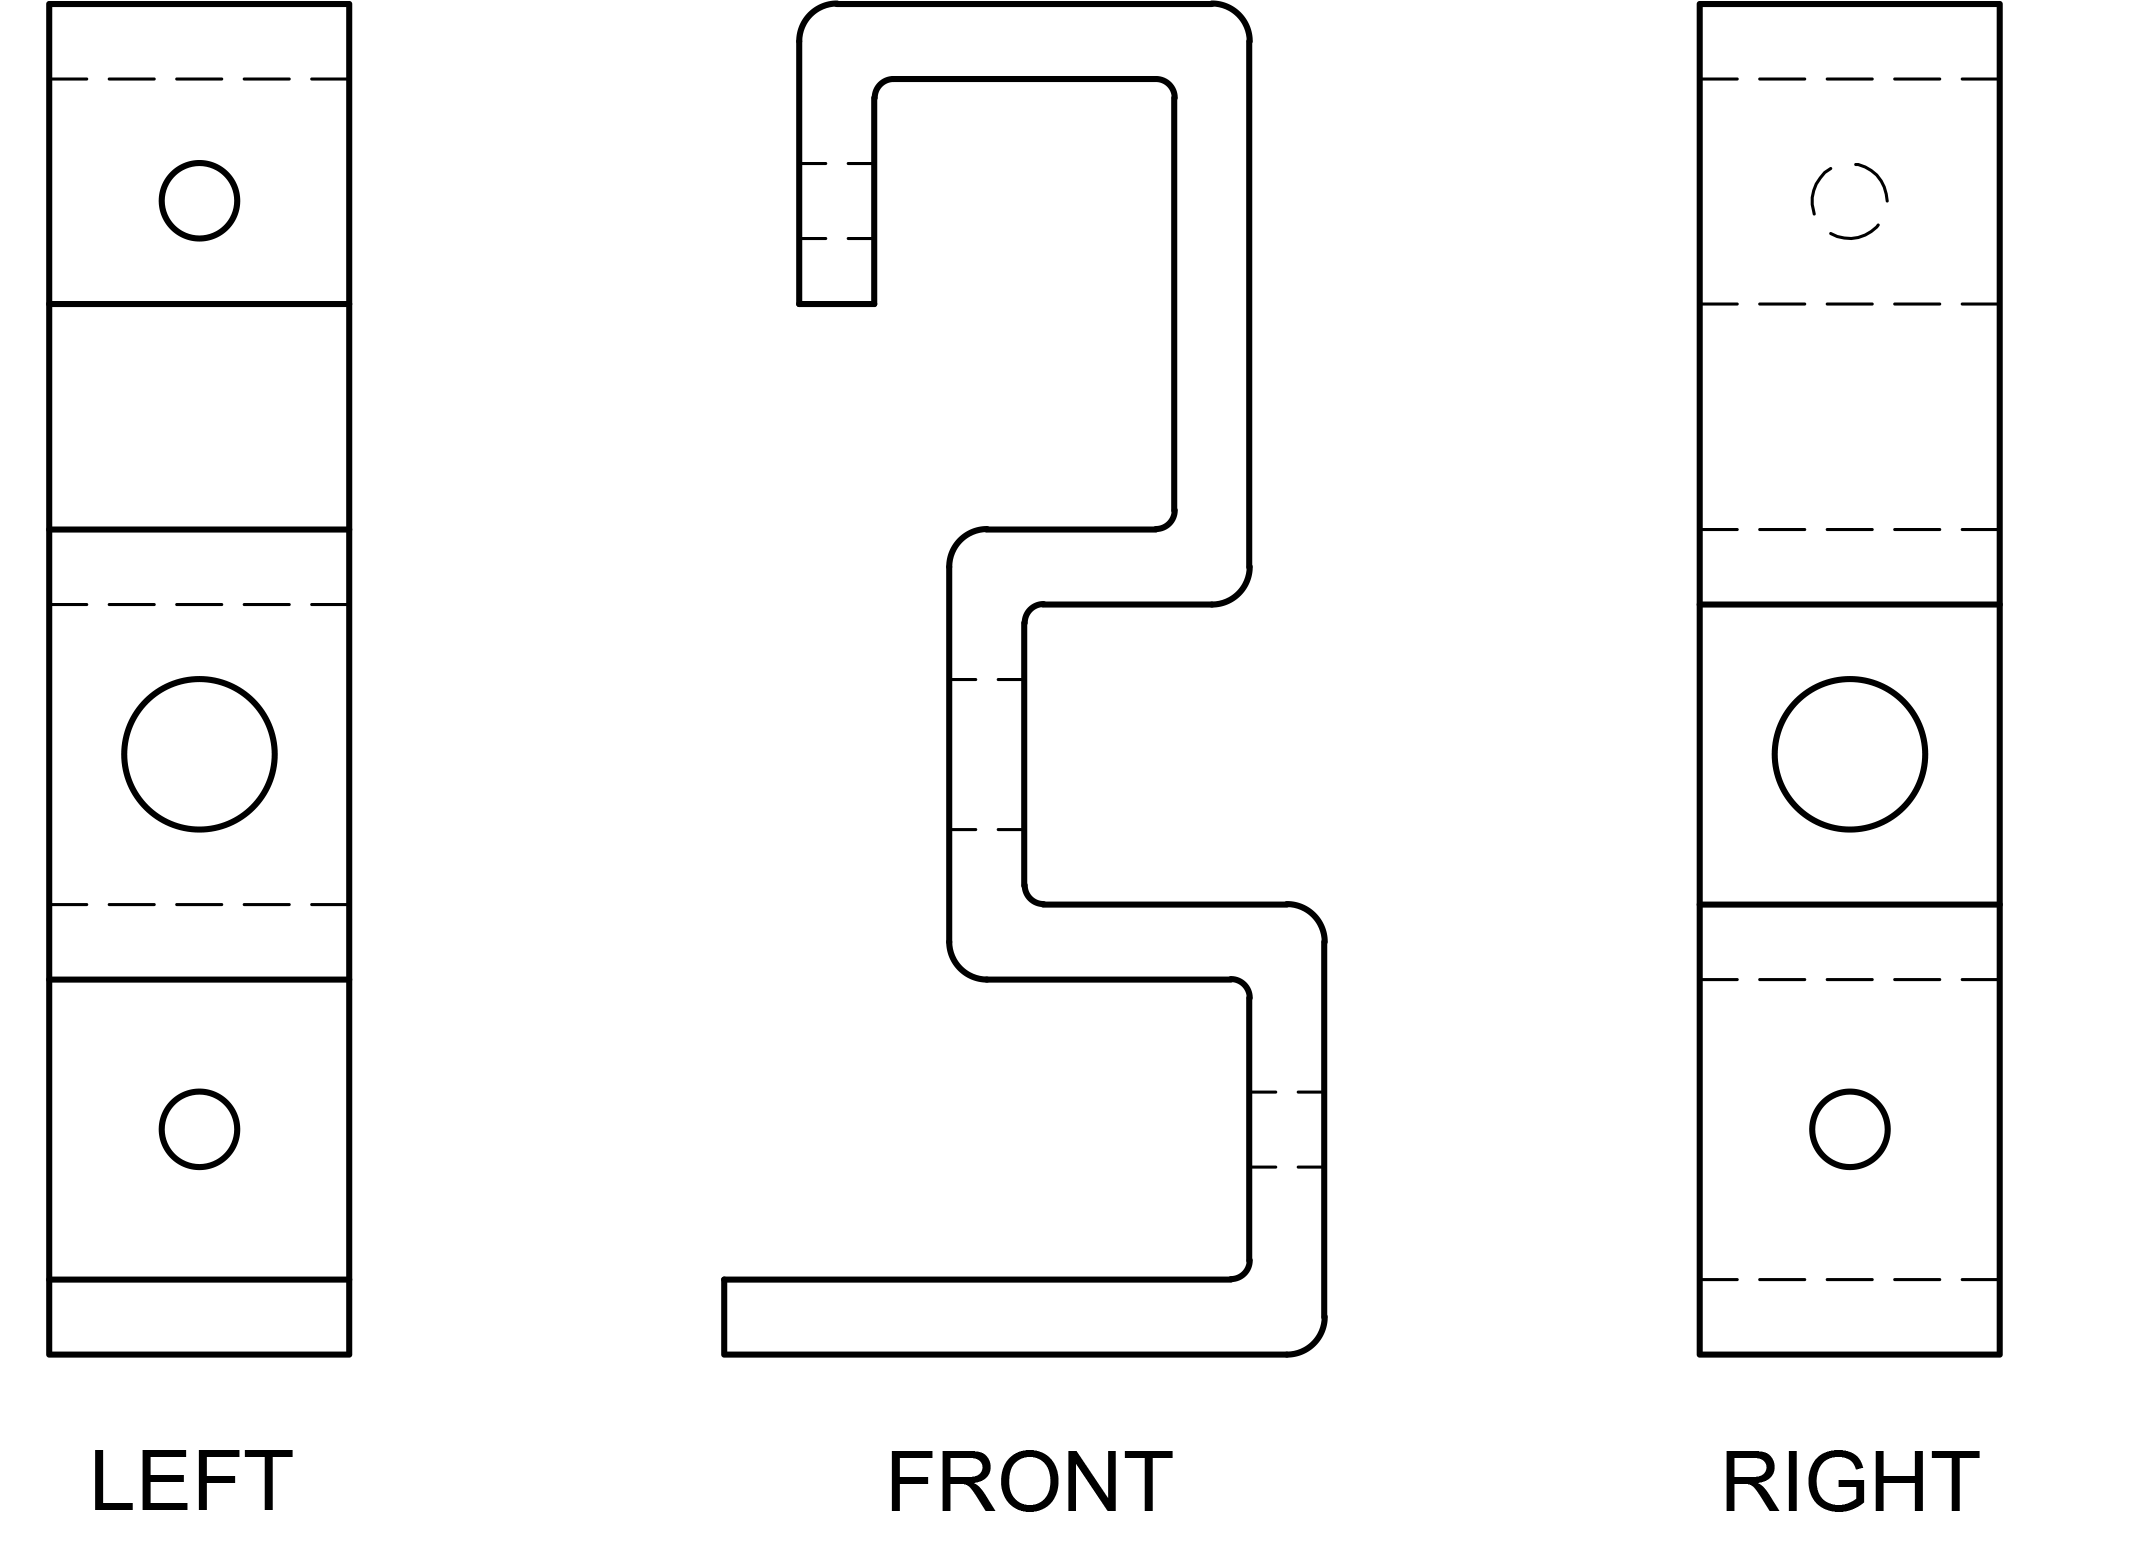
Open the file Extend-Bracket Views.dwg. Note that there are edges in the front view that are not shown in the other views. You will use Extend to extend the edges from the front view to the left and right views.
-
By default, the Extend command will prompt you to select objects to act as boundaries for other lines to be extended to, and then to select lines to be extended. Just like the Trim command, the Extend command has a
<Select All>option which will make every object a potential extension boundary and you can simple select any straight or curved line and it will extend until it hits another object. Because<Select All>appears inside the <> brackets, you can activate it just by pressing Enter. So like the Trim command, the best way to start the Extend command is by pressing EX Enter, because the first Enter will start the command, and the second Enter will activate the Select All option, which you will probably always use. You can also click the Extend under the Trim icon in the Modify Panel in the Ribbon, or in the Modify Toolbar.
-
Press EX Enter to start the Extend command and activate the
<Select All>option. Click the inner edge of the top of the bracket in the front view, on the left side of the line as shown below. The line will extend left until it hits the outer edge of the bracket drawing. Click the line again and it will extend until it hits the next edge. Click a third time so the line extends into the left view. Stay in the Extent Command.
-
Repeat the process from the last step by clicking to the right to extend the same edge into the right view. Keep clicking the same line as it extends to each new boundary as you did for the left edge. Stay in the Extend command for the next step.

-
Continue to use the Extend command to extend all of the horizontal edges in the front view into the left and right views as shown below. Press Enter or Escape to end the Extend command.

-
Use the Trim command to cut away the excess lines in the front view and between the views so that only the lines you extended into the left and right views remain.

-
Select the edges that would not be visible on the left and right views as shown below and move them to the Hidden layer so that they will be dashed lines, indicating that they are hidden edges. Keep the lines selected for the next step.

-
The dashes on the hidden lines are a bit too big at this scale. With the lines still selected, press CTRL–1 to bring up the Properties Palette and change the Linetype Scale to .3 and press Escape to deselect the lines.

Save and close the file.