Explore the in-depth tutorial on working with AutoCAD, focusing on object snap practices and featuring step-by-step instructions with accompanying visual guides.
This exercise is excerpted from Noble Desktop’s past AutoCAD training materials and is compatible with Photoshop updates through 2020. To learn current skills in AutoCAD, check out AutoCAD Bootcamp and AutoCAD classes in NYC and live online.
Topics covered in this AutoCAD tutorial:
Working with object snap
Exercise Preview
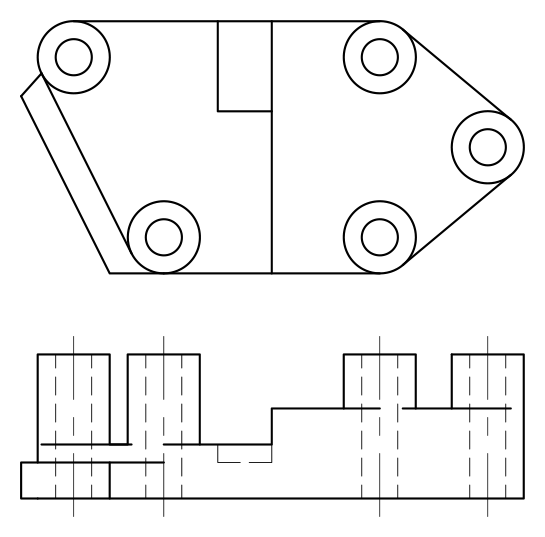
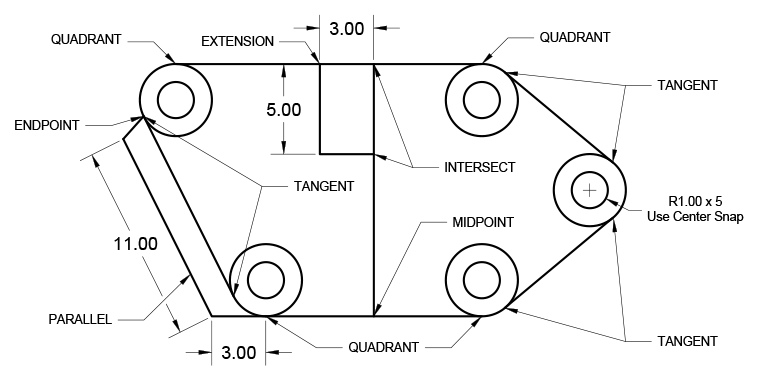
While Working, Use the Following Snaps & Dimensions

Object Snap in a File
Open the file ObjectSnapStart.dwg.
Turn on the Endpoint, Midpoint, Center, Quadrant, Intersect, and Extension Snaps.
-
Use the Circle command
 and the Center snap to place circles with a radius of 1 in the center of each existing circle.
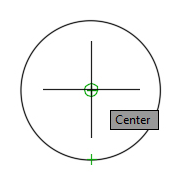
-
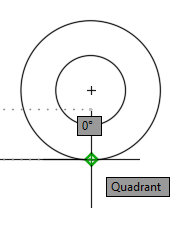
Use Quadrant Snap to draw the top and bottom edges of the object connection the tops of the top circles and the bottoms of the bottom circles with the Line tool
 .
.
-
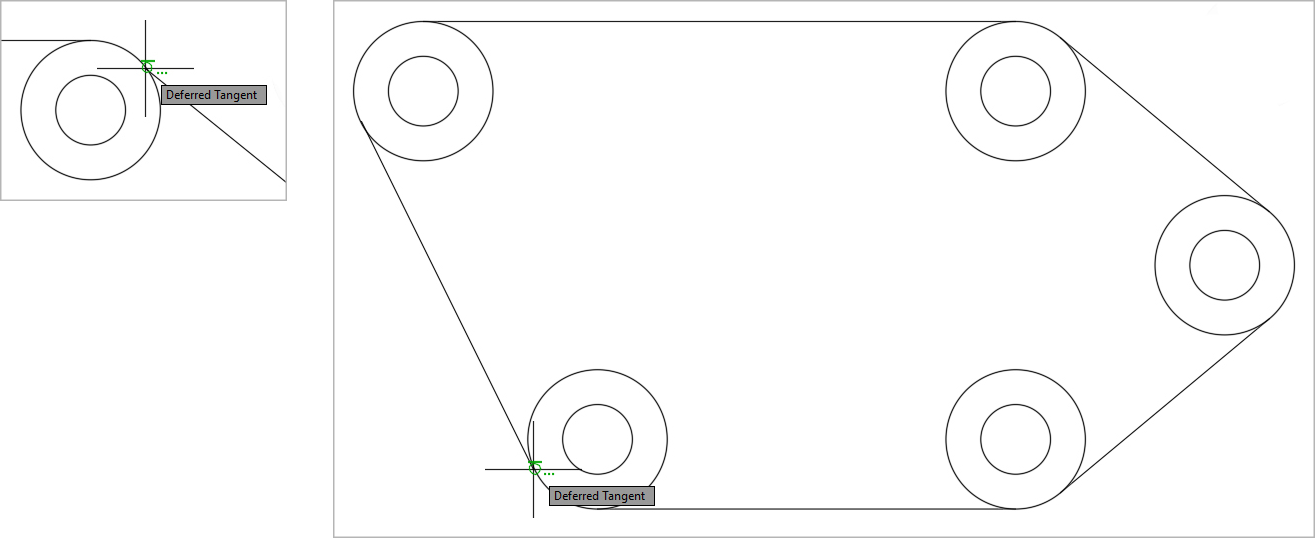
Turn off the Center and Quadrant Snap and turn on Tangent. The Tangent Snap will not work if Center or Quadrant is active. Use the Line Command to connect the outer edges of the circles on both sides to complete the outer perimeter of the object.
-
With the Line tool
, snap to the Midpoint of the bottom edge, pull the cursor upward, and use the 90˚ Polar Tracking line to snap to the Intersect point at the top edge of the object to draw a vertical line connecting the top and bottom of the object. Press Enter or Escape to end the Line command.
-
Press Enter to restart the Line command. Without clicking, snap the cursor to the upper Endpoint of the previous line segment. Pull the cursor to the left until the horizontal tracking line appears. The word Extension may or may not appear in the Dynamic Input, but the Extension Object Snap will be active as long as it’s been checked in the Object Snap menu. While the Polar Tracking line is visible, type in the distance of 3 and press Enter. A new line segment will start 3 units to the left of the previous line segment. Pull downward on the 90˚ tracking line and enter a distance of 5. Pull to the right on the horizontal Polar Tracking line until it intersects with the vertical line and click using the Intersect snap. Press Enter or Escape to end the Line command.

-
Press Enter to restart the Line command. In the Object Snap menu reactivate the Center and Quadrant snap and uncheck Tangent. Snap and click on the lower quadrant of the lower left outer circle and draw a 3 unit line segment to the left along the horizontal tracking line.
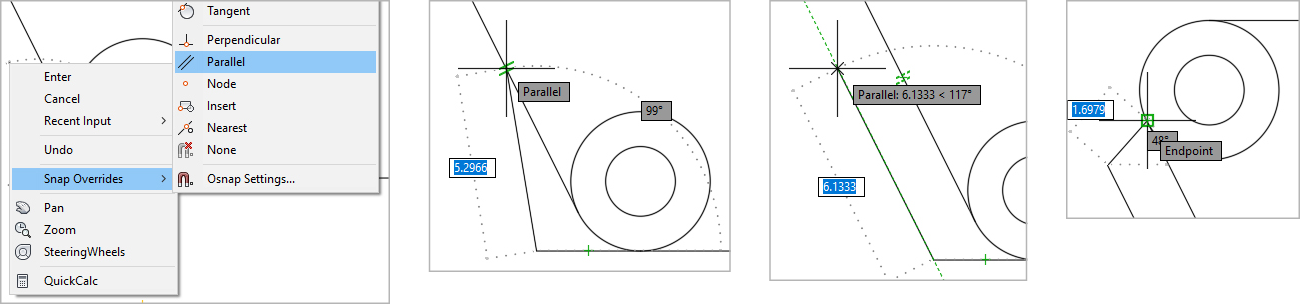
-
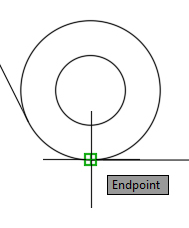
The next line segment will be parallel to the left edge of the object, but the angle is unknown. While still in the Line command, Right–click and select Snap Overrides submenu in the Right–click menu, and then activate the Parallel Snap Override. Without clicking, touch the cursor to the left edge of the object and the Parallel Snap symbol will appear. Pull the cursor back to the right snap to the Parallel tracking line that appears now that you used Parallel Snap. Enter 11 for the distance, the new line segment will be parallel to the left edge of the object. For the last line segment, click on the endpoint where the left edge of the object meets the upper left circle to complete the drawing. Press Enter or Escape to end the Line Command. Because you used Snap Override to turn on the Parallel Snap, it automatically deactivates after one use.