Dive deep into Adobe After Effects with this comprehensive tutorial, exploring topics such as using scripts to automate tasks, animating text and graphics, and more.
This exercise is excerpted from past After Effects training materials and is compatible with After Effects updates through 2020. To learn current skills in After Effects, check out our After Effects classes and video editing classes in NYC and live online.
Topics covered in this After Effects tutorial:
Using Scripts to Automate Tasks in After Effects, Hiding/showing Moving Layers using Static Alpha Mattes, The Set Matte Effect, Animating Overshoot, More Illustrator Masks in After Effects, Animating Scattered Masked Pieces that Recombine
Exercise Preview
Exercise Overview
In this series of four exercises, we’ll create an animated text-based advertisement for WaitingRoom, an online service that connects established medical professionals with other practitioners who want to lease their space, equipment, and staff.

In this exercise, we’ll use a static shape layer as an alpha matte so the animated text associated with it gets revealed as it moves into the shape’s invisible bounds. We will also use masks to divide some text into multiple pieces so we can scatter them across the composition and recombine them with animation. To help us do these tasks more efficiently, we’ll use some handy scripts.
Previewing What You’ll Make in This Exercise
On the Desktop, navigate to Class Files > After Effects Level 2 Class > Text Animation > Finished Clips and double–click Text-Animation-12-Percent.mov.
-
Play the video and notice the following (you may need to slide the playhead slowly):
- The “Medical & Dental Practices” line of text comes into the composition word-by-word, appearing to emanate from an invisible boundary below which the text is not visible. (The other dark blue lines of text come into the frame similarly.)
- This line exuberantly shoots up a bit further than its final resting position, which often happens when objects move in real life. (The last line moves similarly.)
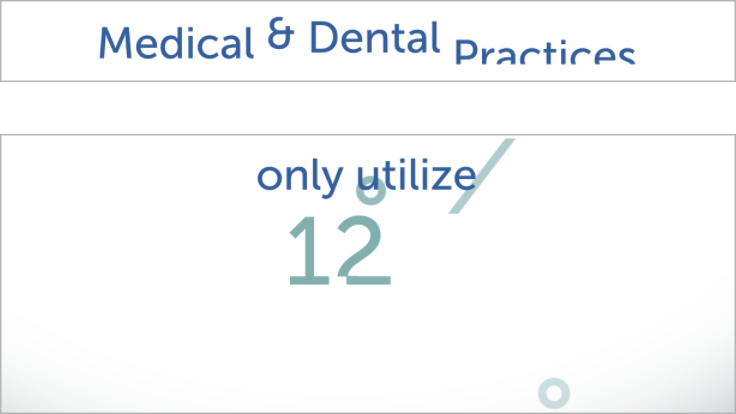
- After the second line of text finishes animating, number fragments start flying on-screen from all different directions until they eventually conjoin in the center of the screen to form the 12% text.
Replay the video as many times as you need—we’ll be reproducing it in this exercise. Keep it open so you can refer back to it as needed.
Using Scripts to Automate Tasks in After Effects
A script automates an existing feature in After Effects, enabling you to work faster and more easily than manually doing that task. They are written in Adobe’s ExtendScript language, which is JavaScript-based code. The three scripts we will use were developed by Charles Bordenave and can be downloaded for any price (including for free) at aescripts.com, an excellent resource for scripts.
All After Effects scripts live in the application’s Scripts folder. Some scripts have an associated user interface, which allows us to access them from After Effects’ Window menu. All three scripts have this feature. To enable this capability, we need to install them into the ScriptUI Panels folder nested inside the Scripts folder.
If you’re using a computer at Noble, we have already installed the scripts so you can skip the next section. If you’re at your home or office, do the following section before continuing this exercise.
If You Aren’t at Noble Desktop: Downloading & Installing Scripts
Open a browser and go to aescripts.com.
In the top right search bar, search for DecomposeText.
In the results, click DecomposeText.
In the field next to Name Your Own Price, enter the price you want to pay.
Click the ADD TO CART button.
-
Return to the search bar at the top right and repeat the same steps to add the following scripts to your cart:
- MasksToLayers
- RepositionAnchorPoint
Go to the cart by clicking the cart icon
 at the top right of the page.
Click PROCEED TO CHECKOUT.
If you don’t already have an account here, click REGISTER and enter your information to create a new account.
Finish checking out and download the scripts.
Make sure you have quit out of After Effects.
Locate the three scripts you’ve downloaded.
Select all three scripts and copy them.
-
Navigate into the Scripts > ScriptUI Panels folder for your operating system:
Mac: Applications > Adobe After Effects 2019 > Scripts > ScriptUI Panels Windows: Program Files > Adobe > Adobe After Effects 2019 > Support Files > Scripts > ScriptUI Panels Paste the three scripts.
The scripts are now ready for use! Relaunch After Effects.
Getting Started
To save time, we did the initial setup for you. In After Effects, go to File > Open Project. (If another project is open, click Save to get the Open dialog to show up.)
Navigate into Desktop > Class Files > After Effects Level 2 Class > Text Animation, and double–click on Text Animation Started.aep to open it.
Go to File > Save As > Save As.
Navigate into Class Files > After Effects Level 2 Class > Text Animation if you aren’t already there. Name the project yourname-Text Animation.aep and click Save.
In the Project panel, expand the folders to see the Assets (layers from an Illustrator file and a Photoshop file) and Pre-comps.
-
When creating the layouts in Photoshop (which is where most of our layers came from), we set up guides to ensure the text is title safe. If you see them, turn them off now by clicking on the Composition panel and going to View > Show Guides.
TIP: When creating a new Photoshop document you intend to use as footage in After Effects, use the HDTV 1080p preset (under the Film & Video tab). This will automatically add guides for the title and action safe areas.
In the Text Animation-MAIN tab, double–click on the [01-12 Percent] pre-comp.
In the Timeline, notice that each word is on a different layer. (You can Solo
 them to confirm, then toggle the option off.) We also have some shape layers.
Hiding/Showing Moving Layers Using Static Alpha Mattes
We can either use an animated alpha matte to reveal a static layer or to animate a layer so it gets progressively more visible as it moves into the invisible boundary of a static alpha matte. We’ve already created the shape layers for use as a static alpha matte. Let’s investigate!
-
We animated the second and last lines for you already. Press Spacebar to preview, and notice the following:
- The only and utilize text that is initially hidden animates on-screen sequentially. They stop moving once you can see the entire word. We matted both of these words for you ahead of time.
- A few seconds later, the of their resources text drops into the turquoise rectangle. We need to turn this ugly shape into a matte so viewers don’t see the fourth line until we want them to.
In the Timeline, find the line 4 matte and turn off its visibility
 .
.With the of layer selected, go to the Effects and Presets window.
Type into the Search Bar Set Matte.
Change Take Matte from Layer to line 4 matte, and uncheck Stretch Matte to Fit.
Scrub through the Timeline to see that “of” is now jumping into the matte!
In the Effect Controls window for the “of” layer, click the Set Matte effect name and Edit > Copy.
Select the layers their and resources (the other 2 fuschia-color layers) and Edit > Paste. All 3 text layers are now affected by the same matte layer!
We want to animate the first line so it leaps into a static matte of its own, so let’s create one final shape layer. In the Tools panel, select the Rectangle tool
 .
.Deselect all to ensure we create a shape layer instead of a mask.
In the Tools panel, click on the blue word Fill (not its swatch!).
Make sure the Solid Color (second) swatch
 is highlighted and Opacity is 100%.
Click OK to set these options.
To the right of the word Fill, click the color swatch.
Use the color picker to choose any color that contrasts with the text well. If you want to enter a hex code instead, #FFA01B (an orange) works well.
Click OK to set the color.
Back in the Tools panel, find the swatch next to Stroke. If the no stroke swatch
 is not displaying, hold Option (Mac) or Alt (Windows) and click on the swatch to cycle through the available stroke styles. Stop once you see the correct icon.
-
On the Medical & Dental Practices line, draw a rectangle that barely kisses the bottom of the text and encompasses the entire line and about half a line above it. Use the screenshot below as a rough guide for where to draw:

In the Timeline, drag the layer so it’s below all the associated text. It should become Layer 5.
Let’s refine the size and positioning so we all have the same thing. Press UU to see all the properties that have changed from the defaults.
Under Contents > Rectangle 1 > Rectangle Path 1, change Size to 930, 100 (toggle the link
 off to change the values independently of one another, then relink them).
Under Contents > Rectangle 1 > Transform: Rectangle 1, set Position to 15, –175 (this is the shape group’s Position, not the Transform property).
Click on the layer name and then rename it to line 1 matte.
So we can remember that this layer is “grouped” with the first line of text, change its label color to Red.
In the Timeline, use the arrows
 to close any open layers.
Creating an Animation That Overshoots its Final Position
When real objects are moving too fast to stop instantly, they overshoot (go past) the position at which they will eventually come to a halt. Before we matte the text, let’s animate each word to “jump” into the rectangle over the course of half a second. For the first 2⁄3 of the animation, the text will move up towards its overshoot position, then it will move back down to where it will settle.
In the Timeline, select the Medical layer. We’ll animate this layer before copying its keyframes to the other layers.
Press the P key to pull up its Position property.
Ctrl–click (Mac) or Right–click (Windows) on the Position property and select Separate Dimensions.
Deselect the separated properties.
Move the playhead to 0;27, the end of our animation sequence. We’re animating backwards because it’s easiest to create the final, “settle” keyframe first.
In the Medical layer next to Y Position, click the stopwatch
 to add a keyframe.
Move the playhead five frames backward to 0;22, when we want the text to overshoot its destination.
Change Y Position to 387.5.
Press Shift-Cmd-Left Arrow (Mac), Shift–Page Up (Windows) or Shift–Fn–Up Arrow (Mac laptop) to go back in time by 10 frames. You should be at 0;12, when we want the text to start shooting upward.
Change Y Position to 495.5, so the word is fully below the orange shape layer. Once we apply the matte, the text will be completely invisible at this point in time.
To simulate a loss of momentum as the text approaches and leaves its highest position, let’s slow down the overshoot part of the animation. Select the second keyframe
 (at 0;22) and press the F9 key as a shortcut to add an Easy Ease.
Click on the word Y Position to select all three keyframes, then copy them.
Let’s stagger the animation so each subsequent word starts animating three frames after the previous one. The word Medical starts moving at 0;12, so go to 0;15.
In the Timeline, select the & layer and paste the keyframes.
-
At the following timecodes, paste the Y Position keyframes onto the following layers (remember that you can press U to confirm that they have been pasted):
0;18: Dental 0;21: Practices Press Spacebar to preview the animation. Nice—we’re ready to matte this puppy!
Select line 1 matte and turn off its visibility
.Select the Medical layer, and go to the menu Effect > Set Matte (because it was recently used, it should be at the top).
In the Effect Controls window, change Take Matte from Layer to line 1 matte.
Turn off Stretch Matte to Fit.
Scrub the playhead through the Timeline to see that it’s worked.
De-select all, then in the Effect Controls window, click on the effect name Set Matte. Edit > Copy.
Select layer 2 and shift-click on layer 4 (the & sign, Dental and Practices), and Edit > Paste.
More Illustrator Masks in After Effects
The next thing we want to do is to create masks that will separate the 12% layer into discrete chunks that we can scatter across the composition.
Keep After Effects open and switch to the Desktop.
Navigate into After Effects Level 2 Class > Text Animation > Assets > Vectors and double–click 12-percent-masks.ai to open it in Adobe Illustrator.
In the artboard in the middle of the screen, click on one of the numbers. You should see it outlined in blue (the layer color). This will become one of our masks.
Select them all, then copy them.
Switch out of Illustrator, but don’t quit it, and return to After Effects.
Select the 12% layer (layer 7) and paste the masks.
If you can’t see the mask outlines, go to the bottom of the Composition panel and click the Toggle Mask and Shape Path Visibility button
 so it becomes blue.
-
Press the M key to see the masks. We created the first mask named 12% for you in After Effects ahead of time as a “reference mask” that will help you position the ones we just pasted (Masks 1–16).
NOTE: The 12% mask mode is Add because that’s the default for masks drawn in After Effects. Difference is the default for Illustrator masks.
In the Tools panel, click the Selection tool
 .
.Now we need to align our masks. Unfortunately, the Align panel only works for layers. To help us position by eye, press the period (
.) key to zoom in to the Composition panel. Zoom in until the comp is magnified by 200% or more.-
In the Composition panel, use the Arrow keys to align all the masks so the ones that are being used to delineate the different pieces (such as numbers) are lined up properly. It may be easiest to look at the number 2 when doing this. When done, your masks should look as shown:
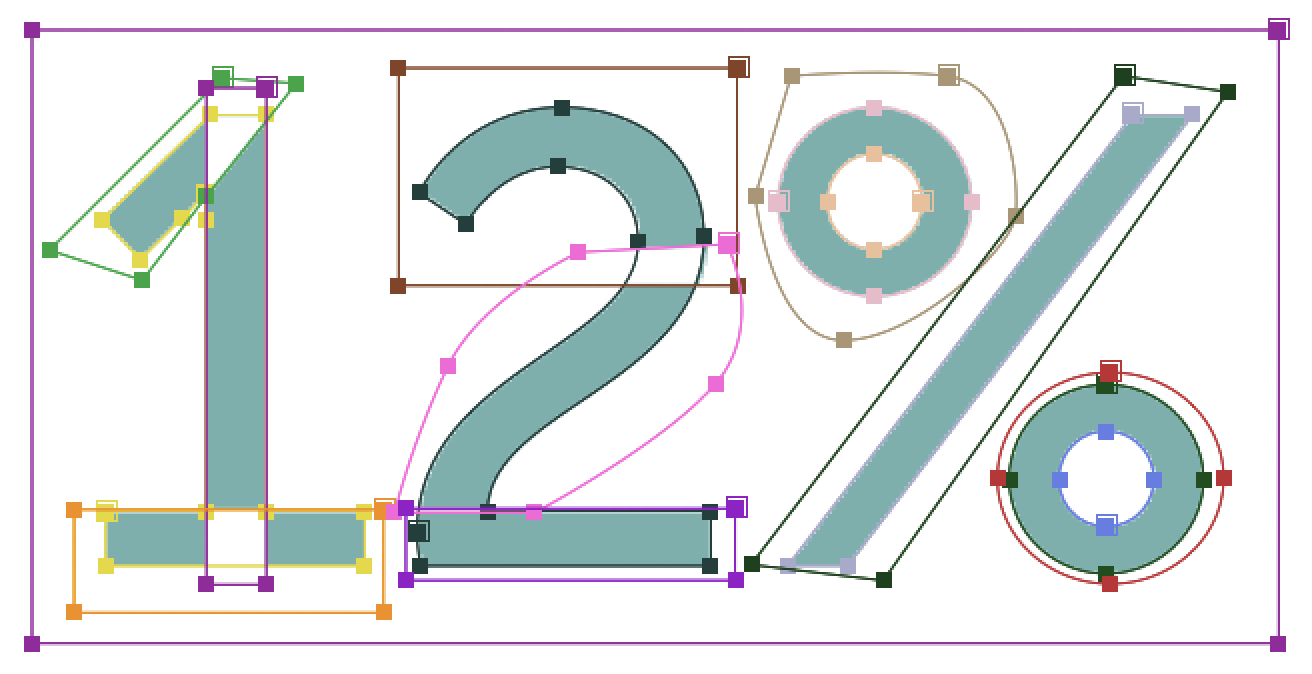
To get the masks to show the places where the pieces overlap, we need to change the masks’ blending mode. With all the masks still selected, go into the menu to the right of any of the numbered masks and change Difference to Add.
Go the bottom left of the Composition panel, click into the menu with a zoom percentage, and choose Fit so the entire composition frame is visible.
Deselect everything.
In addition to our 12% mask, the first few Illustrator masks are reference masks. These masks that outline each text character have outlived their purpose, so under 12% > Masks, click on the 12% mask (the first one), Shift–click on Mask 7, and press the Delete key.
So we don’t accidentally move the remaining masks, click their empty lock switches
 .
.Look in the Composition panel. The masks should no longer be visible, so our screen is nice and clean! If the comp is still cluttered with mask outlines, go to Layer > Mask and check on Hide Locked Masks.
To get the animation we want, each mask needs to be on a different layer. In a previous exercise, we duplicated a masked layer multiple times, and deleted all but one mask per layer. That’s really tedious so let’s use a handy script to do this work for us! To access it, go to Window > MasksToLayers.jsx.
-
Move the panel that appears if needed and set the following:
Blending Mode: Normal (This is the default, so keep the menu as is) Anchor Point: Move To Mask Center (This will help us position the pieces better) To run the script with the options we selected, click the Proceed button.
We’re done with the script, so click the panel menu
 and choose Close Panel.
In the Timeline, notice that the script created one layer per mask. (Feel free to Solo
them to confirm, then toggle it off.) Just in case, the handy script kept the original layer in our comp but hid it on-screen by turning off its visibility. Sweet!
Scattering & Recombining the Masked 12% Pieces
Now that our masks are all set up, we’re ready to animate! Let’s scatter the pieces so they each enter the video from different areas of the composition, and move towards their current positions, where they will combine to form the entire text.
To make it easier to concentrate on scattering the masked layers, let’s temporarily remove the other layers from the Timeline’s layer stack but keep them visible on-screen, using the Shy switch. Select all the layers.
Hold Cmd (Mac) or Ctrl (Windows) and click on all the 12% – Mask # layers (Layers 7–15) to remove them from the selection. Do not select the layer named 12%!
Go to the bottom of the Timeline and click the Toggle Switches / Modes button.
In the column of switches that appears, locate the Shy switch
 (the leftmost one).
In one of the selected layers, click the Shy switch
and the shy guy will hide behind the wall  , which shows that we’ve activated the option.
-
A shy layer is like a shy person whose chatty roommate throws a party at home—it disappears only when all those strangers arrive. To get the “party” started, go to the top middle of the Timeline and click the big Shy button
 :
:
Poof, all the layers we don’t want to see are gone! Deselect all so we can no longer see their bounding boxes.
Move the playhead to 2;14, when the animation will culminate with the intact 12%.
Select all. Look at the bounding boxes in the Composition panel to see that only the layers showing in the Timeline are selected!
-
We’re going to move each layer, which will initially have no opacity. We also want to scale and rotate some of the layers, so press the following keystrokes:
- Opt–P (Mac) or Alt–Shift–P (Windows) to add Position keyframes
- Opt–S (Mac) or Alt–Shift–S (Windows) to add Scale keyframes
- Opt–R (Mac) or Alt–Shift–R (Windows) to add Rotation keyframes
- Opt–T (Mac) or Alt–Shift–T (Windows) to add Opacity keyframes
Each layer should have a set of keyframes.
Deselect the layers.
Select the 12% – Mask 11 layer. (It should still be listed as Layer 10 because using the Shy switch does not change the original layer numbers when layers are hidden.)
To make it easier to animate the top of the number 2, we’ll reposition its anchor point. There’s a script for that, so go to Window > RepositionAnchorPoint.jsx.
In the panel that appears, click on the bottom center arrow
 .
.Click the Reposition button to move the layer’s anchor point accordingly.
Close the panel using the panel menu
or the red button above the panel.-
Move the playhead back in time to 1;24, where we’ll scatter all the pieces.
Before we fiddle with the Rotation, Scale, and Opacity, let’s move all the 12% chunks to the places where they will start entering the composition. To make the Position property motion paths match the individual pieces as best as possible, let’s move each shape at an angle that matches its contours.
For instance, the top of the number 1 (the first layer listed in the Timeline) is connected to the 1’s vertical stick (the second layer) at around a 45° angle. To maintain both angles during the animation, we should move the top piece diagonally and move the stick vertically.
-
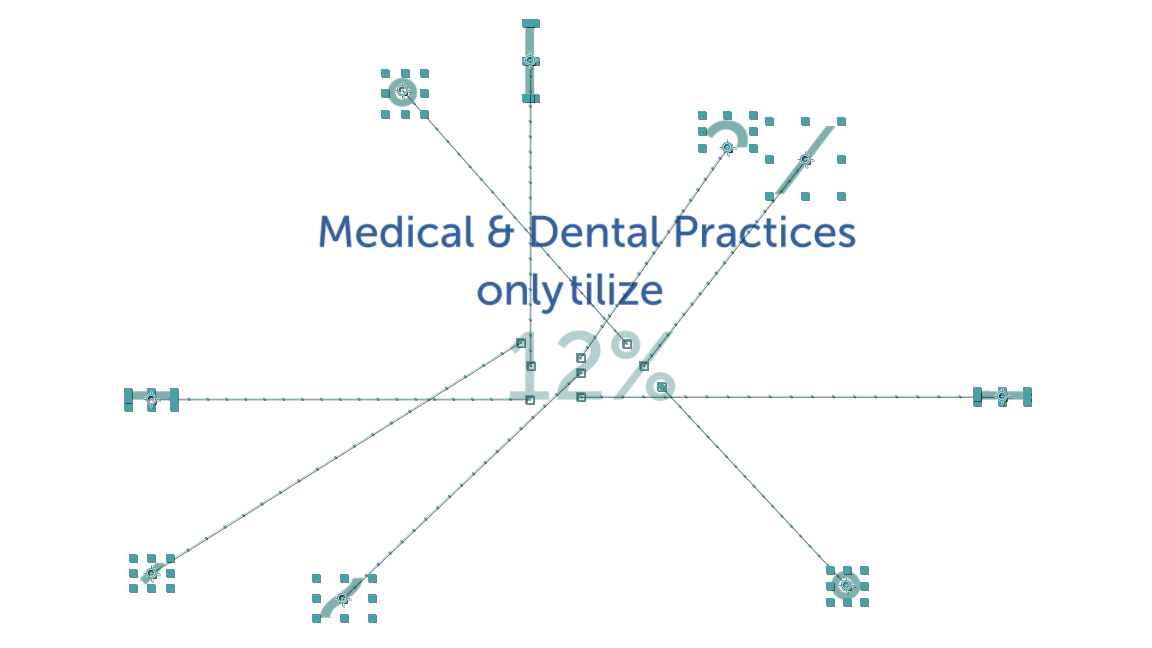
Use the following workflow to scatter each shape across the composition frame along its contour, similar to the screenshot below:
- Select a layer in the Timeline.
- With the Selection tool active, go to the Composition panel and click and hold on the shape.
- Drag the mouse to move the shape along its angle. If that angle is perfectly vertical or horizontal, hold Shift while dragging. The top of the number 2 is not particularly angled, so just move that chunk anywhere above its current position.
- Select the next layer and rinse and repeat until each chunk has a starting position.
TIP: Because these pieces will start off at zero Opacity and won’t even be readable at this stage, there’s no need to keep the pieces title or action safe. However, the grid can be a helpful visual for gauging how close the pieces are to the edges.
-
Let’s rotate the top of the number 2! Select the 12% – Mask 11 layer and change the Rotation so it makes one full revolution with some extra degrees. We set it to 1x+147°, but it’s up to you.
NOTE: Because the other shapes are more angular, we think their animation looks much better if their motion does not deviate from their contour. Do not rotate them!
Scale the layer up. Because it’s a pixel-based layer, do not scale it higher than 130%. In this case, we think 125% looks nice.
Scale up any other layer that you think could use a size boost. If doing so, we recommend scaling larger, more prominent pieces such as the stick of the 1 or the percent character’s diagonal line. Once again, do not go over 130%!
When ready to lower the Opacity, select all the layers.
In any layer, set the Opacity to 0% and they will all change.
-
Draw a selection box around all the final keyframes (at 2;14) and press the F9 key to apply an Easy Ease.
NOTE: Because we are only going to have two keyframes on these layers, it’s perfectly okay to do an Easy Ease instead of an Easy Ease In.
Make sure you are still at 1;24 with all the layers selected.
So we can automatically stagger the appearance of each piece by four frames, let’s temporarily shorten them to be four frames in duration. To set the layers’ in points to start here at 1;24, press Opt–[ (Mac) or Alt–[ (Windows).
Move the playhead to 1;27.
Press Opt–] (Mac) or Alt–] (Windows) to set the out points here. Currently each piece will become invisible at 1;28 (four frames after the in points).
Go to Animation > Keyframe Assistant > Sequence Layers.
-
Make sure Overlap is NOT checked. Keep the default options and click OK.
Keep all the layers selected until we tell you to select another layer.
Hover over the end of the topmost 12% – Mask 8 layer until you see a resize handle
 .
.-
Drag it all the way to the right so it reaches the end of the Timeline. Because the other layers are selected, they will come along for the ride.
NOTE: There’s no need to extend the layers leftward—the visibility of each layer only begins at its start point.
Press Spacebar to preview. Stunning, but once the 12% chunks all settle into place, we should show the original, fully formed 12% layer that’s currently hidden.
Move the playhead to 3;15, one frame before the last piece’s final set of keyframes.
Make sure all the layers are still selected, then press Opt–] (Mac) or Alt–] (Windows) to set the out points here.
Go to the top middle of the Timeline and click the big Shy button
to see the rest of our layers return to their places in the Timeline’s layer stack.Next to the 12% layer (Layer 16), click the eye
to make it visible.Press Cmd-Right Arrow (Mac), Page Down (Windows) (or Fn–Down Arrow) to go to the next frame at 3;16.
Select the 12% layer and press Opt–[ (Mac) or Alt–[ (Windows).
To keep the Timeline tidy, use the arrows
 to swivel closed any open layers.
Save the project and leave it open. We’ll continue working on it in the next exercise.