Learn After Effects techniques such as color matching, adding a 2D camera move, creating transitions, and more in this comprehensive tutorial.
This exercise is excerpted from past After Effects training materials and is compatible with After Effects updates through 2020. To learn current skills in After Effects, check out our After Effects classes and video editing classes in NYC and live online.
Topics Covered in This After Effects Tutorial:
Hue & Saturation Effect for Color Matching, Adding a 2D “Camera Move” by Precomposing
Exercise Preview

Exercise Overview
In this exercise, we’ll transition to the fourth layout, a pre-animated After Effects project. We’ll use this project to animate the fifth layout by copying the animation, and adding a Hue/Saturation effect to change its colors. We’ll then animate the position of each word of the fifth layout, so that they fly in from different directions. Lastly, we’ll import the animated cartoon hero from a previous exercise, and add a zooming “camera move” for the finale.

Previewing What You’ll Make in This Exercise
-
You should still have yourname-Superman.aep open in After Effects. If you closed it, re-open it now. We recommend you finish the previous exercises (B1–B3) before starting this one. If you haven’t finished them, do the following:
- Open Superman-Ready for Man of Steel.aep (from the Superman > Finished AE Projects folder).
- Save the file as yourname-Superman.aep in the Superman folder.
On the Desktop, navigate to Class Files > After Effects Level 2 Class > Superman > Finished Clips and double–click Final-Layouts.mov.
-
Play the video and notice the following (you may need to slide the playhead slowly):
- Firstly, the next layout transitions by zooming through the center of the letter B in Buildings.
- The Amazing Stranger and Man of Steel layouts are both outlined by a similar radiating burst.
- Each of the words in the “The Man of Steel” layout appear to fly in from four different directions.
- The Man of Steel layout animates upwards off-screen to reveal the familiar animated cartoon hero from a previous exercise.
- Throughout the last layout, the “camera” appears to zoom in over everything.
Replay the video as many times as you need—we’ll be reproducing it in this exercise. Keep it open so you can refer back to it as needed.
Creating the Next Transitions
Let’s go ahead and create the transitions both to and from the Amazing Stranger layout. We’ve gone ahead and animated this layout for you to save some time.
If you do not have Superman-MAIN open in the Timeline already, open it now.
We’ll transition to the next layout through the center of the letter B of B uildings. Select [03-Tall Buildings] so we can move its anchor point
 .
.Move the playhead to 7;00.
Swivel open the layer’s Transform properties.
Change the Anchor Point values to 973,560, and the Position values to 1199.7,795.1. The anchor point should be inside the center of the B.
Move the playhead to 7;10.
Next to Scale, click the stopwatch
 to add a keyframe.
Move the playhead to 7;16.
We want to zoom into the center of the letter so that the entire screen becomes black. Change the Scale value to 520%.
Select the first Scale keyframe
 (at 7;10) and press Cmd–Shift–F9 (Mac) or CTRL–Shift–F9 (Windows) to add an Easy Ease Out.
Remember that Motion Blur increases both rendering and previewing time. To speed things up, go to the top of the Timeline and switch off the big Motion Blur button
 .
.Move the playhead to 7;10, where we’ll add in the next Amazing Stranger layout.
From the Project panel’s Assets > 04-Amazing Stranger.aep folder, drag 04-animated-PC (the pre-animated comp) to the right side of the Timeline. Release the mouse once it’s between [Superman-Animatic.mov] and [03-Tall Buildings], and hold Shift to align the new playhead to the original.
We also need the background and radial lines layers, that are common to both the fourth and fifth layouts. Switch to the Superman PSD comp tab. (If it’s not open already, open it from the Project panel’s Pre-comps folder.)
Select both radialLines/Superman.psd and bg/Superman.psd.
Copy the layers.
Switch back to the Superman-MAIN tab.
Select [03-Tall Buildings], and paste the layers above it.
Press the left bracket ([) key to set their in point to the playhead timecode (7;10).
Click in any empty area to deselect all the layers.
Collapse all open layers.
Select both the [04-animated-PC] and radialLines layers. We want both of these layers to move with the background.
In the Parent & Link menu to the right of either layer, change None to 4. bg.
We want to parent the bg layer to the previous layout at 7;16, so go there now.
In the bg layer, go to the Parent & Link menu and change None to 5. 03-Tall Buildings.
-
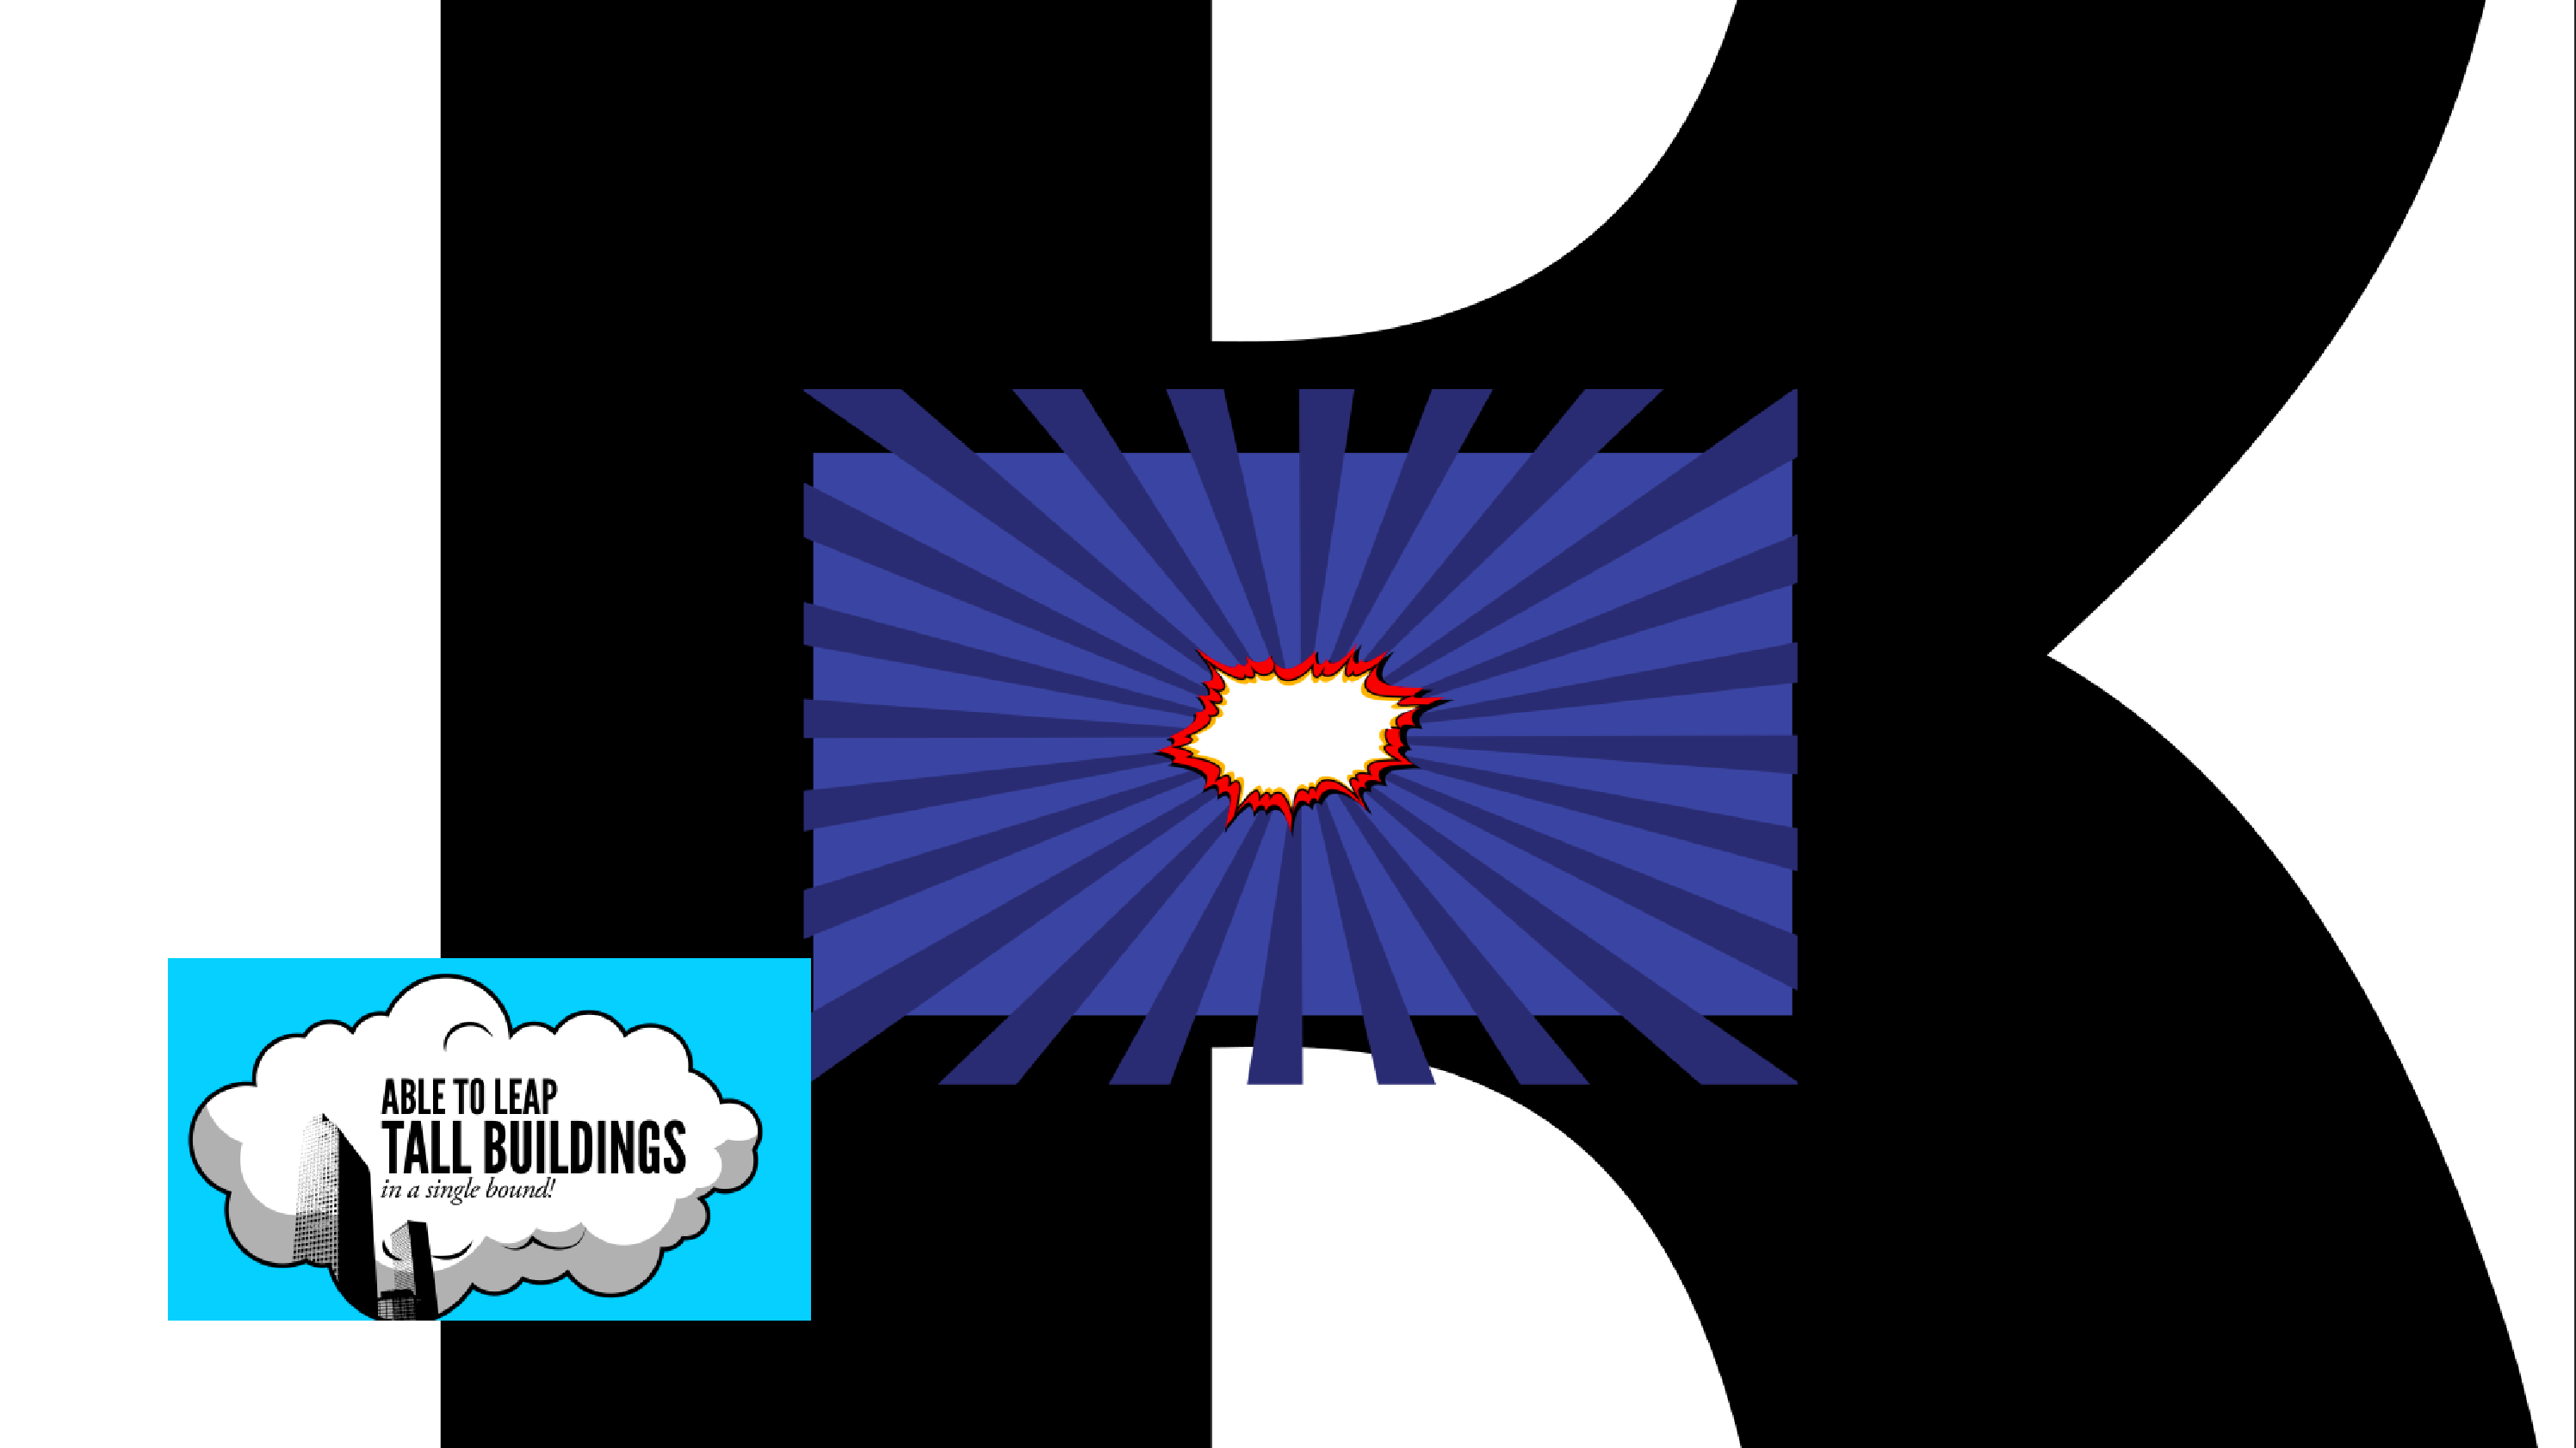
Scrub through to see the layouts transition through the center of the letter B. Halfway between the two keyframes, the transition should look as shown below:
To the right of the radialLines and bg layers, switch on Motion Blur
 .
.Above the Timeline, switch on the large Motion Blur button
.Next to [04-animated-PC], switch on Continually Rasterize
 .
.To smooth out the transition to the next layout, we’ll also add an opacity fade. Select the three new layers, [04-animated-PC], radialLines, and bg.
Move the playhead to 7;16 if it isn’t there already.
Press the T key to view the Opacity property for all three layers.
Click the stopwatch
of any of the layers, to keyframe them all.Move the playhead back to 7;10.
Change the Opacity of any of the three layers to 0%.
With the three new keyframes still selected, press Cmd–Shift–F9 (Mac) or CTRL–Shift–F9 (Windows) to add an Easy Ease Out. All three layers will fade up together now.
Swivel any expanded layers closed, and deselect everything.
To the left of [04-animated-PC] click the Audio switch
 to turn off the sound.
In the Preview panel on the right, set Play From to Current Time.
With the playhead still at 7;10, press Spacebar to preview the new layout. The audio should be synced perfectly!
Let’s go ahead and create the transition to the next layout. Move the playhead to 10;04.
Select [04-animated-PC], and expand the layer’s Transform properties.
We’ll be transitioning to the next layout through the white of the background, so we’ll need to move the anchor point
. Set the Anchor Point to 937,557 and Position to 953,584.Next to Scale, click the stopwatch
to add a new keyframe.To the left of Opacity, click the diamond-shaped dip
 to add another keyframe.
Move the playhead to 10;10.
Set the Scale value to ,000%, and Opacity to 0%.
Draw a selection box around the first column of keyframes
 at 10;04.
Press Cmd–Shift–F9 (Mac) or CTRL–Shift–F9 (Windows) to add an Easy Ease Out.
At 10;04 we also want to add the fifth layout. Press the J key to move there.
We’ll copy the layout from Superman PSD comp so switch to its tab.
Select 05-Man of Steel and copy it.
Switch back to Superman-MAIN.
With [04-animated-PC] still selected, paste the new layer.
Press the left bracket ([) key so that the layer’s in point becomes 10;04.
Press the K key to move the playhead to 10;10.
-
In the [05-Man of Steel] layer, go to the Parent & Link menu on the right and change None to 3. 04-animated-PC.
Now that the transitions are done, we’re ready to animate the next layout!
Copying an Effect & Its Settings
We can animate the text to the correct audio timing, we’ll add “The Man of Steel!” audio section to the 05-Man of Steel pre-comp. Go to 10;08.
Select the [Superman-1940-no4.mp4] layer.
With the playhead still at 10;08, press Cmd–Shift–D (Mac) or CTRL–Shift–D (Windows) to do an Edit > Split Layer.
The section we need should be selected, so copy the layer.
To keep the audio layer intact, press Cmd–Z (Mac) or CTRL–Z (Windows).
Double–click on the [05-Man of Steel] layer to open the pre-comp in a new tab.
Paste the audio layer.
Move the playhead to 0;04 (if it isn’t already).
Press the left bracket ([) key to move the audio layer’s in point here.
Switch on Motion Blur
for all the video layers. (If you don’t see the switches, you may need to click on Toggle Switches/Modes at the bottom of the Timeline.)From the Project panel, double–click 04-animated-PC to open its tab.
-
Press the Spacebar to preview this layout.
Notice that the outside rays are very similar to the rays in the Man of Steel layout. The only difference is the colors. We like this radiating effect, so we’ll save some time and copy the animated burst layers to use in the next layout.
Before we do so, let’s take a look at how the rays were animated. Click on BurstNull and Shift–click on the blackShadow layer (to select all the red layers).
Press UU to view the settings that changed from the defaults.
-
Notice that each of the Illustrator layers have an expression added to the Scale property.
On the right-hand side of the Timeline, you’ll also see the wiggle(2,10) text. Similar to a previous exercise, this means that these layers will wiggle (move randomly) 2 times per second with a maximum wiggle of 10% either bigger or smaller than the current values in horizontal and vertical scale disproportionately, to create the cool sizzling effect.
-
Also notice that a Null Object (BurstNull) is controlling all of these burst layers. You’ll create a new Null Object in a later exercise.
Using Null Objects to Parent Other Layers
A Null Object is an invisible layer that can be animated and adjusted like any other layer. Null objects are best used to simplify an animation, usually via Parenting. When a null object is set as another layer’s parent, any Position, Scale, or Rotation adjustment (but not Opacity or Effects) you make to the null object would be applied to its child layer.
When you’re done examining the layers in the Timeline, collapse them closed.
All the burst-related layers should already be selected, so copy them now.
At the top of the Timeline, click 04-animated-PC’s small X to close it and return to the 05-Man of Steel tab.
Select the bottommost layer blue/gray burst, and paste the new layers above. The new burst-related layers should be Layers 6–10 here as well.
Using the Hue/Saturation Effect to Change Colors
Next to blue/gray burst, click the eye icon
 to hide the layer. We’ll be using the pasted layers instead.
Move the playhead to approximately 3;00 so you can see the burst at its full size.
In the Timeline, deselect everything then select yellowWithOutline.
-
Go to Effect > Color Correction and select the Hue/Saturation effect.
NOTE: To apply an effect you can use either the Effect menu or the Effects & Presets panel. Animation presets must be applied from the panel (or from Adobe Bridge).
In the Effect Controls panel on the left, change Master Hue to 0x+154°. The inside outline should now be a cyan color.
In the Timeline, select the red layer. We’ll change this layer’s color using the Hue/Saturation effect as well.
Go to the Effect menu and at the top, click Hue/Saturation (the last used effect).
In the Effect Controls panel, drag the Master Saturation to –100.
To the right of Master Lightness, click on the value (the blue zero) and change it from 0 to 23. The outside outline should now be a light gray color. Looking good!
Animating Text from Different Directions
To finish off this layout, we’ll animate the text. Each of the words are already on separate layers so we can easily animate them. (We don’t need to convert them to editable text first because we’re not using a text animation preset.) We’d like the words to animate in from each of the four corners, so we’ll use the Position property.
In the Timeline, click on the and Shift–click the Steel! layer so that all four of the text layers are selected.
Move the playhead to 1;14 and press the P key to bring up the Position property.
Click the stopwatch
of any of the selected layers to keyframe them.Press Opt–T (Mac) or ALT–Shift–T (Windows) as a quick and easy shortcut to simultaneously bring up the Opacity property and add a keyframe.
Move the playhead to 1;08.
Click in any empty area of the Timeline to deselect everything.
In the Tools panel, click the Selection tool
 .
.At the bottom of the Composition panel, click the Toggle Transparency Grid icon
 . This will help us see our text, which is black like our background.
-
Using the Selection tool
move each of the four words into the four corner areas of the composition.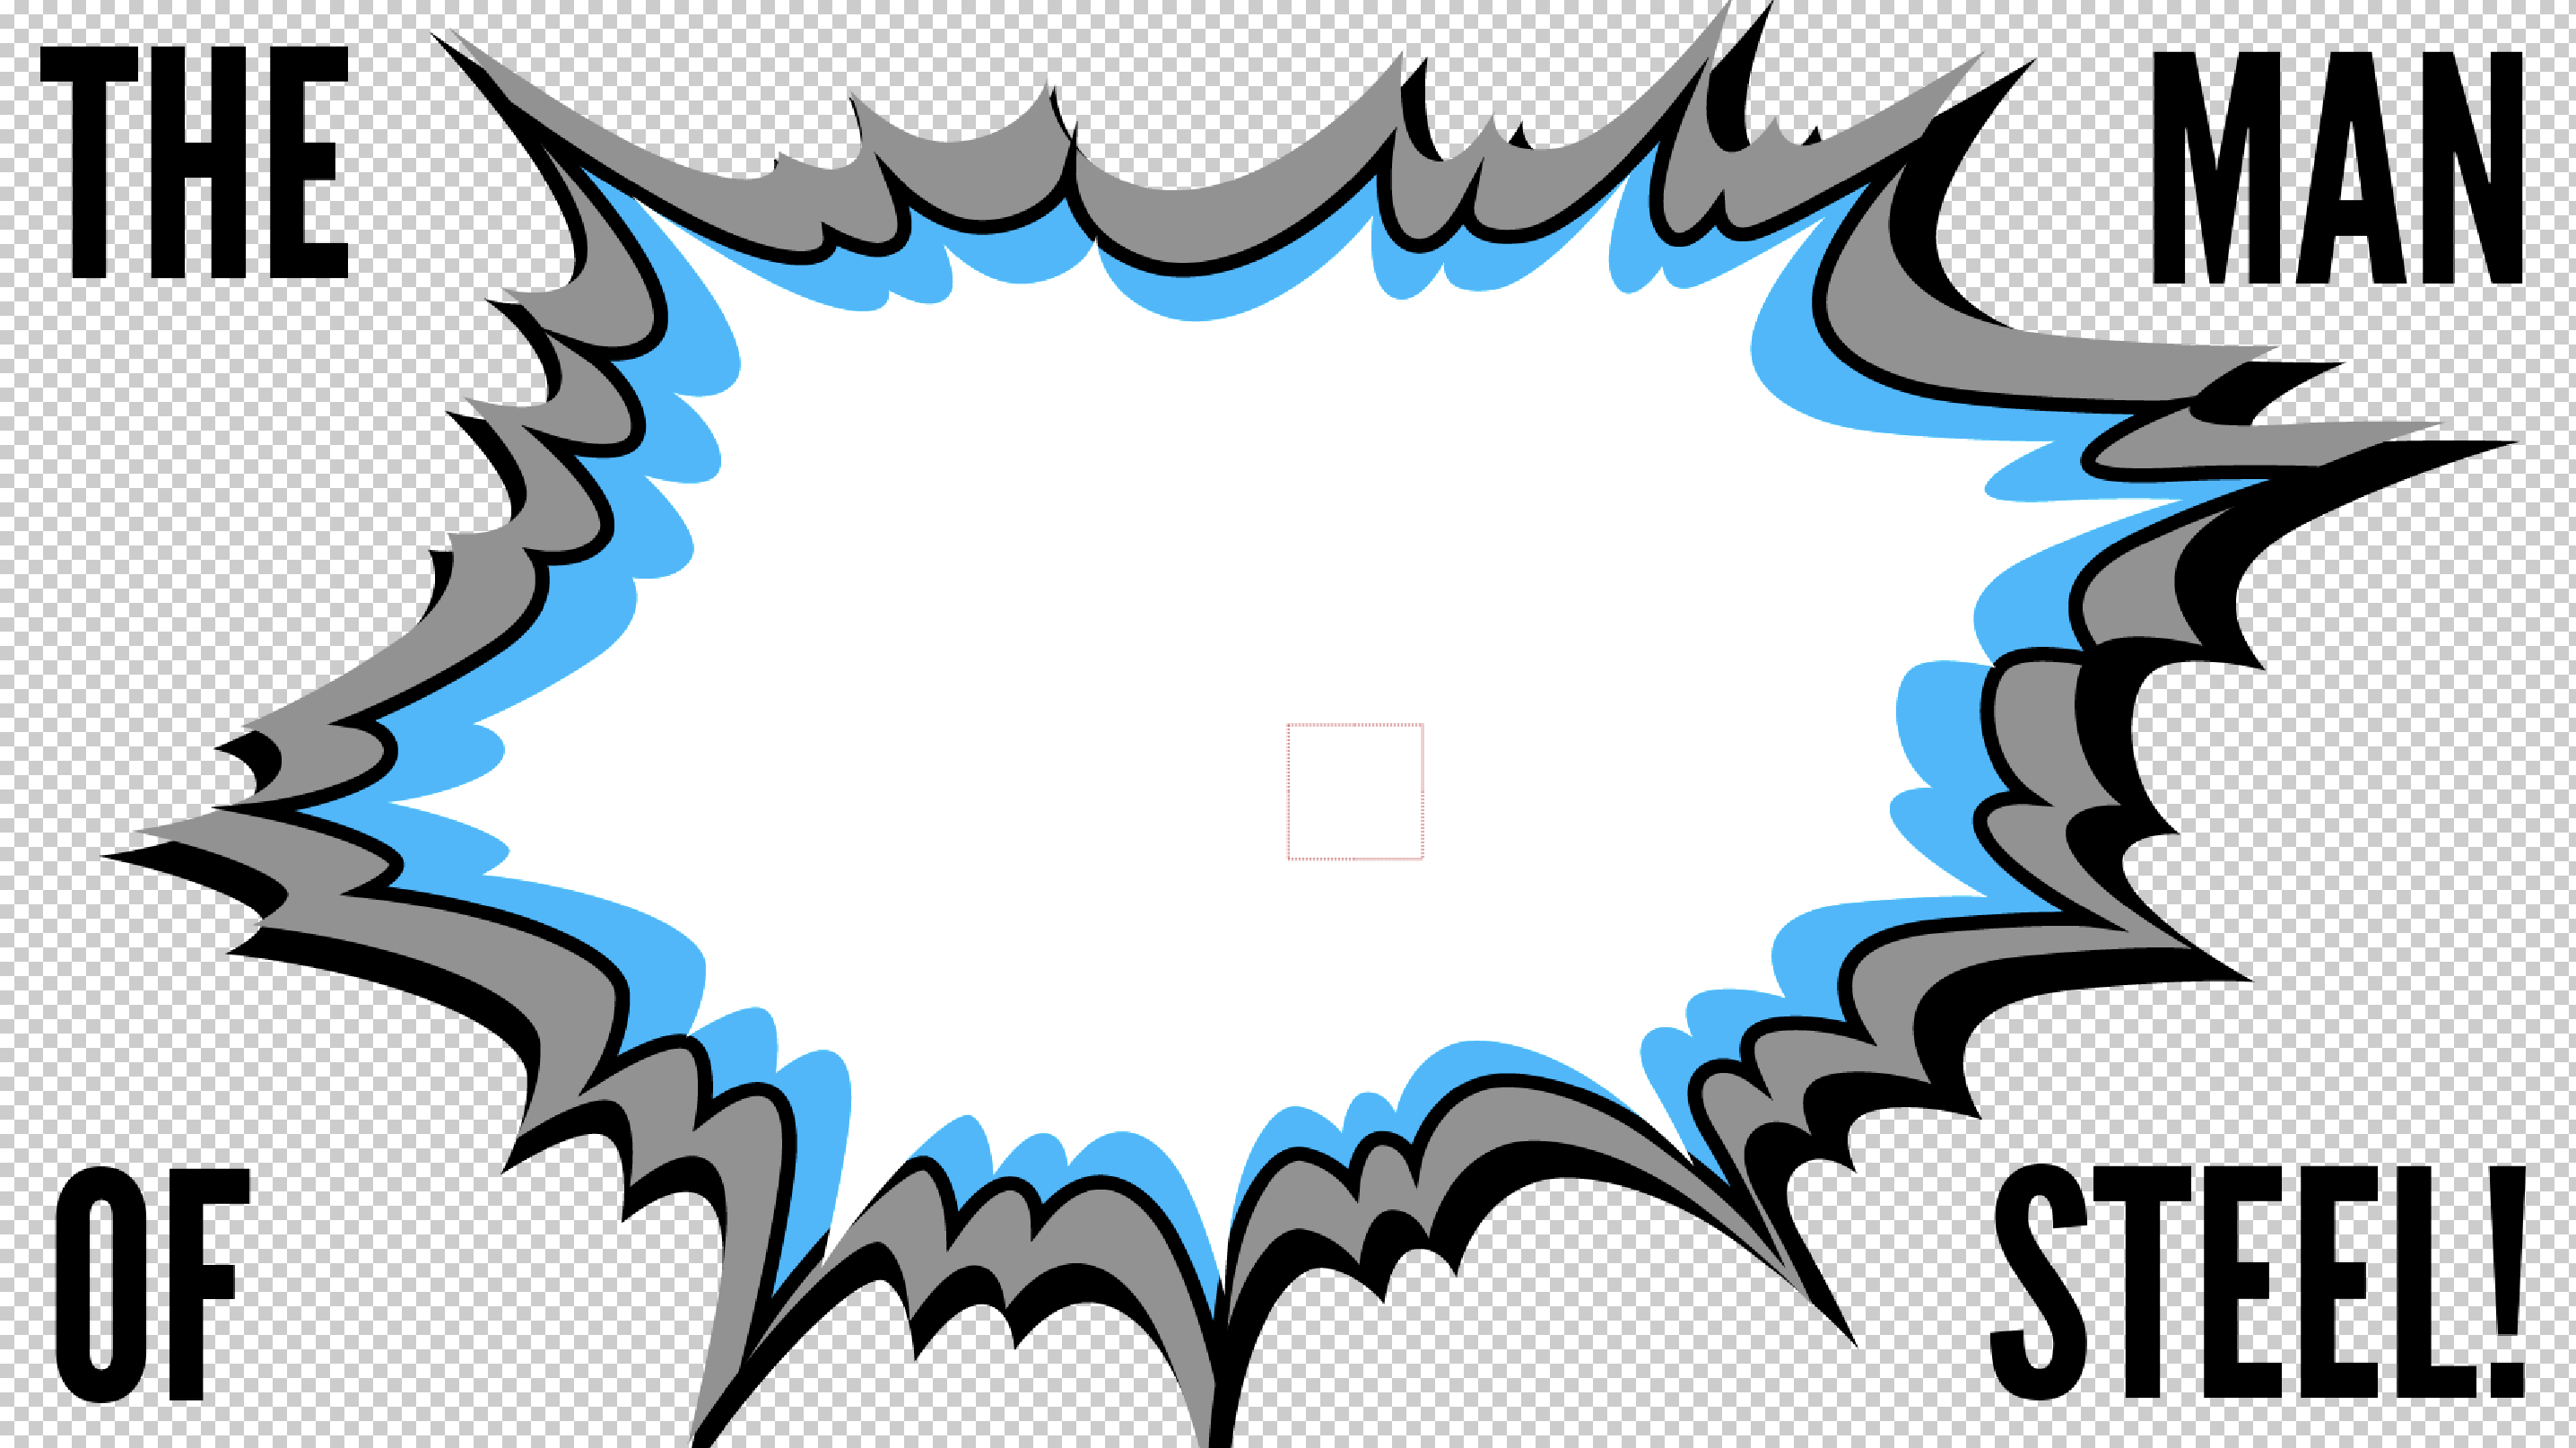
Notice that we can still see the text in the corners. We’ll need to animate the Opacity property as well, as we’ll be placing this comp over the blue background in the main composition.
Change the Opacity value of each of the four text layers to 0%.
Draw a selection box around the first column of keyframes
at 1;08. (It may help to zoom in on the Timeline using the slider  .)
.)Press Cmd–Shift–F9 (Mac) or CTRL–Shift–F9 (Windows) to add an Easy Ease Out.
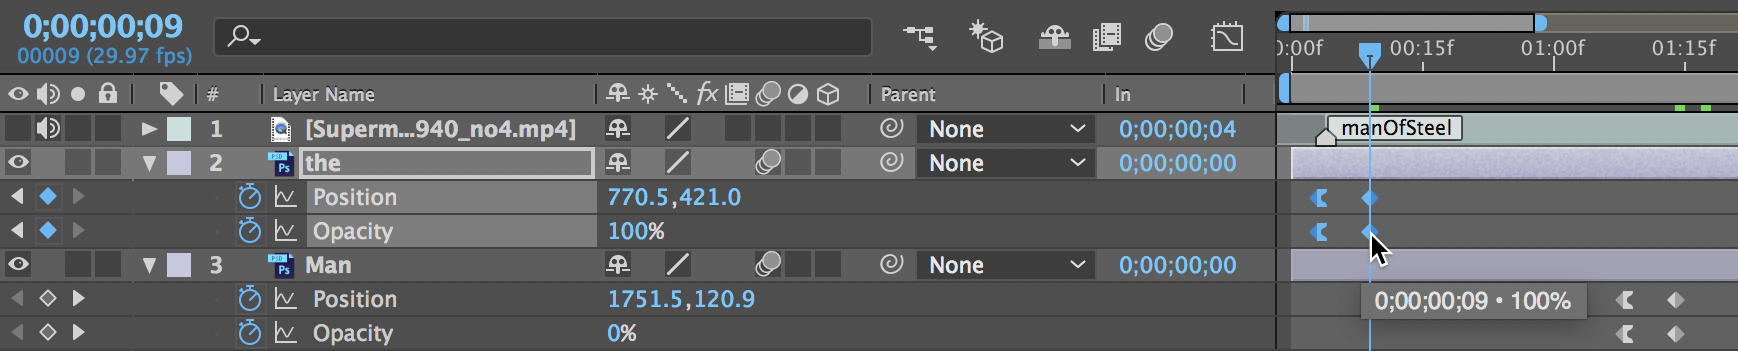
Using the Command key (Mac) or CTRL key (Windows) while dragging the playhead, scrub through the audio frame by frame, so we can locate the audio for each word. For example, at 9 frames we hear the word “the”, so we’ll need to adjust the keyframes accordingly.
Click in any empty area of the Timeline to deselect everything.
Move the playhead to 0;09.
Draw a selection box around the four keyframes for the.
-
Start dragging the keyframes to the left, then press Shift. Release the mouse when the second column of keyframes in the set snap to the playhead at 0;09.
Go to 0;16. Select the four Man keyframes, then hold Shift to snap the second column of keyframes to the playhead.
Go to 0;22 and snap the second set of of keyframes to the playhead.
Go to 1;02 and snap the second set of Steel! keyframes to the playhead.
At the top of the Timeline, turn on the large Motion Blur switch
.Switch back to the Superman-MAIN tab.
-
To the left of [05-Man of Steel] click the Audio switch
to turn off the sound.If the layer is hidden, click in its eye column
to show it. Let’s preview our newly animated layout over its blue background. Move the playhead to 10;04.
Press the Spacebar to preview. Great, this layout is done!
Animating the Last Transition
With [05-Man of Steel] still selected, move the playhead to 11;27 where we’ll begin the final transition.
Press Opt–P (Mac) or ALT–Shift–P (Windows) to simultaneously bring up the Position property and add a keyframe.
Move the playhead to 12;03.
-
We want the whole burst to animate off-screen. To move it upwards, either drag it with the Selection tool
, use Shift–Up Arrow, or reduce the Position y-coordinate until you cannot see it anymore.We set our Position values to 937.8, 500.
Select the first Position keyframe
(at 11;27) and press Cmd–Shift–F9 (Mac) or CTRL–Shift–F9 (Windows) to add an Easy Ease Out.Press J to move the playhead back to 11;27, where we want the last layout to animate in.
From the Project panel (you may need to close the Effect Controls panel), expand into the Pre-comps folder and double–click Final Lockup AI comp to open it in a new tab.
Before we add the Final Lockup AI comp to the master composition, we’re going to replace [07-Cartoon Hero] with the animated pre-comp from a previous exercise. Select [07-Cartoon Hero].
In the Project panel, click on the Assets folder so the project we’re about to import is added to the folder.
Press Cmd–I (Mac) or CTRL–I (Windows) to do a File > Import > File.
-
If you completed Exercise 2A, navigate into Class Files > After Effects Level 2 Class > Superman and double–click yourname-Cartoon Hero.aep to open it.
If You Did Not Complete Exercise 2A
Navigate into Class Files > After Effects Level 2 Class > Superman > Finished AE Projects, and double–click Cartoon Hero Finished.aep to open it.
In the Project panel, expand
 into the yourname-Cartoon Hero.aep (or Cartoon Hero Finished.aep) folder. Select cartoonHero and hold Option (Mac) or ALT (Windows) while dragging it onto [07-Cartoon Hero] in the Timeline to replace it.
We’ll use an animated pre-comp of the city background and Superman text instead of [Super-Text] so switch off its eye
.Return to the Superman-MAIN tab.
From the Project panel’s Pre-comps folder, Shift–click both City bg-PC and Final Lockup AI comp, and drag them to the Timeline below the [Superman-Animatic.mov] layer.
If [Final Lockup AI comp] isn’t Layer 2, and [City bg-PC] isn’t Layer 3, reorder them.
With both layers still selected, press the left bracket ([) key to set the layers’ in point to the playhead timecode (11;27).
Move the playhead to 12;03.
In the [Final Lockup AI comp] layer, go to the Parent & Link menu on the right and change None to 4. 05-Man of Steel.
Scrub through to see our cartoon superhero keeping a watchful eye over the city!
Close any Timeline tabs other than Superman-MAIN.
Adding a “Camera Move”
Lastly, we’d like to add a zooming “camera move” over everything. We’ll pre-compose all of the animated layers so that we can easily add Scale and Position animations to create the camera move effect.
To select all the layers belonging to the animation, click on [Final Lockup AI comp] and Shift–click on [01-Speeding Bullet-PC].
Pre-compose the layers by pressing Cmd–Shift–C (Mac) or CTRL–Shift–C (Windows).
Name it Camera Move and click OK.
Move the playhead to 12;03.
With [Camera Move] selected, press the P key, followed by Shift–S to bring up the Position and Scale properties.
Next to both properties, click the stopwatch
to keyframe them.Press the End key (or Fn–Right Arrow) to move to the last frame (21;22).
Change the Scale value to 125%.
-
Make sure the Title/Action Safe grid is turned on so we can check whether the text is within the safe zone. At the moment, the text is sitting above the safe area and we need to move it down to be inside the second set of lines (HD Title Safety).
Either move it with the Down Arrow key or change the Position values to 960, 652.
Next to [Camera Move], switch off the Audio
.In the Project panel, drag Camera Move into the Pre-comps folder to stay organized.
Close up any expanded folders.
Make sure the Work Area is the length of the comp and do a File > Save. We’re ready to render!
Rendering
Let’s export our video and save it for publishing! In the Timeline, make sure you are in the Superman-MAIN tab.
Go to Composition menu > Add to Render Queue.
In the Render Queue panel that appears at the bottom, next to Output To, click on the file name or Not yet specified.
Navigate to Class Files > After Effects Level 2 Class > Superman > Renders, name it Superman.mov and click Save.
-
At the top right of the Render Queue panel, click the Queue in AME button.
This should launch Adobe Media Encoder.
Go to Window > Workspaces > Default Workspace
Then go to Window > Workspaces > Revert Workspace to reset to factory settings.
On the right you should see that Superman-MAIN has been added to your Queue.
Below the Format column, click the small arrow
 and choose H.264 if it isn’t already.
Below the Preset column, click the small arrow
. If you created an Adobe Media Encoder preset earlier, click on your H264 preset now. If not, please continue with the steps below. If you did set a preset, you can skip to step 21!In the Preset column, choose Match Source-High Bitrate from the menu.
Click the words Match Source-High Bitrate to customize these settings.
In the Export Settings window that opens up, a little further down, make sure you’re viewing the Video tab.
Click the Match Source button to make sure our export is the same dimensions as our sequence settings.
Scroll down in the Video section and check on Render at Maximum Depth so that our video exports at a high quality.
Below that, find the Bitrate Settings.
Set Bitrate Encoding to VBR, 2 pass. This refers to a Variable Bit Rate and number of encoding passes.
Further down in the Video section, under Advanced Settings, check on Key Frame Distance and set it to 30 to match it to our project’s frame rate.
At the bottom of the Export Settings window, check on Use Maximum Render Quality.
At the bottom of the window, click OK to exit out of the Export Settings.
Below the Output File column you’ll see the filename and location where it’s going to save your file should already be set to your Renders folder. If it isn’t already, click the blue filepath text, and set it to Class Files > After Effects Level 2 Class > Superman > Renders.
To start the rendering/exporting process, in the top right of the Queue window, click on the green Start Queue button
 .
.When the progress bar below the Queue panel is completely blue, the rendering is complete! Once it’s done, you can click the blue filepath below the Output File column, to go to the folder where the file is located.
Open the Superman.mp4 movie and watch your finished piece!