Dive into this in-depth After Effects tutorial and learn how to work with 3D layers, cameras, and lights to create a compelling underwater animation scene.
This exercise is excerpted from Noble Desktop’s Adobe After Effects training materials and is compatible with After Effects updates through 2023. To learn current skills in After Effects with hands-on training, check out our After Effects Bootcamp, Motion Graphics Certificate, and video editing classes in-person and live online.
Topics Covered in This After Effects Tutorial:
Moving Layers in 3D Space, Working with Cameras, Working with Lights
Exercise Preview
Exercise Overview
In this exercise you’ll start learning to use the 3D features to create, light, and animate a camera moving through a three-dimensional scene.

Previewing the Final Video
Let’s see a preview of what you’ll be making. If you’re in After Effects, keep it open but switch to your Desktop.
On the Desktop, navigate to Class Files > After Effects Class > Working with 3D > Preview Movie and double–click underwater world.mp4.
-
Notice the following:
- The animation looks like a camera flying into the underwater environment.
- The layers appear to go in and out of focus as the camera moves.
- The message at the end appears to wipe on as the whale moves past it.
Replay the video if you need to, and close it when done.
Setting up the Workspace
In After Effects, go to Window > Workspace > Standard.
Choose Window > Workspace > Reset “Standard” to Saved Layout.
-
If the After Effects window does not fill the screen, maximize it:
Mac: At the top left of the window, click the green button (the third button). Windows: At to the top right of the window, click the Maximize button (the middle button).
Creating a Dummy Comp & Importing
When importing Illustrator and Photoshop file as Compositions, the dimensions are taken from the AI or PSD file but most of the other comp settings (duration, framerate, etc.) must come from somewhere else. These other settings are based on the last After Effects composition you had open, so to set them we can create a dummy composition before importing the files.
-
In After Effects, if you have a project open:
- Choose File > Save.
- Choose File > Close Project.
Choose Composition > New Composition, press Cmd–N (Mac) or CTRL–N (Windows), or click on the New Composition button in the Composition panel.
-
Do NOT click OK until we say so! Set the following:
- From the Preset menu choose HDTV 1080 29.97
- Make sure Resolution is set to Full.
- For Duration type in ,000 and hit Tab to set it 0;00;30;00 (30 seconds).
- If the background color is not set to black: click on the Background Color box, set the hex code to #00,000 and click OK.
- Click OK to create the composition.
In the Project panel, click on Comp 1 and hit Delete (Mac) or Backspace (Windows) to delete it.
Choose File > Import > File or press Cmd–I (Mac) or CTRL–I (Windows).
Navigate to Desktop > After Effects Class > Working with 3D > Media > images.
-
Click once on the Underwater World.ai to select it and:
Change the Import As menu to Composition—Retain Layer Sizes.
Make sure Create Composition and Illustrator/PDF/EPS Sequence are both unchecked.
Click Open (Mac) or Import (Windows).
In the Project panel, double–click on the Underwater World comp to open it.
Choose Composition > Composition Settings or hit Cmd–K (Mac) or CTRL–K (Windows).
-
Change both the Width and Height to 1080
NOTE: When working with layers that will be 3D in After Effects, it’s usually best to start with layers that are larger than you need, so you won’t have to scale them up too much.
Click OK.
-
This cropped the comp in on the art (like changing a canvas size in Photoshop). Let’s scale down the art so to fit into the smaller comp.
Press Cmd–A (Mac) or CTRL–A (Windows) to select all layers.
-
Choose File > Scripts > Scale Selected Layers and:
- Check on Scale about Center.
- Set the number to 0.5
- Click Scale.
- Close the panel.
NOTE: This script scales everything as a group with single center reference point. That’s different from changing the scale property of the layers which would scale each layer to their own individual reference point.
-
Choose File > Save As > Save As and:
- Name the file Your Name—Working with 3D.aep and
- Save it into Desktop > Class Files > After Effects Class > Working with 3D.
- Click Save.
Moving Layers in 3D Space
All layers start off as basic 2D layers, but any visual layer can be converted into a 3D layer. For layers created from imported footage, being 3D allows it to be positioned along a z–axis and for it to be affected by cameras and lights.
- In the Timeline, if you do not see the switches
 , go to the bottom of the Timeline and click the Toggle Switches / Modes button.
 - With the Timeline active, press Cmd–A (Mac) or CTRL–A (Windows) to select all layers.
- Click the 3D Layer switch
 for any of the selected layers.
 Hit Cmd–Shift–A (Mac) or CTRL–Shift–A (Windows) to deselect all layers.
Select the Puffer Fish layer.
-
Hold Cmd (Mac) or CTRL (Windows), click on the Shark, Whale, and text layers and:
Hide those layers by clicking the eye
 for any of the selected layers.
With the 4 layers selected, to the right of the layer names click a Shy switch
 .
.All the selected layers’ Shy switches should now be
 .
.
-
Now that we’ve indicated which layers we want to hide, we must actually hide them. At the top of the Timeline, click the Shy button
 as shown here:
-
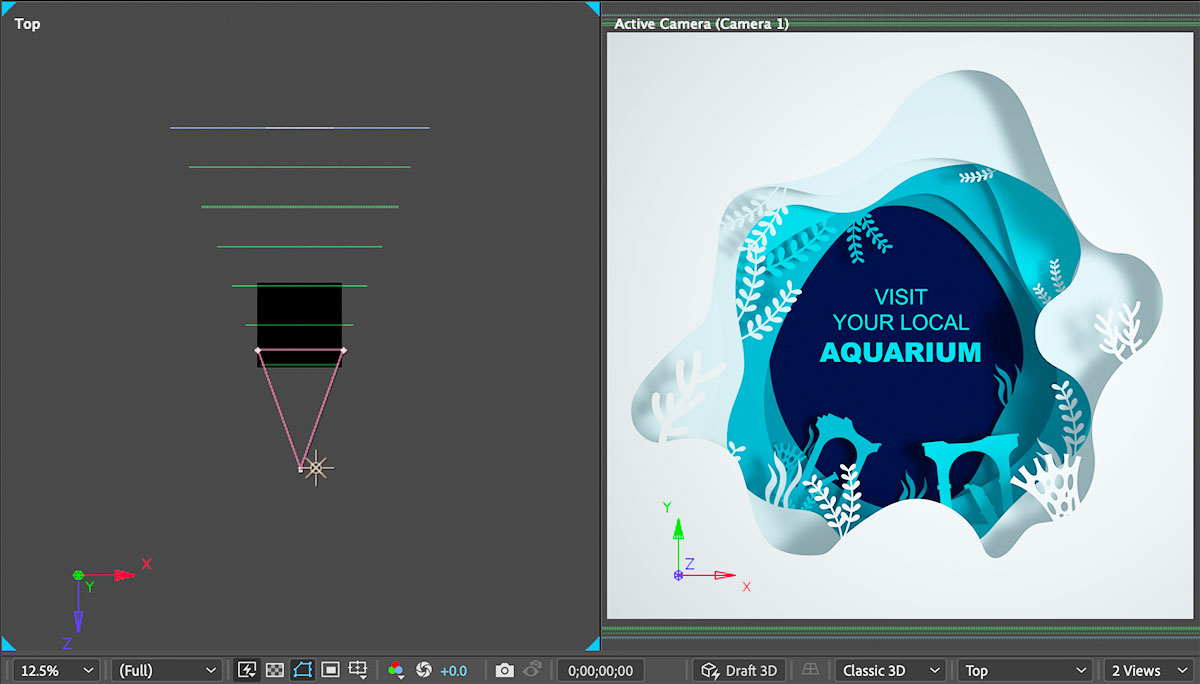
At the bottom right of the Composition panel, click on the Select view layout menu
 and choose 2 Views.
NOTE: Multiple views are helpful when working with 3D layers. The two default views are Active Camera (which is a default camera view), and Top (which gives you a top down view of the composition). While our instructions will give you specific position values for the layers, you can also visually move layers in any view with the Selection tool.
- In the Tools panel, make sure you’re using the Selection tool
 .
. - On the left side of the Composition panel, click on the view called Top.
-
Hit , (comma) several times to zoom out until you can see a lot of space outside the black composition.
Keystroke for Changing Viewport Magnification
Command Shortcut Zoom Out , (comma) Zoom In . (period) 100% / (slash) Fit Opt–/ (Mac) or ALT–/ (Windows) - Click in the Timeline to make it active.
-
Hit Cmd–A (Mac) or Ctr–A (Windows) to select all layers.
NOTE: Selecting all in the Timeline will select layers that are not shy, whereas selecting all in the Composition panel will select all layers, including shy layers.
- Click on any layer’s label color and change it to Green.
Press P to reveal the Position property for all layers.
Press Cmd–Shift–A (Mac) or CTRL–Shift–A (Windows) to deselect all layers.
For the Ring 1 layer, change the 3rd position value (z-position) to -500
-
Continue setting the 3rd position value (z-position) of the remaining layers as follows:
Layer Name Z–Position Ring 2 0 Ring 3 500 Ring 4 ,000 Ring 5 1500 Ring 6 ,000 bg 2500 - In the Timeline, change the bg layer’s label color to Blue.
-
In the Top view notice the layers start at the front of the composition (the bottom of the black box) and go farther back in even increments (of 500).
This creates three-dimensional front to back depth which we’ll use when we move a camera through the scene from front to back.
Choose File > Save or hit Cmd–S (Mac) or CTRL–S (Windows).
Adding a Camera
In the Timeline, select the top–most layer.
-
Choose Layer > New > Camera and set the following options:
- Type: One–Node Camera
- Preset: 50mm
- Enable Depth of Field: Unchecked
- Lock to Zoom: Checked
- Click OK.
- In the Top view notice the camera position. It’s a little too close to our art, so let’s move it back a bit.
-
With the Camera 1 layer selected:
- Hit P to reveal Position.
- Set the 3rd position (z–position) value to -1800
- Hit P again to hide Position.
NOTE: Once a camera layer has been added to the composition it replaces the default camera to become the new Active Camera.
Scaling 3D Layers
When we change the position of a layer in 3D space its visual size changes. Due to the effects of perspective, layers that are closer to you appear larger, while layers that are farther back appear smaller. Let’s resize the layers get them back to the same/similar proportions they were before we moved them in 3D space.
- Hit Cmd–A (Mac) or CTRL–A (Windows) to select all layers.
- Press S to show Scale for all layers. (This also hides Position.)
- Hit Cmd–Shift–A (Mac) or CTRL–Shift–A (Windows) to deselect all layers.
-
Select the bg layer.
- In the Active Camera view notice how small the selected object is (look for the blue resize handles in the middle of the view).
- Change any of the Scale values (they’re all linked) to 205
- Notice the size is now just slightly larger than the composition, so it covers the entire area.
-
Continue setting the Scale for the remaining layers as follows. (We’re scaling all the layers up so they’re a bit larger than the composition. This gives us a little extra freedom if we need to move the layers around later.)
Layer Name Scale Ring 1 44 Ring 2 60 Ring 3 91 Ring 4 130 Ring 5 154 Ring 6 175 - Hit Cmd–A (Mac) or Ctr–A (Windows) to select all layers.
- Press S to hide Scale for all layers.
- Press Cmd–Shift–A (Mac) or CTRL–Shift–A (Windows) to deselect all layers.
Choose File > Save or hit Cmd–S (Mac) or CTRL–S (Windows).
Adding a Light
Placing layers in 3D space can create an interesting visual effect, but it all starts to come together when you add camera and light layers. Keep in mind that only layers with their 3D switch enabled are affected by cameras and light.
In the Timeline, select the top–most layer.
-
Choose Layer > New > Light and set the following:
- Light Type: Point
- Color: White (#FFFFFF)
- Intensity: 100
- Falloff: None
- Cast Shadows: Checked On
- Shadow Darkness: 50
- Shadow Diffusion: 50
- Click OK.
-
With the Point Light 1 layer selected:
- Hit P to reveal Position.
- Set the 3 Position values to: 740,542, -1800
(This places the light right next to the camera.) - Hit P again to hide Position.
-
In the Active Camera view notice there are no shadows.
Creating shadows is a two part process. The light must have the option enabled, but so do the layers we want to cast shadows.
-
Select the Ring 1 layer.
- Hold Shift and click on Ring 6 to select these and all the layers in between.
Press AA (hit A twice) to reveal the Material Options for the highlighted layers.
-
On any of the selected layers, to the right of the Cast Shadows click the word Off (so it changes to On).
You can now see the shadows in the Active Camera view, and they look cool!
Hit Cmd ~ (Mac) or CTRL ~ (Windows) to hide the properties of all selected layers.
Hit Cmd–Shift–A (Mac) or CTRL–Shift–A (Windows) to deselect all layers.
Animating Cameras & Lights
Move the playhead to the beginning of the timeline.
-
In the Point Light 1 layer’s Parent & Link column, set the menu to 2. Camera 1
Making the camera the parent of the light will allow the light to move with the camera as we fly it into the scene. This will give us some interesting movement of the shadows in the scene.
-
Select the Camera 1 layer:
- Hit P to reveal Position.
Click the Position stopwatch
 .
.Move the playhead to 10;00
-
Hover over the camera’s 3rd position value and drag it to the right to move the camera into the scene.
NOTE: You can scrub a value faster by holding Shift, or scrub it slower by holding Option (Mac) or ALT (Windows).
-
To finalize the camera’s position, click on its 3rd position value, type 1020 and hit Return (Mac) or Enter (Windows).
You should end up with blue filling the entire screen (we’ll be showing text here in a moment).
- CTRL–click (Mac) or Right–click (Windows) on the second position keyframe and choose Keyframe Assistant > Easy Ease
- Scrub through the timeline to see how the camera moves into the scene. Nice!
Hit P to hide Position.
Finalizing the Text at the End
- At the top of the Timeline, click the Shy Switch
 to reveal the other layers.
 - Show the text layer by click in its eye column.
- Scrub through the timeline to see how the camera moves toward the text and passes through it.
-
We need to move this text back to the same 3D plane the bg layer. The easiest way to do this is to copy and paste the Position property.
Select the bg layer and:
- Hit P to reveal Position.
- Click on the Position property name to highlight it.
- Hit Cmd–C (Mac) or CTRL–C (Windows) to copy this layer’s Position property.
- Hit P again to hide Position.
-
Select the text layer.
- Press Cmd–V (Mac) or CTRL–V (Windows) to paste the position values onto the selected layer.
-
With the text layer still selected, hit S to show Scale.
- CTRL–click (Mac) or Right–click (Windows) on Scale and choose Reset.
- Hit S to hide Scale.
-
Scrub through the timeline, or use the Spacebar to preview the animation.
This is already looking good, but in the next exercise we’ll add more animation by adding marine life.
Choose File > Save or hit Cmd–S (Mac) or CTRL–S (Windows).