Learn how to export an image sequence from After Effects, create an Animated GIF in Photoshop, and reduce the number of frames in this detailed tutorial.
This exercise is excerpted from past After Effects training materials and is compatible with After Effects updates through 2020. To learn current skills in After Effects, check out our After Effects classes and video editing classes in NYC and live online.
Topics Covered in This After Effects Tutorial:
Exporting an Image Sequence from After Effects, Exporting As Animated GIF in Photoshop, Reducing the Number of Frames
Exercise Preview
Exercise Overview
In this exercise, we’ll learn how to export our work from After Effects so that we can use Photoshop to export the final animated GIF.

Getting Started
-
You should still have yourname-classes-in-a-day.aep open in After Effects. If you closed it, re-open it now by going to File > Open Project then Desktop > Class Files > After Effects Class > Classes in a Day GIF. We recommend you finish the previous exercises (1B–1C) before starting this one. If you haven’t finished it, do the following sidebar.
If You Did Not Do the Previous Exercises (1B–1C)
- If a project is open in After Effects, go to File > Save, then File > Close Project.
- Go to File > Open Project and navigate to Desktop > Class Files > After Effects Class > Classes in a Day GIF > Finished AE Projects.
- Double–click on classes-in-a-day-Ready for Exporting.aep.
- Do a File > Save As > Save As. Name the file yourname-classes-in-a-day.aep and save it back into the Classes in a Day GIF folder.
Exporting from After Effects
We can’t export an animated GIF directly from After Effects, but we can from Photoshop. To move our work from After Effects into Photoshop, we will export all the frames as separate PNG files. Let’s see how to do that.
- Go to Composition and click Add to Render Queue.
- In the Render Queue panel that appears, next to Output Module click the word Lossless.
- At the top of the Output Module Settings dialog that opens, set Format to PNG Sequence.
- Click OK.
- Next to Output To click Not yet specified or the file name.
- Navigate to Desktop > Class Files > After Effects Class > Classes in a Day GIF.
- Make sure Save in subfolder is checked on, at the bottom of the window.
- Click Save.
-
At the top right of the Render Queue panel, click Render.
A progress bar at the top of the Render Queue panel will show the rendering progress, which should not take long for a short animation like this.
Exporting As Animated GIF in Photoshop
- Launch Adobe Photoshop.
- Go to File > Open.
- Navigate to Desktop > Class Files > After Effects Class > Classes in a Day GIF > PSD Layout.
- Notice there are 170 PNG images numbered 0,000 through 00169.
- Click once on PSD Layout_0,000.png (the first frame).
- Check on Image Sequence. Mac users may need to click the Options button to see the Image Sequence option. (You may need to wait a few seconds for the Image sequence checkbox to appear.)
- Click Open.
- In the dialog that appears, set Frame Rate to 30 fps.
- Click OK.
- If the Timeline panel at the bottom is not visible, go to Window > Timeline to open it.
- Choose View > Fit on Screen.
-
At the top left of the Timeline panel click the Gear icon (for Set playback options) and do the following:
- Set Resolution to 100%.
- Click the Gear icon again to close the options.
Press the Spacebar to preview the animation.
Reducing the Number of Frames
Photoshop cannot export animated GIFs longer than 500 frames. In this case, we’re well under the 500-frame limit, but we’ll show you a technique for reducing the number of frames in case your animation ever exceeds 500 frames.
This technique involves taking all the frames where nothing is moving on-screen and combining them into a single frame, by importing the first of the stationary frames as a Smart Object. Then you extend that frame to the 500-frame mark or as long as your animation was (whatever is shorter), and delete the unneeded part of the PNG sequence you imported into Photoshop. If your GIF animates for more than 500 frames, you will need to edit it down in After Effects and reexport the sequence before using this technique!
- At the top right of the Timeline panel, go into the panel menu
 and choose Panel Options.
 - Set Timeline Units to Frame Number.
-
Click OK.
At the bottom left of the Timeline the current time display now shows frames (0) instead of timecode (0:00:00:00).
- In the Timeline, drag the playhead to the start of the animation (frame 0).
- Go to File > Export > Save for Web (Legacy).
At the top right of the window, set the file format to GIF. (The GIF settings don’t matter—we’re only here to see the duration of the final GIF if exported as-is.)
- On the right side of the window, at the bottom of the options, notice it says 1 of 170, indicating that the exported GIF will contain 170 frames.
- Click Done.
- If the timeline is too zoomed out, it will be hard to scrub through the timeline precisely. At the bottom of the Timeline is a slider that controls the timeline’s zoom. Adjust the slider so Layer 1 in the timeline fills at least the width of the Timeline panel (you can adjust it again later if needed).
-
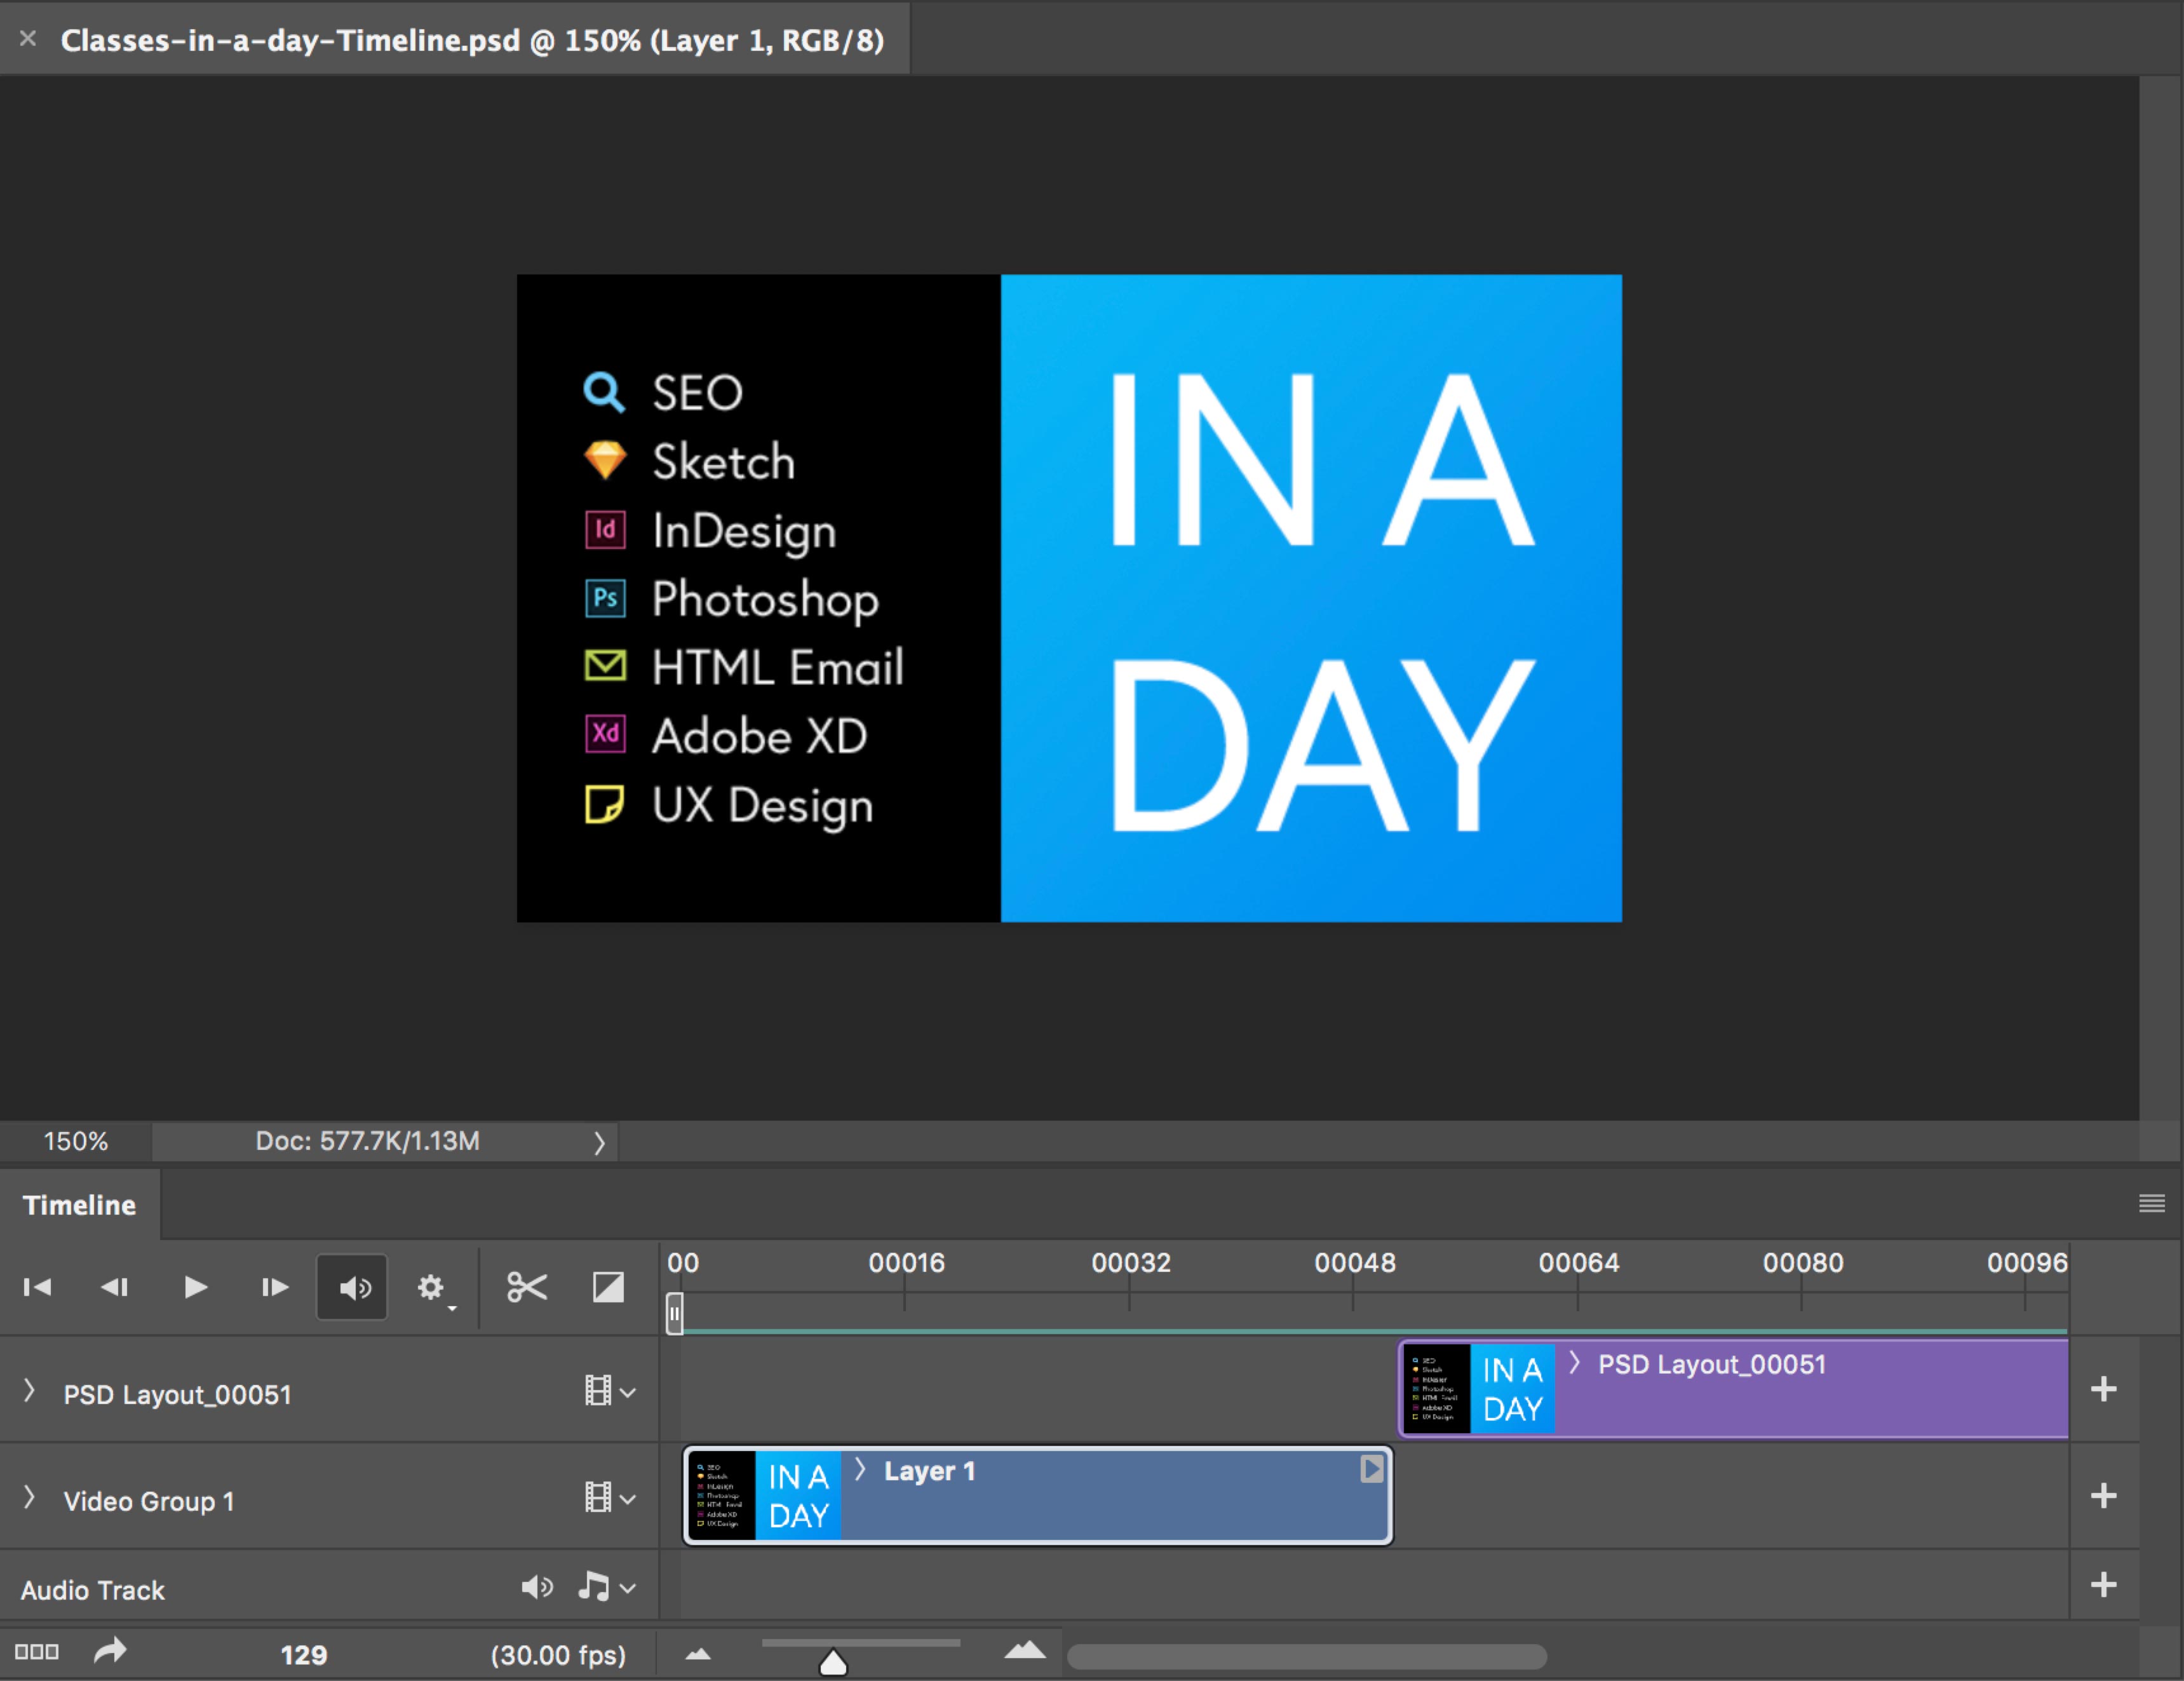
Drag the playhead until you find the frame where the animation stops moving (which should be frame 51).
Pay close attention! There is some nearly imperceptible movement between frames 50 and 51, which means frame 51 is the frame we’re looking for. Frames 51–169 are identical because no movement happened during those frames.
- In the Layers panel, select Video Group 1 (not Layer 1).
- Go to File > Place Embedded to place the single frame as a Smart Object.
- Navigate to Desktop > Class Files > After Effects Class > Classes in a Day GIF > PSD Layout.
- Double–click on PSD Layout_00051.png to place it.
- Press Return (Mac) or Enter (Windows) to accept the current size. If you still see a box around your image with an X across it, hit Return again.
-
As shown below, in the Timeline, drag the end of the PSD Layout_00051 clip until it’s flush with the end of the Layer 1 clip. Be careful not to drag the entire clip, drag only the end.

- Select the Layer 1 clip in the Timeline.
- Make sure the playhead is still at frame 51.
- Near the top left of the Timeline, click the Split at Playhead button
 .
. - In the Timeline, click on Layer 1 copy.
- Press Delete to remove it.
- Go to File > Export > Save for Web (Legacy).
- Make sure the file format is still set to GIF.
- At the bottom right of the window, notice it now says 52 of 52 (previously it was 1 of 170). The duplicate frames at the end of our animation have been merged into a single frame!
- Set Looping Options to Forever.
-
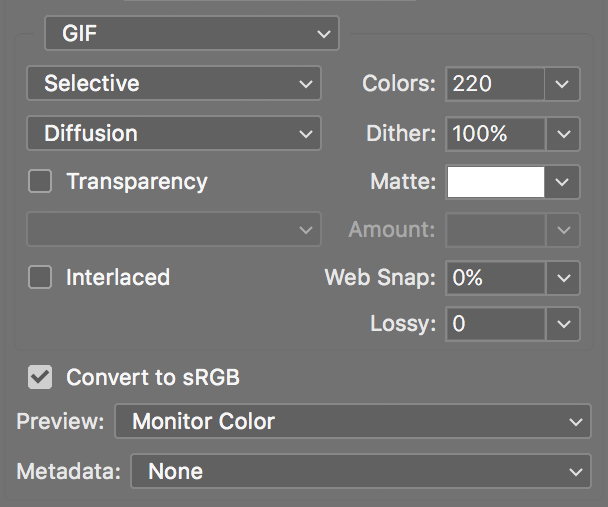
At the top right of the window, set the following options. We think they are a good balance of image quality and file size for this animation.
- Click Save.
- Name the file yourname-classes-in-a-day.gif and save it into Desktop > Class Files > After Effects Class > Classes in a Day GIF folder.
- Go to File > Save As.
-
Save your Photoshop file as Classes in a Day Timeline.psd in the Desktop > Class Files > After Effects Class > Classes in a Day GIF folder.
This is in case you need to change your export settings in the future.
- Leave Photoshop and switch to your Desktop.
- Navigate to Desktop > Class Files > After Effects Class > Classes in a Day GIF > Final GIF.
-
CTRL–click (Mac) or Right–click (Windows) on yourname-classes-in-a-day.gif, go to Open With and select a web browser (Google Chrome, Firefox, Safari, Microsoft Edge, etc.).
Enjoy the fruits of your work!