Delve into the inner workings of Adobe After Effects with this tutorial, exploring advanced techniques such as video splitting, alpha inverted matte creation, feathering masks, logo removal using motion tracking, and color correction, culminating in the creation of a commercial based on an existing edit.
This exercise is excerpted from past After Effects training materials and is compatible with After Effects updates through 2020. To learn current skills in After Effects, check out our After Effects classes and video editing classes in NYC and live online.
Topics covered in this After Effects tutorial:
Splitting Video Clips, Creating an Alpha Inverted Matte using Solids and Masks, Feathering Masks, Hiding a Logo Using the “Punching a Hole” Technique, Using the After Effects Tracker for Logo Removal, Color-Matching using the Levels Effect, Color-Correcting Footage to Black & White
Exercise Preview
![]()
Exercise Overview
In Sections 3–5 we’ll create a commercial for Cellphone based on an existing edit. This will involve motion graphics in certain sections, and in others, techniques that fall more into the realm of digital compositing.

Digital compositing, in a nutshell, is a collection of methods that take images and video created using different means, putting them together so that they feel like they were filmed at the same time. (Or in the case of touch-up or beauty work, enhancing the original footage.) Digital compositing techniques include color keying, matte (background) painting, color correction, motion tracking, and rotoscoping.
In this exercise, we’ll learn how to use motion tracking to remove a logo on an actor’s shirt.
Terminology Used in These Sections
Color Keying: Keeping or removing a unique color from a scene to create an area of transparency. This is sometimes referred to as bluescreen or greenscreen removal.
Mask: A shape drawn on an existing layer using the Pen tool or Shape drawing tools.
Matte: A layer that is used as a way of revealing or hiding parts of another layer, either via transparency info (Alpha or Alpha Inverted Matte) or brightness/luminance info (Luma or Luma Inverted Matte).
Inverted: To make the opposite of. Black becomes white, transparent becomes opaque, etc.
Rotoscoping: Selecting an area of video to keep or remove, either by hand-drawing a mask path or by using painting tools, or a combination of both.
Color Correction: Enhancing the color of a video clip or scene using effects or filters that adjust hue, contrast, saturation, or color balance.
Previewing the Final Movie
You’re about to preview a video with sound. Make sure your speakers are on so you can hear the audio. You may want to plug in some headphones if they’re available.
On the Desktop, navigate to Class Files > After Effects Level 2 Class > Cellphone > Final Movie and double–click Cellphone-Commercial.mov.
Play the video and notice that in the scenes between 0:08 and 0:15, there’s a man talking and using his phone. Notice that he is wearing a plain black shirt. Believe it or not, the shirt started out with a logo on it, which we will be removing using motion tracking!
Replay the video as many times as you need.
Getting Started
Open Cellphone Started.aep from the Cellphone folder.
Save the file as yourname-Cellphone.aep into the Cellphone folder.
If the Cellphone-MAIN comp isn’t already open in the Timeline, go to the Project panel and double–click that comp.
In the Timeline, notice that the promo has already been set up for you with a bunch of staggered pre-comps that are ready to go.
Look in the Composition panel and notice that in the bottom-left corner, there is a rough cut video, which is accompanied by audio. This will be a helpful reference for us as we work on the other layers—staggered pre-comps ready for animation.
Splitting the Interview Clip
We’re going to remove the logo from the actor’s shirt. Before we get started, let’s get acquainted with how we’ll achieve this. It’s not a unique color to the scene, so we cannot use color keying. It’s not a totally unique shape from frame to frame, so we should not use (time consuming) rotoscoping. Instead, we will use a combination of a matte and motion tracking that we call “punching a hole”. This method involves a 3-layer “sandwich” for each shot in the interview sequence:
A soft-edged shape that covers up and follows the movement of our logo. We call this “The Hole”. Its primary visibility is turned off and it acts as a “hole punch” for the original footage below.
Our original footage, which uses the above layer as an Alpha Inverted Matte. As a result, it has a soft-edged hole that moves around to always hide the logo. This has the same name as our original footage clip.
A duplicate copy of our original footage, but shifted in position so that the area showing through the moving hole above has no logo but does have the same shirt and video-grain texture as our original footage. We call this “The Patch”.
In the Timeline, double–click the [6-Interview] pre-comp to open it in a new tab. This pre-comp contains the footage we’ll be editing in this exercise.
Scrub through the clip and notice that it’s comprised of three different shots. We want to split this clip into three parts, breaking it up where each shot starts. This way we can work with each shot in the sequence individually and make a separate “sandwich” for each.
Move the playhead to 12;09 where the second shot starts.
Select the interview layer.
Press Cmd–Shift–D (Mac) or Ctrl–Shift–D (Windows) to split the layer.
Rename the interview 2 layer to texting.
Move the playhead to 14;03 where the third shot starts.
The texting layer should already be selected, so split it now.
Rename the texting 2 layer to calling.
Adding Solids for the Mattes That Will Cover the Logo
The next thing we’ll need to do is create some solids to mask the logo area. Unfortunately, it’s not possible to track a layer’s mask, so instead we’ll create a matte and track it to the movement of the logo.
If it’s not already, set the zoom percentage to Fit.
Notice the crocodile on the right side of the man’s shirt. That’s Lacoste’s logo—definitely not something Cellphone would want in their ad!
Select the interview layer.
Press Cmd–Y (Mac) or Ctrl–Y (Windows) as a shortcut for Layer > New > Solid.
-
In the Solid Settings dialog, name it Interview Hole, make it comp size, and set the color to any contrasting color such as cyan (a bright blue).
Because the logo moves around so much from shot to shot, it will be helpful to split this solid into three separate sections, matching the interview clips.
Move the playhead to 12;09.
Select [Interview Hole] and split the layer.
Rename the newest [Interview Hole] (Layer 3) to Texting Hole.
Move the playhead to 14;03.
With Texting Hole selected, split the layer.
Rename Texting Hole 2 to Calling Hole.
Move Calling Hole to the top of the layer stack so it is Layer 1.
Move Texting Hole above texting so it becomes Layer 3.
Let’s keep ourselves organized by changing the layer colors. Select the [Interview Hole] and interview layers.
Click on one of their colored squares and change it to Cyan.
Select the Texting Hole and texting layers and change their layer color to Orange.
Select the Calling Hole and calling layers and change their layer color to Red.
Deselect all, then hide the three Hole solid layers by clicking their eye switches
 .
.We’ll draw a mask on each solid layer to block out the logo, revealing the layer below. Select the [Interview Hole] layer.
Press the Home key (or Fn–Left Arrow) to get to the beginning of the Timeline.
We can use keystrokes to quickly select a tool that’s hidden behind another tool. Press Q to get the Rectangle tool
 , then press Q twice more to get the Ellipse tool
  .
.If the resolution isn’t Full, change it now to help you mask the layer.
-
On the Composition panel, draw an oval over the crocodile (zoom in if needed). Make sure to completely cover it. You can use the Arrow keys to adjust the position.
NOTE: Remember that drawing a shape on a selected layer will mask that layer, even if the selected layer’s visibility has been turned off.
Turn on the [Interview Hole] layer’s visibility
.We want to center the oval’s anchor point so that we can track it easily. Go to Layer > Transform > Center Anchor Point in Layer Content.
If you don’t see the TrkMat column, click the Toggle Switches / Modes button.
-
For the interview layer, click the TrkMat menu and change it to Alpha Matte “[Interview Hole]”.
We want the crocodile to disappear, but that’s all we can see! Remember that alpha mattes show what’s inside the matted area and hide everything else.
-
The fix is simple—we need to invert the mask or the matte. To invert the matte, change TrkMat to Alpha Inverted Matte “[Interview Hole]”.
What the Different Matte Modes Do
Alpha & Alpha Inverted Mattes are meant to be used with layers that have some areas of transparency. Luma & Luma Inverted Mattes are intended to be used with layers that have high contrast between dark and light values, preferably that are black and white (we’ll use these in a later exercise).
Alpha Matte: Our layer is only visible where the layer above it is opaque—in other words, 100% alpha on the matte layer means our current layer can be seen completely in those areas.
Alpha Inverted Matte: Transparent areas of matte act as a “window” for our current layer to show through. Our current layer is seen where the matte layer has 0% alpha.
Luma Matte: Our layer is visible through the brightest areas of the matte.
Luma Inverted Matte: Our layer is visible through the darkest areas of the matte.
-
Notice the oval now appears white. It’s now hiding the area inside the masked oval, like we want!
We created a hole where our masked oval was, so we’re looking through to the comp’s white background.
Feathering the Mask to Soften Its Edges
At the moment, the edges of the oval shape are pretty defined. We’ll feather the edges so that when we fill the hole with a patch, the edges will blend in smoothly.
So we can see things better, go to the bottom left of the Composition panel and make sure Toggle Mask and Shape Path Visibility
 is turned off (gray).
Expand the [Interview Hole] layer into Masks > Mask 1.
To the right of Mask Feather, hover over either 0 dimension and drag the hand slider
 rightwards a little. They should both change.
Keep an eye on the Composition panel as you continue to drag, stopping at around 16 pixels (or whatever value feathers your mask and fully hides the crocodile).
Hiding the Crocodile
To hide the crocodile logo, we’ll fill the hole we made with a different area of the shirt. To do so, we’ll duplicate the footage layer, and move it into position.
Select the interview layer and duplicate it.
Rename the interview 2 layer to interview patch and move it below the interview layer.
We don’t want to matte this bottom layer, so change the interview patch layer’s TrkMat menu to No Track Matte.
-
Now to hide the crocodile! Select the interview patch layer and use your Arrow keys (in any direction) to position it out of the oval and out of sight.
Feel free to play around with the positioning so that you show an area of the shirt that blends in nicely. We set our Position values to 924, 658.
Scrub the playhead forward and notice that soon enough, the croc appears again! Because the patch we made is static, it doesn’t follow the guy’s movement. We’ll need to track the movement of the logo.
Using the Tracker to Hide the Logo
Motion tracking allows us to track an object’s movement so it can be applied to another object, such as a layer. To do so, open the Tracker panel by going to Window > Tracker.
In the Timeline, double–click the interview layer so it opens in the Layer panel next to the Composition panel.
Zoom in to 200% to see the crocodile better.
Press the Spacebar (to temporarily get the Hand tool
 ) and drag so the crocodile is visible.
Press V to get the Selection tool
 .
.Go to the beginning of the Timeline.
In the Tracker panel, click Track Motion. This creates the Tracker controls.
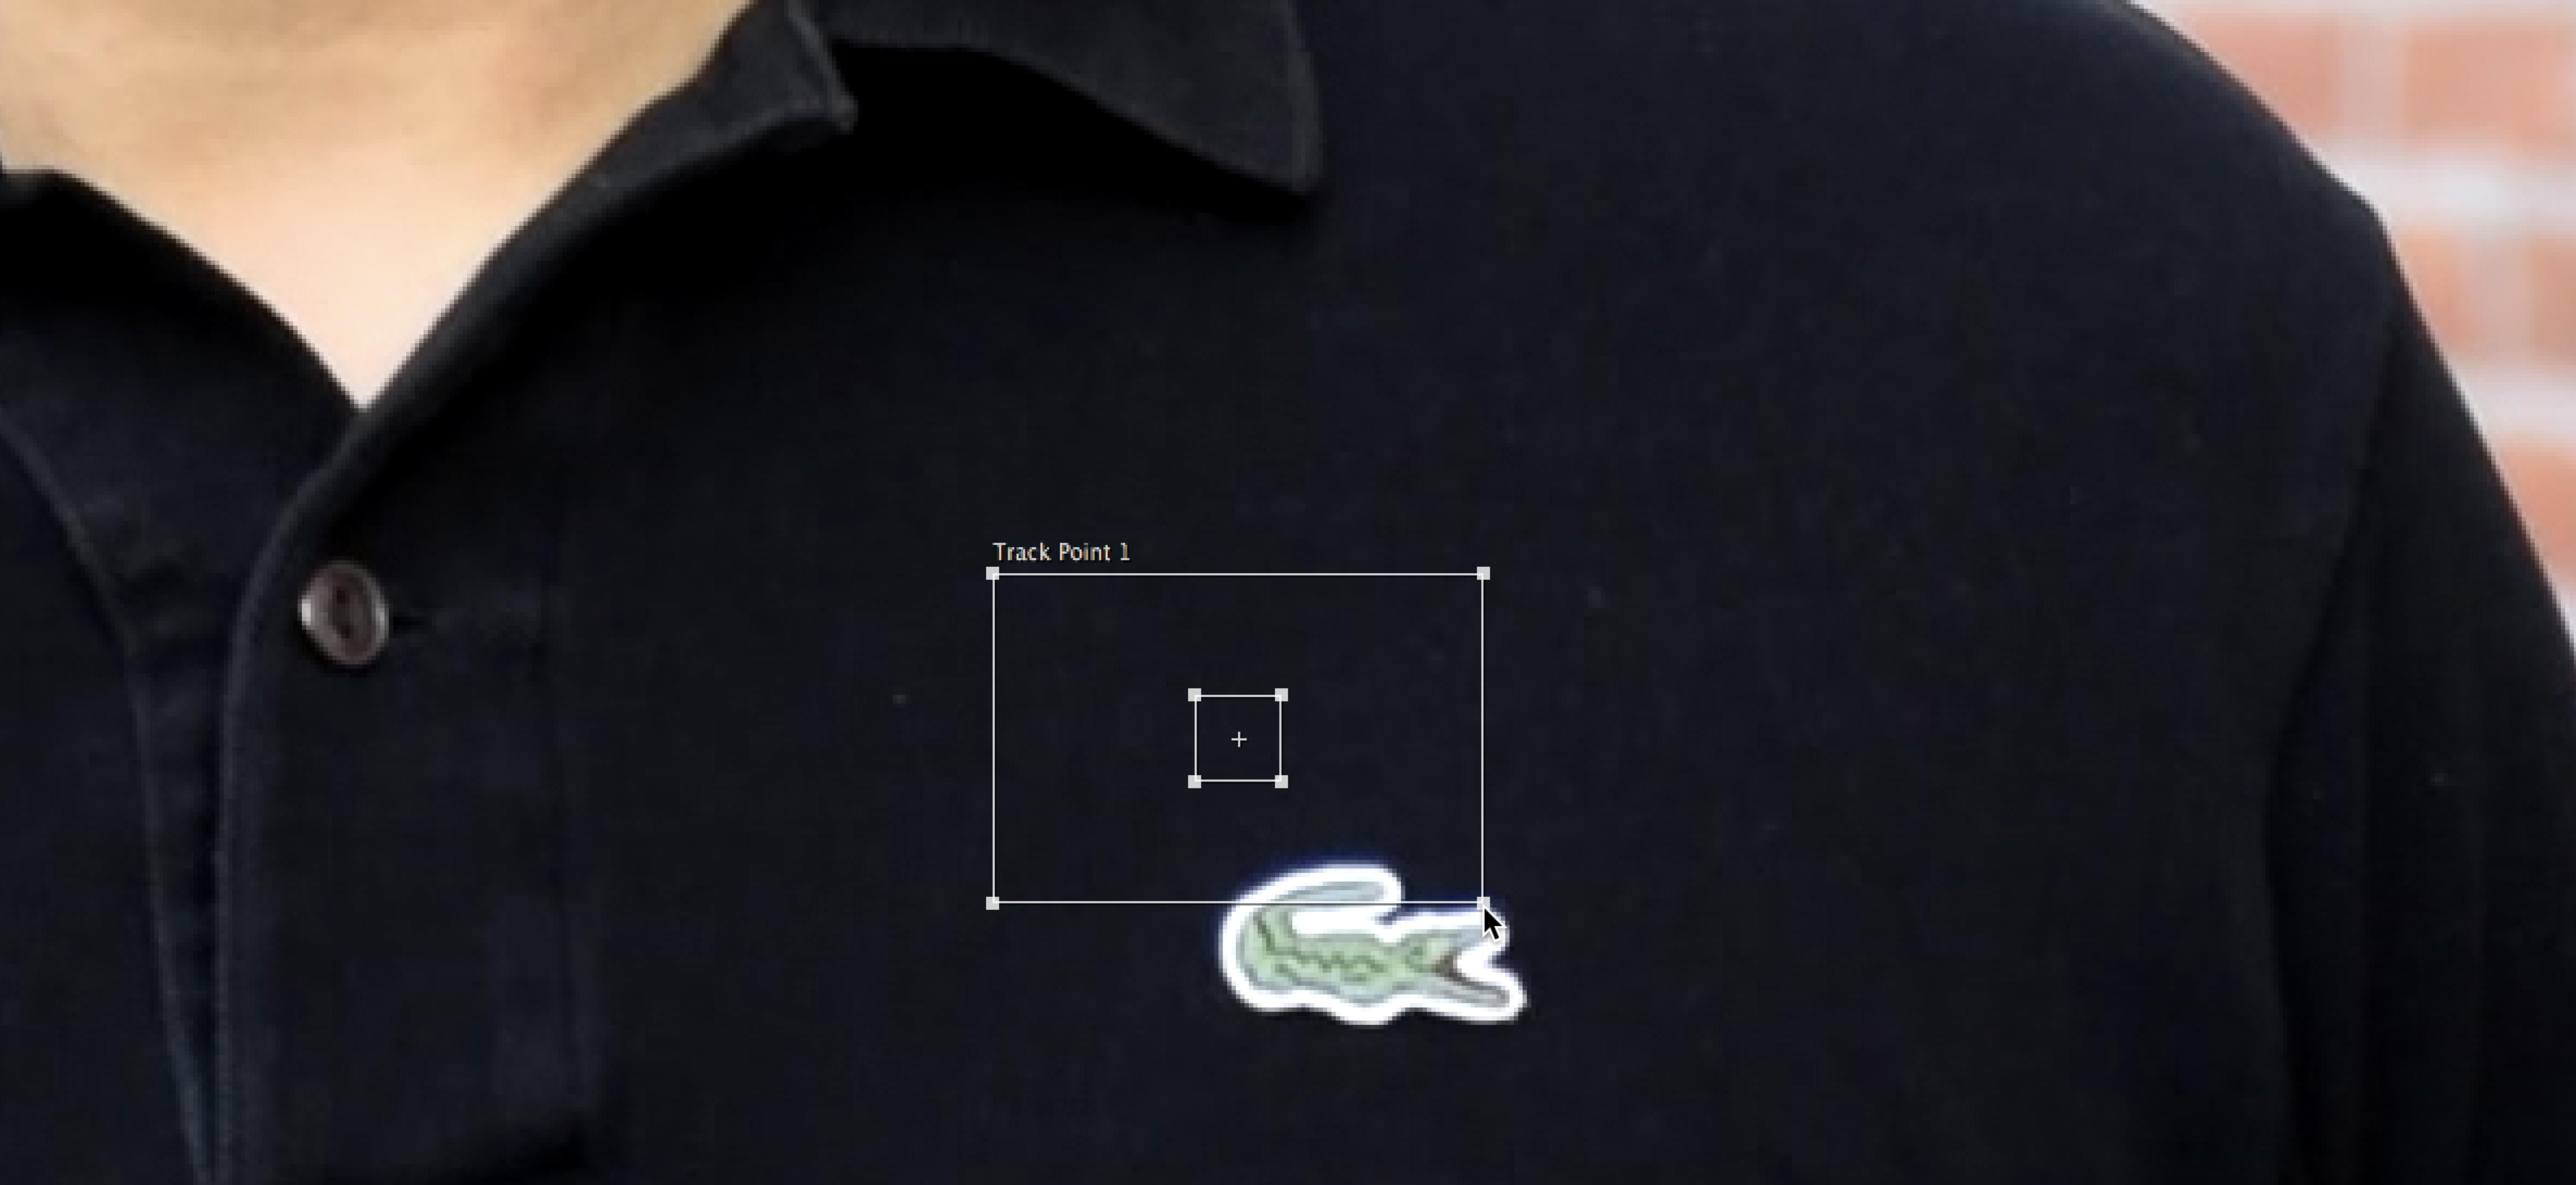
In the Composition panel, notice a box labeled Track Point 1 appears. There are three parts to the Tracker: an outer box, an inner box, and an attach point (+).
-
The outer box is the search region that indicates where After Effects will look for the pattern contained in the inner box. Increase the size of the box by dragging one of the corners of the outer box as shown:
-
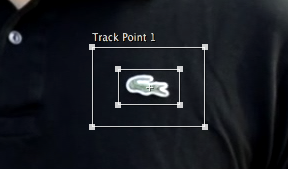
The inner box contains the unique pattern that After Effects is going to look for on a frame-by-frame basis. Drag one of the corners of the inner box as shown:

-
The attach point (the + in the middle of the inner box) indicates where the Tracker will attach. Within the inner box, click and hold in the area between the attach point and the edge and drag. You’ll see an enlarged view appear, which magnifies anything within the inner box. Release when the crocodile appears centered:

-
Readjust the size of the inner and outer boxes to better fit the crocodile.

NOTE: If we had a situation where we knew the area to be covered would just move in one direction (e.g. camera panning to the right), we would shift the outer box (search region) over to the right (or whichever direction is appropriate) so that After Effects would be searching for the pattern as it moves in that direction. We are keeping the outer box centered around the inner box because the crocodile moves around so randomly.
By default, it targets the topmost layer. To change the target, go to the Tracker panel and click Edit Target.
In the Motion Target dialog that opens, set the Layer menu to 5. Interview Hole. This specifies that this is the layer we want targeted.
Click OK.
In the Tracker panel, make sure only the checkbox next to Position is checked. This is the only kind of tracking we want right now.
Still in the Tracker panel, click the Options button.
-
In the Motion Tracker Options dialog, set the following:
- Channel: Luminance, which affects the brightness and contrast. It will work best in this case as the crocodile contrasts so much with the black shirt.
- Enhance Before Match should NOT be checked as our footage is relatively sharp.
- Track Fields should NOT be checked as our footage is progressive rather than interlaced.
- Subpixel Positioning should be checked so tracking will be more precise.
- Check on Adapt Feature On Every Frame.
- At the bottom, make sure the menu is set to Stop Tracking If Confidence is Below 90%. Confidence specifies the amount to which the pattern matches the previous frame.
Click OK.
-
In the Tracker panel, next to Analyze, click the Analyze forward button
 to preview the tracking. As you watch the preview, make sure the crocodile never goes outside the borders of the boxes. Feel free to scrub through more slowly if needed.
Because we have our Motion Target set to Interview Hole, when we apply our settings, all the tracking info is going to immediately apply to the interview layer. The attach point is going to correspond to wherever the interview’s anchor point is. Remember that we previously used Center Anchor Point in Layer Content to center the Interview Hole’s anchor point, so this should work out well.
In the Tracker panel, click Apply.
In the window that appears, Apply Dimensions should be set to X and Y. Click OK.
Select the [Interview Hole] layer and press U to show the keyframes.
On the right side of the Timeline, notice all those Position keyframes!
Deselect all.
Make sure the [Interview Hole] layer’s eye switch
is off and the interview layer’s TrkMat menu is set to Alpha Inverted Matte “Interview Hole”.-
Scrub through the [Interview Hole] section to see the croc completely hidden!
If the Patch Doesn’t Always Blend in Seamlessly
- Select the interview patch layer so we can easily specify a different part of the shirt to show through.
- In the Composition panel, drag the patch layer around to see if there’s another part of the shirt that has a bit more dimension.
- We can also increase the amount of feathering. Expand into [Interview Hole] > Masks > Mask 1 and increase the Mask Feather to about 20 pixels (or whatever works for you).
- Increase Mask Expansion to around 5 pixels.
- If the logo is showing again, move the interview patch layer to hide it.
Collapse any expanded layers in the Timeline to keep it tidy. This section is done!
Hiding the Logo on the Texting Layer
Select the texting layer.
Duplicate it.
Rename the duplicate to texting patch and move it below the texting layer.
Select the Texting Hole layer and make sure its eye
is turned off. (Remember, that’s our Solid layer that we’re going to draw an oval mask on.)Press Q to select the Ellipse tool
.Press I to get to the layer’s in point at 12;09 where the texting shot starts.
On the Composition panel, draw an oval over the crocodile (zoom in if needed).
This time, because of the guy’s arm movement, we’ll need to tilt the oval a bit to match the logo’s angle. Press V to select the Selection tool
.Double–click one square handle on the oval.
Mouse over an area just outside the square handle so you see a rotation handle
 . Click and drag it so the mask better aligns with the croc.
Use the Arrow keys to fine-tune the positioning.
Go to Layer > Transform > Center Anchor Point in Layer Content.
Select the texting layer and set its TrkMat menu to Alpha Inverted Matte “Texting Hole”.
Select the texting patch layer and use the Arrow keys to hide the logo. We set our Position to 1000, 460 to get the texture we need. (We can fix the color using effects later.)
Go to the bottom left of the Composition panel and make sure Toggle Mask and Shape Path Visibility
is turned off (gray).Expand into Texting Hole > Masks > Mask 1 and increase the Mask Feather to about 11 (or whatever works for you).
Set Mask Expansion to 2.
Refining the Color of the Patch Using the Levels Effect
The main reason we’re using the footage itself as the patch rather than a color solid is because in this case, the shirt area will look much more natural with shirt texture. If the texture is not exactly the right matching color, we can apply an effect to the layer to help.
Select the texting patch layer and go to Effect > Color Correction > Levels.
In the Effect Controls panel, find the Histogram—the graph that shows the distribution of pixels in an image or frame of video. Make sure it’s black and white instead of color. If not, click it.
Immediately below the Histogram, notice there are three sliders: one for the white, black, and gray points. (If you can’t see the black point slider on the right, expand the panel.)
To improve the contrast of an image, you’d simply move the black point slider
 to the left-hand end of the mountain range, and the white point slider
  to the right-hand end of the mountain range. Feel free to try this out, but make sure to press Cmd–Z (Mac) or Ctrl–Z (Windows) enough times to undo it!
-
The gray point or gamma slider
 adjusts how much of the image’s pixels will be mapped from black to gray or gray to white. By default it’s equidistant from the black and white sliders. That’s not always what looks best for an image, so try these:
- Drag the gamma slider rightwards, so it’s very close to the black point slider. You should see that the image washes out, because more pixels are being mapped to the gray-to-white range than to the black-to-gray range.
- Try the reverse—moving the gamma slider leftwards, close to the white point slider. The image darkens, with more pixels going to the dark side.
When done experimenting, drag the gray point slider
slightly to the left so that Gamma is around 1.27, which is good for our image.-
Color gamma works a bit differently because you adjust individual color channels. To see what each of these channels look like in isolation, go to the bottom middle of the Composition panel and click the Show Channel and Color Management Settings button
 . It has 3 rings of color, so we like to call it the “Nerd Olympics” button.
Notice the Red, Blue, and Green options. That’s because images for TV or web (such as footage in After Effects) are in the RGB or additive colorspace. In this colorspace, viewing each channel individually shows which pixels are 100% “on” in that channel as being white, and 0% “on” as being black. Anything that contains some of that color, is a shade of gray.
Choose Red, and notice that anything that’s pure white (100% each of red, green, and blue is white) or pure red is white. Anything black (0% each of red, green, and blue is black) or containing no red color, are black.
When you’re done playing in the Nerd Olympics area, click the button
and change it back to RGB to see your full color image again.-
To perfect our color correction, we need to remove some of the blue from the patch. Go back to the Effect Controls panel, click the menu to the right of Channel and choose Blue to edit this individual color channel.
The opposite of the Blue channel is the Yellow channel. In this channel, dragging the Gamma slider to the left maps more pixels to the gray-to-white range for the Blue channel, and makes the image more blue overall. Dragging the Gamma to your right, maps fewer blue pixels to the gray-to-white range, and gives more of those pixels over to Blue’s opposite: Yellow.
NOTE: The opposite of Red is Cyan, and Green’s opposite is Magenta. You may recognize these opposites if you’ve ever worked with print images, which are in the CMYK, or subtractive colorspace.
-
Drag the midpoint slider to the right so that Blue Gamma is around 0.93 (or whatever looks good depending on where you placed the patch layer).
Now that the image has more yellow, it blends in seamlessly!
Tracking the Texting Layer
Select the texting layer, then press I to make sure you’re at its in point.
Double–click the texting layer to open it in the Layer panel.
If you aren’t viewing at 200%, zoom in now.
In the Tracker panel, click Track Motion.
Make sure you’re using the Selection tool
.Click and hold on the area between the outer and inner boxes (but not the attach point) to drag it over the crocodile logo.
Resize the inner box so that it neatly covers the croc.
-
The camera is moving a bit more in this shot. Resize the outer box a bit larger:
In the Tracker panel, click Edit Target.
Set the Layer menu to 3. Texting Hole, the layer we want to target and click OK.
Conveniently, After Effects keeps the Tracker options we set last time, so we don’t need to redo them. In the Tracker panel, next to Analyze, click the Analyze forward button
to preview the tracking.It should look good, so in the Tracker panel, click Apply.
In the Motion Tracker Apply Options, click OK.
Scrub through to check that the texting patch looks good. If needed, select the texting patch layer and adjust the positioning and/or Levels (color).
Collapse the expanded layers in the Timeline.
Hiding the Logo on the Calling Layer
In the Timeline, select the calling layer, then press I to go to its in point.
Duplicate the layer.
Rename the calling 2 layer to calling patch and move it below the calling layer.
Select the Calling Hole layer and make sure its eye
is turned off.Press Q to select the Ellipse tool
.On the Composition panel, draw an oval over the crocodile (zoom in if needed).
Again we should tilt the oval to better align it. Press V to get the Selection tool
.Double–click one square handle on the oval, then rotate it so that it better aligns with the croc. Use the Arrow keys to fine-tune the positioning.
Select the calling layer and set TrkMat to Alpha Inverted Matte “Calling Hole”.
Select the calling patch layer and use the Arrow keys to hide the crocodile logo.
Under Calling Hole > Masks > Mask 1, increase the Mask Feather to about 10.
With the Calling Hole layer selected, go to Layer > Transform > Center Anchor Point in Layer Content.
Tracking the Calling Layer
Double–click the calling layer to open it in a new tab in the Layer panel.
Press the Spacebar and drag so you can better see the crocodile.
Make sure you have the Selection tool
selected.Make sure you’re at 14;03 in the Timeline.
In the Tracker panel, click Track Motion.
Click and hold on the area between the outer and inner boxes (but not the attach point) to drag it over the crocodile logo.
Resize the inner box so that it neatly covers the croc. The camera moves quite a bit, so resize the outer box a bit larger than last time.
Notice that by default, the Motion Target is already set to Calling Hole, the layer we want to target.
-
Our Tracker options will still be set correctly, so in the Tracker panel, next to Analyze, click the Analyze forward button
to preview the tracking.If the Analyze Forward Preview Suddenly Stops
If at some point, the preview suddenly stops and the attach point turns red, that means After Effects has lost confidence in the pattern matching. This can also happen if the outer box goes out of frame. If this happens, you can manually analyze and adjust the boxes at each problematic frame.
- In the Tracker panel, next to Analyze, click the Analyze 1 frame forward button
 to step forward one frame.
 - In the Composition panel, adjust the alignment of the boxes over the crocodile if needed. (If the boxes go outside the frame, reduce them because they are too big.)
- Click Analyze forward again. If it stops again, repeat the previous steps to check/adjust the remaining frames.
- In the Tracker panel, next to Analyze, click the Analyze 1 frame forward button
When everything looks good, in the Tracker panel, click Apply. Then click OK.
Scrub through to check that the calling patch looks good. If needed, select the calling patch layer and adjust the positioning.
- Collapse the expanded layers.
If you’re still zoomed in, change the zoom percentage to Fit. Feel free to change the resolution if needed.
Turning the Video Black & White
Now for color correction! Unlike the implications of the phrase “color correction” there is no wrong or right answer when it comes to color. It’s more like enhancement! But our client specifically asked for the footage to be black and white. We can easily do this using an adjustment layer.
Make sure you’re still in the 6-Interview tab.
Go to the start of the comp at 7;27.
Select the topmost layer, Calling Hole, so the adjustments we make will affect all the layers below it.
-
Press Cmd–Opt–Y (Mac) or Ctrl–Alt–Y (Windows) as a shortcut for Layer > New > Adjustment Layer.
NOTE: In After Effects, adjustment layers and any effects you apply to them affect all layers below them in a 2D stack. Unlike the adjustment layers in Photoshop, in After Effects you can apply any effect to an adjustment layer and even combine effects for further customization.
Select the [Adjustment Layer 3] layer, and rename it BW adjustment.
Go to Effect > Color Correction > Black & White.
In the Effect Controls panel, notice the various controls we have for adjusting the color. Adjust the levels as you see fit, or just leave the defaults.
Scrub through the video to check out what we’ve accomplished so far. Great!
Close the 6-Interview tab.
Save the project and leave it open. We’ll continue working on it in the next exercise.