Learn how to effectively use Adobe Bridge to sort, compare, and label images, as well as how to create slideshows and fullscreen previews in this comprehensive tutorial.
This exercise is excerpted from past Adobe Bridge training materials and is compatible with InCopy updates through 2016. To learn current skills in Adobe Creative Cloud and graphic design, check out our graphic design classes in NYC and live online.
Topics covered in this Adobe Bridge tutorial:
Closely comparing images, Rating images, Assigning labels to images, Slideshows
Exercise Preview
Exercise Overview
You can use Bridge to easily sort through and compare all the images you have available for your project. A built-in rating system and flexible groups let you quickly narrow your selection to the best images.
Navigating to a Folder
-
To make sure we are looking at the same thing:
- Go to Window > Workspace > Essentials.
- Then go to Window > Workspace > Reset Workspace.
At the top left of the window, you should see a Favorites and a Folders tab.
You should already be viewing the Favorites tab, so in the list of favorites click on Desktop.
Go into the following folders: Class Files, then Bridge Files and finally into the Australia Photo Shoot folder.
At the bottom right of the window, adjust the thumbnail size using the slider
 until you can see the images well and can read their entire filename.
Ranking Images & Using the Loupe
Some of the pictures are better than others. We need to decide on four images that we’ll actually use in our project.
Let’s take a closer look at some of these photos by switching to the Preview workspace. Go to Window > Workspace > Preview.
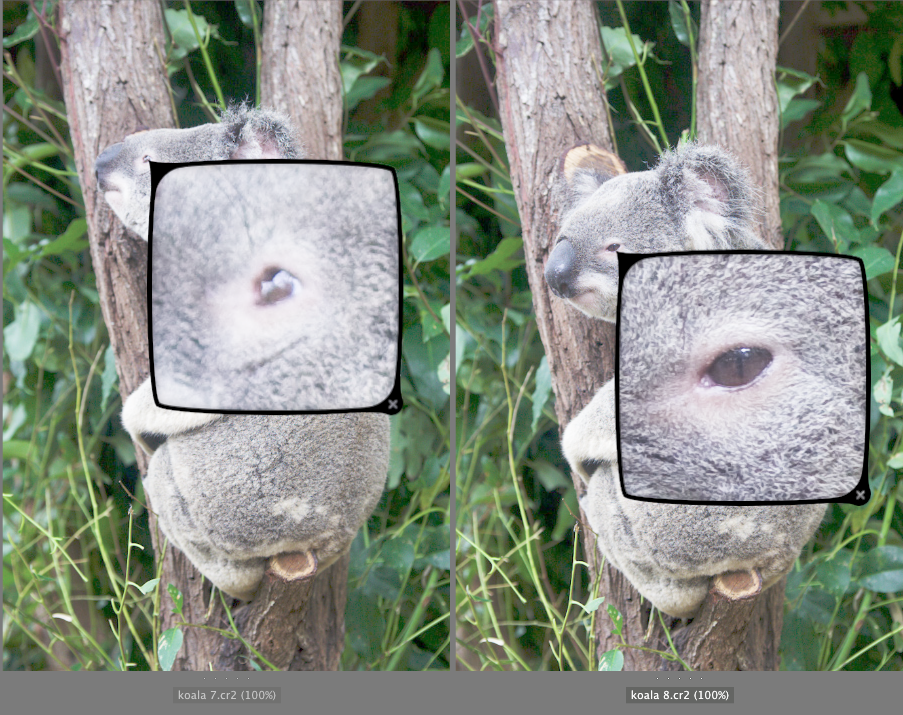
Click once on koala 7.cr2 thumbnail. You may have to scroll through the thumbnails in the Content panel to find it.
Hold down Shift and click on koala 8.cr2 to see both images side-by-side.
They are both somewhat similar shots, but let’s check out how they compare in regards to focus.
In the large preview of koala 7.cr2, click right on his eye. You’ll get a Loupe that zooms all the way in on the eye detail.
-
In the large preview of koala 8.cr2, click right on his eye. You should now have a Loupe for each of the koala’s eyes. Notice that koala 8.cr2 is more in focus.
Click once on the thumbnail of koala 8.cr2 so it is the only one selected. Do NOT double–click on it, as that will open it in Photoshop.
Click anywhere on the loupe again to close it.
-
You can rate images from 0–5 stars, with 5 stars being the best. Press Cmd–4 (Mac) or Ctrl–4 (Windows) to assign it the second-highest rating of 4 stars.
If you get a message about “Labels and Rating are stored in XMP files…” check Don’t show again and click OK.
Go to Window > Workspace > Essentials.
Click once on koala 3.cr2.
Press Cmd–4 (Mac) or Ctrl–4 (Windows) to give it a 4-star rating.
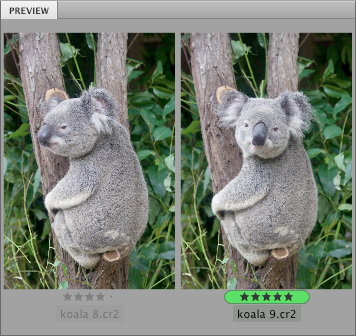
Select koala 9.cr2.
Press Cmd–5 (Mac) or Ctrl–5 (Windows) to assign it the highest rating of 5 stars.
Select sydney aquarium - shark.cr2.
-
A different way to rate images is using the dots under the thumbnail. In the Content panel, click the rightmost dot below the thumbnail to give it a 5 star rating (as shown below). Keep in mind that these dots aren’t displayed when thumbnails are too small. Also, the dots shown in the Preview panel are for display only and can’t be used to set ratings.

-
Using whichever method you like, assign the following rating to these images:
sydney aquarium.cr2: 4 stars sydney cityscape.cr2: 5 stars sydney opera house - front.cr2: 3 stars sydney opera house - side.cr2: 5 stars sydney street performers.cr2: 4 stars -
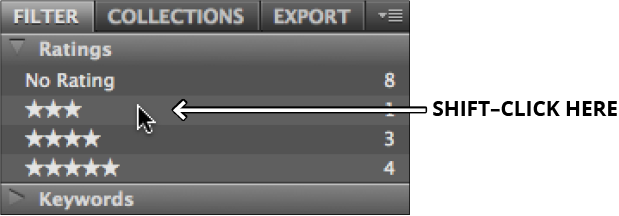
With the ranking complete, let’s hide the images we’re not interested in. On the left of the window, in the Filter panel under the Ratings section, Shift–click on the 3 stars to only show images with 3 or more stars.
Labeling Images
We’ve decided on the final four images. We’re going to label them Approved (green) to mark them as our top picks.
Click once on koala 9.cr2.
-
Hold Command (Mac) or Control (Windows) and click on:
- sydney aquarium - shark.cr2
- sydney cityscape.cr2
- sydney opera house - side.cr2
Go to Label > Approved.
To see only the “top picks” in the Filter panel, under Labels, click Approved.
Viewing a Slideshow
To see all the images again go to the Filter panel and Shift–click on the 3 stars and uncheck Approved to remove the filters. There should now be no check marks next to the star ratings and all your images should be showing.
Click once on the first image (named koala 1.cr2) to select it.
Go to View > Slideshow (Cmd–L (Mac) or Ctrl–L (Windows)).
-
If the Adobe Bridge Slideshow Commands are displayed over your image, press H on the keyboard to hide them.
NOTE: You can press H later if you want to display them again.
If the Slideshow is automatically moving through the pictures, press the spacebar to stop the slideshow.
-
Press L on the keyboard to show the Slideshow Options window and set:
Slide Duration: Manual Caption: Full When Presenting, Show Slides: Centered Click OK.
Press the right arrow key to switch to the next image (koala 2.cr2).
Press 4 on the keyboard or number pad to rate the image as four stars. You will see the stars appear in the caption area at the bottom of the screen.
Use the Right/Left arrow keys to navigate forward/backward through the photos.
If you see a photo you like, click on the photo to zoom to 100%. Click and drag to move around the image and check out the detail. Click again to zoom back out.
The slideshow will end if you try to arrow past the last picture. If you are still in the slideshow, press Esc to exit the slideshow and return to Bridge.
Viewing Fullscreen Previews
Select any thumbnail and press the spacebar to view it full screen.
That was easy! Press the spacebar again to close the preview.
Press the spacebar again to go back to the full screen preview.
-
Press any Arrow key (Left, Right, Up, or Down) to switch between photos. Cool!
While these previews are great, if you want the transitions and additional display options, you’ll have to use the “true” slideshow feature.
Press the spacebar to close the preview.