Dive into this comprehensive iOS Development tutorial that covers topics like preparing and using the assets catalog, adding and testing launch images, and adding iTunesArtwork files.
This exercise is excerpted from Noble Desktop’s past app development training materials and is compatible with iOS updates through 2021. To learn current skills in web development, check out our coding bootcamps in NYC and live online.
Topics covered in this iOS Development tutorial:
Preparing the assets, Using the assets catalog, Adding & testing launch images, Adding iTunesArtwork files
Exercise Preview
![]()

Exercise Overview
Now that our app is functional, we need to finish a few last things, such as setting launch screens for when the app first launches, along with icons for the app!
Getting Started
-
If you completed the previous exercise you can skip the following sidebar. We recommend you finish the previous exercises (B1–B4) before starting this one.
If you completed the previous exercise, Jive Factory.xcworkspace should be open. If you closed it, re-open it (from yourname-iOS Dev Level 2 Class > Jive Factory).
If You Did Not Complete the Previous Exercises (B1–B4)
- Close any files you may have open and switch to the Desktop.
- Navigate to Class Files > yourname-iOS Dev Level 2 Class.
- Duplicate the Jive Factory Ready for Launch Images folder.
- Rename the folder to Jive Factory.
- Open Jive Factory > Jive Factory.xcworkspace.
Preparing the Assets
If you use Photoshop, applypixels.com has a great template where you can add your icon artwork and it will resize it to all the various sizes and even preview how it looks in the App Store and on the iPhone Home Screen. It even has a set of actions for exporting all the various sizes with the proper names! We used this template when creating the icons for this Jive Factory app.
There are numerous icons of varying sizes. It’s a good idea to check Apple’s iOS Developer Library for the most up-to-date reference.
Launch images will be displayed when an app is starting up from a fresh state. Apple’s documentation says, “Because users are likely to switch among apps frequently, you should make every effort to cut launch time to a minimum, and you should design a launch image that downplays the experience rather than drawing attention to it. Avoid using your launch image as an opportunity to provide an ‘app entry experience’ such as a splash screen, an ‘About’ window, or branding elements, unless they are a static part of your app’s first screen. If you think that following these guidelines will result in a plain, boring launch image, you’re right. Remember, the launch image is not meant to provide an opportunity for artistic expression; it is solely intended to enhance the user’s perception of your app as quick to launch and immediately ready for use.”
We made the launch images for our app by running it in the Simulator. To save a screenshot to the Desktop, we hit Cmd–S. We then used Photoshop to remove user interface elements that could change.
Using the Assets Catalog for App Icons
The assets catalog makes managing images in your application much easier.
- In the Project navigator, click on the Assets.xcassets folder.
- In the Editor, at the top of the column on the left, you should see an AppIcon catalog.
Click the AppIcon catalog.
-
Notice this opens the catalog on the right side of the Editor, which has empty areas for icons as shown below:
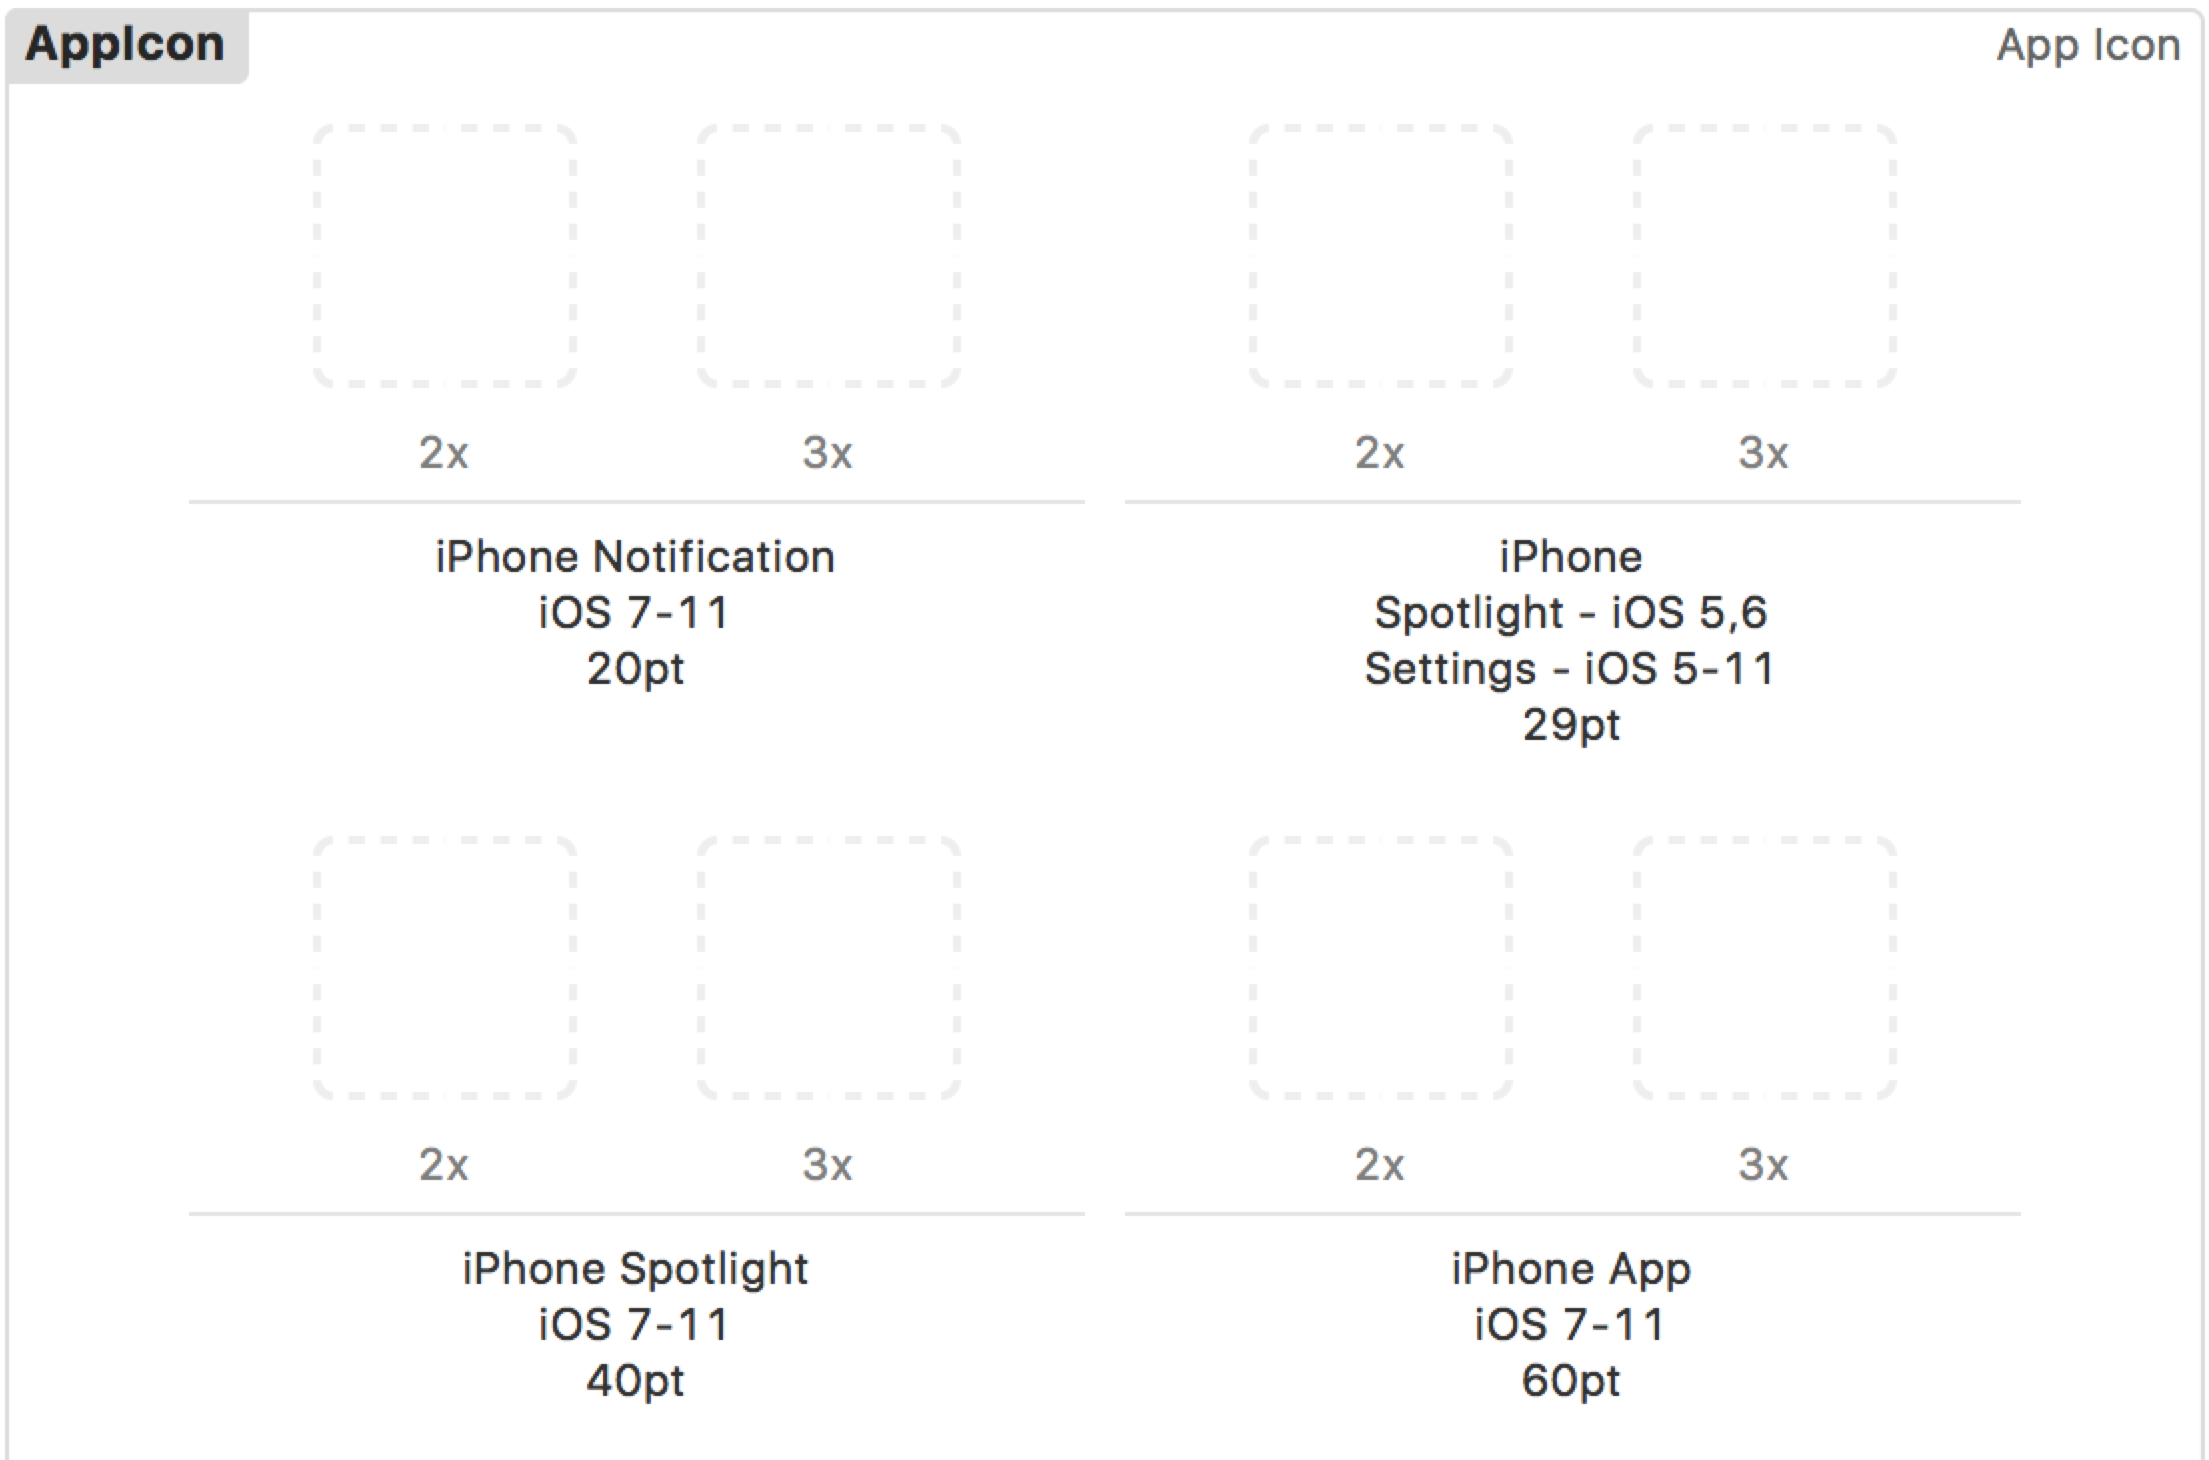
Below each empty area, there is a description of what the icon image is used for and the iOS version. The 2x and 3x refer to the resolution of the image, and the size of the image (in points) is at the bottom.
- In the Utilities area, click on the Attributes inspector tab
 .
. - Make sure both iPhone and iPad are selected.
- Open a Finder window.
- Navigate to the Desktop > Class Files > yourname-iOS Dev Level 2 Class > App Icons folder.
- Position the Finder window so you can see it as well as the empty icon areas in Xcode.
-
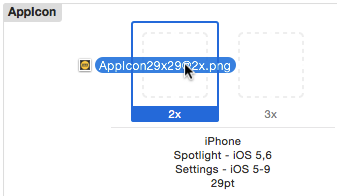
From the Finder window, drag the AppIcon29x29@2x.png file over to Xcode and drop it over the first iPhone empty icon area (not iPhone Notification) as shown below:
-
Repeat this process for the rest of the app icons, dragging over the corresponding files:
3x iPhone Spotlight iOS 5,6 29pt: AppIcon29x29@3x.png 2x iPhone Spotlight iOS 7–10 40pt: AppIcon40x40@2x.png 3x iPhone Spotlight iOS 7–10 40pt: AppIcon40x40@3x.png 2x iPhone App iOS 7–10 60pt: AppIcon60x60@2x.png 3x iPhone App iOS 7–10 60pt: AppIcon60x60@3x.png 1x iPad Settings iOS 5–10 29pt: AppIcon29x29.png 2x iPad Settings iOS 5–10 29pt: AppIcon29x29@2x.png 1x iPad Spotlight iOS 7–10 40pt: AppIcon40x40.png 2x iPad Spotlight iOS 7–10 40pt: AppIcon40x40@2x.png 1x iPad App iOS 7–10 76pt: AppIcon76x76.png 2x iPad App iOS 7–10 76pt: AppIcon76x76@2x.png 2x iPad Pro iOS 9–10 83.5pt: AppIcon83.5x83.5@2x.png 1x App Store iOS 1024pt: AppIcon1024x1024.png NOTE: Remember that when we add images using the assets catalog, the files are automatically copied over to the project folder. In this case they are copied into their own AppIcon.appiconset folder.
- Let’s test the icons in the Simulator. Set the active scheme to iPhone 8.
- Click the Run button.
- In the Simulator, go to Hardware > Home so you can see the new custom icon!
Switch back to Xcode.
Adding the Launch Images
Now we need to add the launch images for the app. This process is similar to that of the app icons, but the launch images have their own catalog.
- Make sure Assets.xcassets is still selected in the Project navigator.
- Go to: Editor > Add Assets > App Icons & Launch Images > New iOS Launch Image
- In the Editor, click the LaunchImage catalog in the column on the left.
- In the Attributes inspector tab , in the iOS 7.0 and Later section, make sure iPhone Portrait is checked.
- Check on Landscape for the iPad to add areas for those launch images in the asset catalog (and uncheck Portrait if it isn’t already).
- In the iOS 8.0 and Later section, uncheck iPhone Landscape.
-
In the iOS 6.0 and Prior section, uncheck all the options in this section.
NOTE: We aren’t supporting iOS 6.0 and prior in this workbook, but if you are in your own apps, you may want to also check these options. - Open a Finder window.
- Navigate to the Desktop > Class Files > yourname-iOS Dev Level 2 Class > App Launch Images folder.
- Position the Finder window so you can see it as well as the empty launch image areas in Xcode.
- From the Finder window, drag the Default@3x-iphonex.png file over to Xcode and drop it on the empty iPhone X Portrait iOS 11+ launch image area.
-
Repeat this process for the rest of the launch images, dragging over the corresponding files:
Retina HD 5.5 iPhone Portrait iOS 8,9: Default@3x-iphone-rhd55.png Retina HD 4.7 iPhone Portrait iOS 8,9: Default@2x-iphone-rhd47.png 2x iPhone Portrait iOS 7–9: Default@2x-iphone.png Retina 4 iPhone Portrait iOS 7–9: Default@2x-iphone-r4.png 1x iPad Landscape iOS 7–9: Default-Landscape-ipad.png 2x iPad Landscape iOS 7–9: Default-Landscape@2x-ipad.png
Testing the Launch Images
Our app launches quickly, so the launch image will not be displayed for very long. But let’s try to see it, so we can make sure it’s working. Our launch image is just a simple white image. It will only be visible for a moment, and then the bands table will load. You’ll have to watch closely or you’ll miss it!
- Back in Xcode, click the Run button.
-
Did you see it? If it happened too fast, switch back to Xcode and click the Run button again.
NOTE: The launch image is only shown when the app launches from a fresh state. If you leave the app by hitting the Home button, when you go back into the app it will often be reloaded from a saved state. Therefore the launch image may not be displayed. You must start the app fresh to be able to see the launch image. Running the app again will ensure that.
Congratulations, this app is done!
Changing the Name of the App
When first creating a project, you choose a project name. This is used for the app name. You may need to change this later. For example, once you see that name on the Home Screen, you may realize it’s too long and the name is being shortened with an ellipse (…) in the middle. To rename a project:
- In the Project navigator, click on the project name to select it.
- Click again on the project name and pause for a moment until the name becomes editable. Enter a new name and hit Return.
- When asked about renaming the project content items, click Rename.
- When it’s done, click OK.