Here’s a free sample exercise to get you started photo retouching in Photoshop and get a taste of Noble’s teaching style.
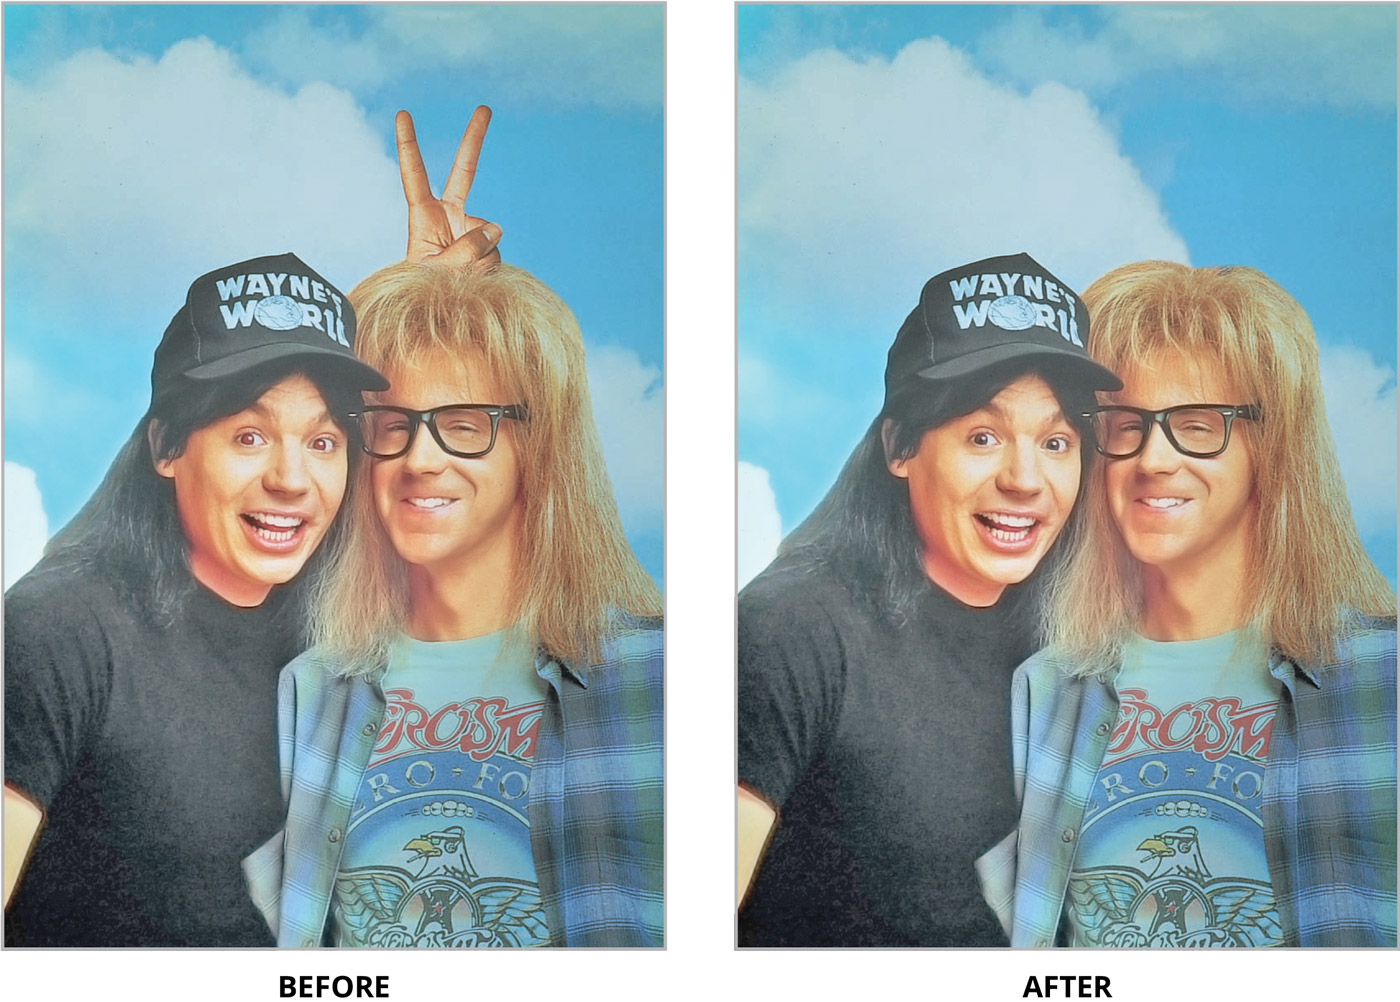
In this step-by-step exercise, you’ll perform common retouching tasks: eliminating red eye, erasing facial blemishes, and removing an undesired background element. Download a PDF of the exercise and class files to begin.
To begin the exercise, make sure you Download a PDF of the exercise and class files to begin.
-
Go to File > Open.
-
Navigate to Desktop > Class Files > Photoshop Class and double–click on WaynesWorld.tif to open it.
Fixing Blemishes
-
We’re going to touch up the blemishes in their faces, so zoom in to get a better look. You can do this by choosing the Zoom tool and clicking on the image, or by pressing Cmd–Plus(+) (Mac) or Ctrl–Plus(+) (Windows).
-
Click and hold on the Spot Healing Brush tool and choose the Healing Brush tool.
-
We need a small, soft brush, so go to the Options bar at the top of the screen and click on the Brush Preset picker.
-
In the pop-up panel, set Size to 6 px and Hardness to 60%.
-
Close the panel when done.
-
The Healing Brush requires two steps:
- Option–click (Mac) or Alt–click (Windows) on a good area of the face to set where you are sampling from.
- Move the cursor over a blemish and click to x it.
HINT: Because you are working with skin textures/tones that change over the face, it’s a good idea to Option–click (Mac) or Alt–click (Windows) fairly close to the blemish so that you get the same general texture/tone.
-
Find another blemish on the faces and repeat the process:
- Option–click (Mac) or Alt–click (Windows) on a good area without any facial blemishes.
- Then click on the blemish (or click and drag to affect a broader area).
Once you’ve eliminated a few imperfections, move on to the next step.
-
Choose View > 100% to see the best representation of the image’s quality for print or web.
-
When you are happy with the image, go into File > Save As.
• From the Format (Mac) or Save as type (Windows) menu, choose Photoshop.
• If you’re not already in the Photoshop Class folder, navigate into it.
• Name the le yourname-WaynesWorld.psd
• Click Save.
Removing the Hand
-
To remove Wayne’s hand, we must completely cover it over with sky. The Clone Stamp tool is best suited for this, so choose it now.
NOTE: You use the Healing Brush and Clone Stamp exactly the same way, but the Clone Stamp “clones” an area exactly (almost like copying and pasting), whereas the Healing Brush “heals” an area by melding the textures from the source and the tones from the destination (where you paint).
-
In the Options bar at the top of the screen, click on the Brush Preset picker.
-
Set the Size to 35 px and Hardness to 0%. Close the panel when you’re done.
-
Option–click (Mac) or Alt–click (Windows) in the clouds/sky to de ne the source that you will be copying. Along the right side, you’ll want to sample blue sky. Along the left, you will sample the cloud.
-
Move the cursor over the hand and click and drag on the hand to clone onto that area. Because the background varies in tone, you’ll need to Option–click (Mac) or Alt–click (Windows) in different parts of the clouds/sky to sample different tones to create something that looks natural.
-
As you near the bottom of the hand, you may have to clone over the top edge of Garth’s hair to get rid of all of the hand. Don’t worry; you will add more hair later.
-
The edge of your cloud may be a bit even and abrupt compared to the original background clouds. To get a varied edge, go to the Options bar at the top of the screen and set the Opacity to 20%.
-
Also in the Options bar, click on the Brush Preset picker and select a somewhat small, soft-edged brush. (13 px with a Hardness of 0% should be good.)
-
Option–click (Mac) or Alt–click (Windows) in the cloud to sample from it.
-
Then click along the edge of the cloud to get a bit more variation.
Fixing the Hair
Now that you have covered the hand with sky, the top of Garth’s head probably looks a bit rough. Let’s patch up the hair with the Clone Stamp tool .
Select the Clone Stamp and in the Options bar:
- Select a small, soft brush (around 10 px should work).
- Set the Opacity to 100%.
-
Look at the top of Garth’s head to determine the overall color and direction of the missing hair. Option–click (Mac) or Alt–click (Windows) on a section of the remaining hair that matches these characteristics.
-
Click and drag along the top of Garth’s head to clone over the missing hair.
If it doesn’t look quite right, try sampling a different area instead:
- Option–click (Mac) or Alt–click (Windows) on the hair you like.
- Then click and drag on the hair you don’t like.
- You’ll probably get the best results by sampling several different areas.
Eliminating Red Eye
Finally, it’s time to get rid of Wayne’s irritating red eye problem. Luckily we have a tool specifically for this.
1. Choose the Zoom tool and zoom in on Wayne’s face.
-
Click and hold on the Healing Brush tool and choose the Red Eye tool . NOTE: If you’re using a different workspace, tools may be in different locations.
-
Click once in the red part of Wayne’s eye. Voilà! The red eye is gone.
-
Click once on the other eye to x it.
-
If you want, you can save the le.
Congratulations—you’ve completed your first retouching job!
Learn Photo Retouching, Photography, and Graphic Design at Noble Desktop
Explore the power of Photoshop in Noble Desktop’s Adobe Photoshop courses:
- In our Photo Retouching Certificate you can improve your Photoshop retouching skills and learn Adobe Lightroom.
- Take better photographs, learn professional studio photography/lighting techniques, and much more in Noble Desktop’s photography classes in NYC.
- Noble’s graphic design classes in NYC will help you can master Photoshop, InDesign, and Illustrator as well as build a design portfolio.
Learn more in these courses
-
![]()
Adobe Photoshop Bootcamp
- Weekdays, sundays, or evenings
- 18 hours
- Open to beginners
Learn how to retouch and color correct photos, combine images, and create graphics in Photoshop. This course covers the basic and intermediate features of Photoshop, such as color/contrast, photo retouching, layers, masks, filters, and saving files for web/video/print.
-
![]()
Photo Retouching Certificate
- Not currently scheduled
- 48 hours
- Open to beginners
Learn industry-standard retouching techniques with our Photo Retouching Certificate program. Perfect your photos and develop comprehensive skills in photo retouching using Adobe Photoshop and Lightroom. Suitable for beginners and those with design backgrounds.
-
![]()
Graphic Design Certificate
- Weekdays, sundays, or evenings
- 84 hours
- Open to beginners
- Financing available
- 1:1 Mentoring
Begin your journey as a professional graphic designer by learning the essential skills and tools used by industry experts. Gain hands-on experience in Adobe Photoshop, InDesign, and Illustrator, and create a stunning portfolio to showcase your talent to potential employers or clients.


